Secure SSH with Google Authenticator Two-Factor Authentication on CentOS 7
On this page
SSH access is always critical and you might want to find ways to improve the security of your SSH access. In this article we will see how we can secure SSH with simple two factor authentication by using Google Authenticator. Before using it you have to integrate the SSH daemon on your server with Google Authenticator one time password protocol TOTP and another restriction is that you must have your android phone with you all the time or at least the time you want SSH access. This tutorials is written for CentOS 7.
First of all we will install the open source Google Authenticator PAM module by executing the following command on the shell.
yum install google-authenticator
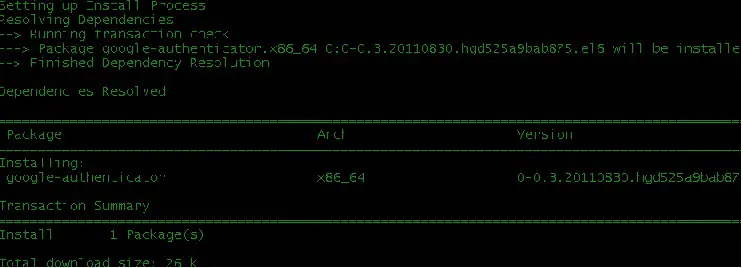
This command will install Google authenticator on you Centos 7 Server. The next step is to get the verification code. It's a very simple command to get the verification code and scratch codes by just answering simple questions of server which he will ask you. You can do that step by running the following command:
google-authenticator
You will get an output like the following screenshot which is being displayed to help you step by step as this step is very important and crucial. Write down the emergency scratch codes somewhere safe, they can only be used one time each, and they're intended for use if you lose your phone.
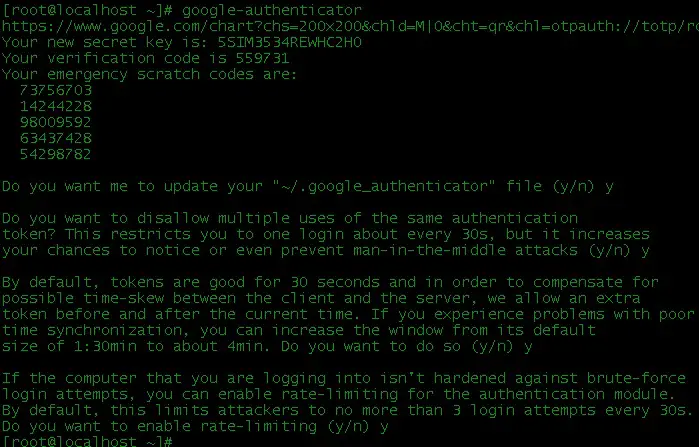
Now download Google authenticator application on your Mobile phone, the app exists for Android and Iphone. Well I have Android so I will download it from Google Play Store where I searched it out just by typing "google authenticator".
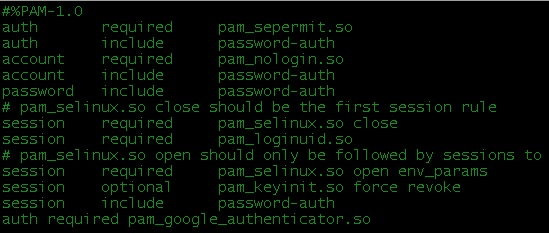
The next step is to change some files which we will start by first changing /etc/pam.d/sshd. Add the following line to the bottom of line:
auth required pam_google_authenticator.so
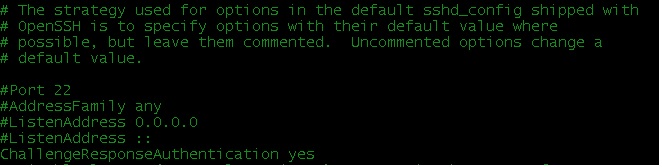
Change the next file which is /etc/ssh/sshd_config. Add the following line in the file and if its already placed then change the parameter to "yes":
ChallengeResponseAuthentication yes
Now restart the service of ssh by the following command:
service sshd restart
Last step is to test the service by connecting with SSH to the server to see if it will require verification code. You can see the following screenshot which shows the verification code that keeps on changing time after time and you have to login with it:

So we have successfully configured SSH authentication based on Google Authenticator. Now your SSH is secure and no brute attack can invade your server unless someone has your verification code which will require access to your phone as well.

