How to Install Nagios 4.0.8 on Ubuntu 15.04 (Vivid Vervet)
This tutorial exists for these OS versions
- Ubuntu 22.04 (Jammy Jellyfish)
- Ubuntu 20.04 (Focal Fossa)
- Ubuntu 18.04 (Bionic Beaver)
- Ubuntu 16.04 (Xenial Xerus)
- Ubuntu 15.04 (Vivid Vervet)
- Ubuntu 14.04 LTS (Trusty Tahr)
On this page
Nagios is an open source software for system and network monitoring. Nagios can see the activity of a host and its services, and provides a warning/alert if something bad happens on the server. Nagios can run on Linux operating systems. At this time we are using Ubuntu 15.04 for the installation.
Prerequisites
- Ubuntu 15.04 - 64bit
- Root/Sudo access
What we will do in this tutorial:
- Installing package is needed - LAMP etc.
- User and group configuration
- Installing Nagios
- Configuring Apache
- Testing Nagios Server
- Adding a Host to Monitor
Installing package
Nagios requires gcc / build-essential for the compilation, LAMP (Apache, PHP, MySQL) for Nagios web base and Sendmail to send alerts from the server. To install all those packages and some additional packages:
apt-get install apache2 libapache2-mod-php5 build-essential libgd2-xpm-dev libssl-dev sendmail-bin sendmail heirloom-mailx wget apache2-utils curl daemon apt-file libnet-snmp-perl libpq5 libsensors4 libsnmp-base libtalloc2 libtdb1 libwbclient0 samba-common samba-common-bin smbclient snmp whois mrtg libcgi-pm-perl librrds-perl libgd-gd2-perl libmysqlclient-dev libperl5.20 libmysqlclient18 libradiusclient-ng2
User and group configuration
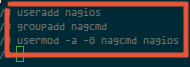
For Nagios to run, you have to create a new user for Nagios. We will name the user "nagios" and additionally create a group named "nagcmd". Now we add the new user to the group as shown below:
useradd nagios
groupadd nagcmd
usermod -a -G nagcmd nagios
Installing Nagios
Step 1 - Download and extract
cd ~
wget http://prdownloads.sourceforge.net/sourceforge/nagios/nagios-4.0.8.tar.gz
tar -xzf nagios*.tar.gz
cd nagios-4.0.8/
Step 2 - Compile Nagios
Before you build Nagios, you need to configure it with the user and the group you have created earlier.
./configure --with-nagios-group=nagios --with-command-group=nagcmd
For more information please use: ./configure --help .
Now to install Nagios:
make all
sudo make install
sudo make install-commandmode
sudo make install-init
sudo make install-config
/usr/bin/install -c -m 644 sample-config/httpd.conf
/etc/apache2/sites-available/nagios.conf
Step 3 - Installing Nagios Plugin
Download and extract the nagios plugin:
cd ~
wget http://nagios-plugins.org/download/nagios-plugins-2.0.3.tar.gz
tar -xzf nagios-plugins*.tar.gz
cd nagios-plugin*/
Please do as above:
./configure --with-nagios-user=nagios --with-nagios-group=nagios --with-openssl
make && make install
Step 4 - Configure Nagios
After the installation phase is complete, you can find the default configuration of Nagios in /usr/local/nagios/.
Now to configure nagios contact with your email.
vim /usr/local/nagios/etc/nagios.cfg
Uncomment the line cfg_dir=/usr/local/nagios/etc/servers
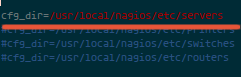
and add a new folder named servers:
mkdir -p /usr/local/nagios/etc/servers
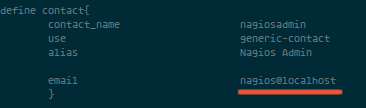
The Nagios contact can be configured in the contact.cfg file. To open it use:
vim /usr/local/nagios/etc/objects/contacts.cfg
Then replace the default email with your own email.
Configuring Apache
Step 1 - enable Apache modules
sudo a2enmod rewrite
sudo a2enmod cgi
You can use htpasswd to configure a user nagiosadmin for the nagios web interface
sudo htpasswd -c /usr/local/nagios/etc/htpasswd.users nagiosadmin
and type your password.
Step 2 - enable Nagios virtualhost
sudo ln -s /etc/apache2/sites-available/nagios.conf /etc/apache2/sites-enabled/
Step 3 - Start Apache and Nagios
/etc/init.d/apache2 restart
/etc/init.d/nagios start
When Nagios starts, you may see the following error :
Starting nagios (via systemctl): nagios.serviceFailed
And this is how to fix it:
cd /etc/init.d/
cp /etc/init.d/skeleton /etc/init.d/nagios
Now edit the Nagios file:
vim /etc/init.d/nagios
... and add the following code:
DESC="Nagios"
NAME=nagios
DAEMON=/usr/local/nagios/bin/$NAME
DAEMON_ARGS="-d /usr/local/nagios/etc/nagios.cfg"
PIDFILE=/usr/local/nagios/var/$NAME.lock
Make it executable and start Nagios:
chmod +x /etc/init.d/nagios
/etc/init.d/apache2 restart
/etc/init.d/nagios start
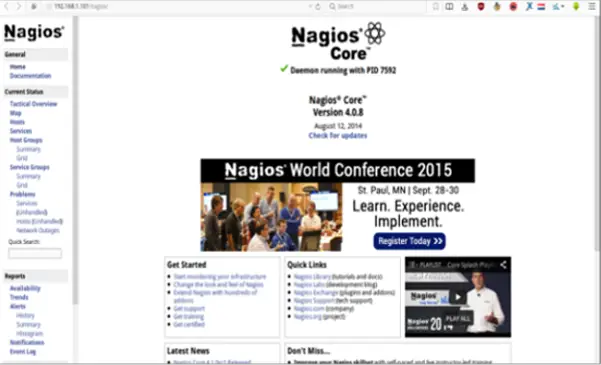
Testing the Nagios Server
Please open your browser and access the Nagios server ip that has been installed. http://192.168.1.101/nagios.
Adding a Host to Monitor
In this tutorial you will add an Ubuntu host to monitor to the Nagios server we have made above.
Nagios Server IP : 192.168.1.101
Ubuntu Host IP : 192.168.1.102
Step 1 - Connect to ubuntu host
ssh [email protected]
Step 2 - Install NRPE Service
sudo apt-get install nagios-nrpe-server nagios-plugins
Step 3 - Configure NRPE
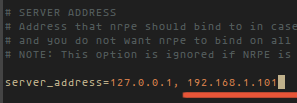
After the installation is complete, edit the nrpe file /etc/nagios/nrpe.cfg:
vim /etc/nagios/nrpe.cfg
... and add Nagios Server IP 192.168.1.101 to the server_address.
Step 4 - Restart NRPE
/etc/init.d/nagios-nrpe-server restart
Step 5 - Add Ubuntu Host to Nagios Server
Please connect to the Nagios server:
ssh [email protected]
Then create a new file for the host configuration in /usr/local/nagios/etc/servers/.
vim /usr/local/nagios/etc/servers/ubuntu_host.cfg
Add the following lines:
# Ubuntu Host configuration file

define host {
        use                          linux-server
        host_name                    ubuntu_host
        alias                        Ubuntu Host
        address                      192.168.1.102 #Ubuntu host IP
        register                     1
}

define service {
      host_name                       ubuntu_host
      service_description             PING
      check_command                   check_ping!100.0,20%!500.0,60%
      max_check_attempts              2
      check_interval                  2
      retry_interval                  2
      check_period                    24x7
      check_freshness                 1
      contact_groups                  admins
      notification_interval           2
      notification_period             24x7
      notifications_enabled           1
      register                        1
}

define service {
      host_name                       ubuntu_host
      service_description             Check Users
      check_command		      check_local_users!20!50
      max_check_attempts              2
      check_interval                  2
      retry_interval                  2
      check_period                    24x7
      check_freshness                 1
      contact_groups                  admins
      notification_interval           2
      notification_period             24x7
      notifications_enabled           1
      register                        1
}

define service {
      host_name                       ubuntu_host
      service_description             Local Disk
      check_command                   check_local_disk!20%!10%!/
      max_check_attempts              2
      check_interval                  2
      retry_interval                  2
      check_period                    24x7
      check_freshness                 1
      contact_groups                  admins
      notification_interval           2
      notification_period             24x7
      notifications_enabled           1
      register                        1
}

define service {
      host_name                       ubuntu_host
      service_description             Check SSH
      check_command                   check_ssh
      max_check_attempts              2
      check_interval                  2
      retry_interval                  2
      check_period                    24x7
      check_freshness                 1
      contact_groups                  admins
      notification_interval           2
      notification_period             24x7
      notifications_enabled           1
      register                        1
}
You can find many check_command in /usr/local/nagios/etc/objects/commands.cfg file. See there if you want to add more services like DHCP, POP etc.
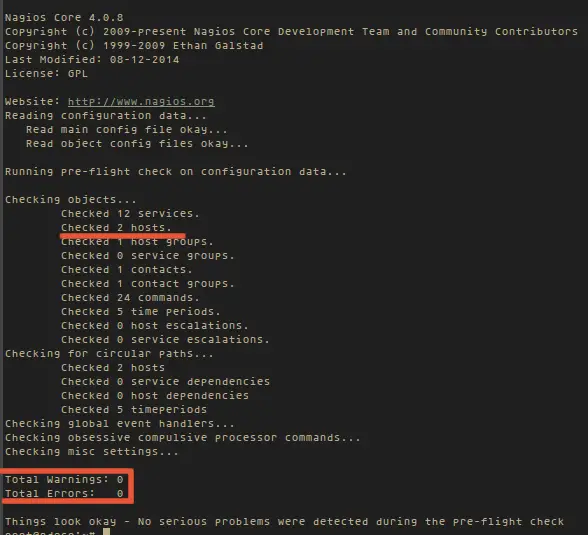
And now check the configuration:
/usr/local/nagios/bin/nagios -v /usr/local/nagios/etc/nagios.cfg
... to see if the configuration is correct.
Step 6 - Restart all services
On the Ubuntu Host start NRPE Service:
/etc/init.d/nagios-nrpe-server restart
... and on the Nagios server, start Apache and Nagios:
/etc/init.d/apache2 restart
/etc/init.d/nagios restart
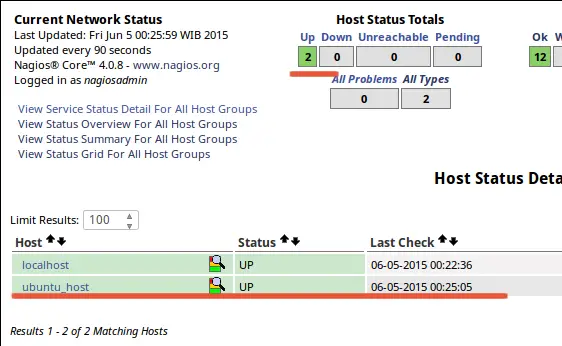
Step 7 - Testing Ubuntu Host
Open the Nagios server from the browser and see the ubuntu_host being monitored.
Conclusion
Nagios is an open source application for monitoring a system. Nagios has been widely used because of the ease of configuration. Nagios in support by various plugins, and you can even create your own plugins. Look here for more informations.

