This tutorial exists for these OS versions
- Ubuntu 16.04 (Xenial Xerus)
- Ubuntu 15.04 (Vivid Vervet)
On this page
How to Install Wordpress with Nginx, MariaDB and HHVM in Ubuntu 15.04
Introduction
HHVM (Hip Hop Virtual Machine) is a just-in-time compiler developed by Facebook to run applications that are written in PHP and Hack language. HHVM is faster than the traditional PHP engine from ZEND and is used by Facebook to serve billions of web requests per day. HHVM has a 9x higher throughput of web requests and over a 5x reduction in memory consumption compared with the Zend PHP 5.2 engine + APC. see more here.
This tutorial describes the steps to install WordPress with Nginx, MariaDB and HHVM on Ubuntu 15.04 Server - 64bit.
Prerequisites
I assume you have installed on your machine:
- Ubuntu 15.04 Server with 64-bit architecture, because HHVM is running on 64-bit only.
- That you have root/ sudo access to the server.
So this is what we will do in this tutorial:
- Install Nginx.
- Install and Configure MariaDB.
- Install and Configure HHVM
- Install and Configure Wordpress
Install Nginx
Nginx web server is available in the Ubuntu repository. You can install it with the apt command:
sudo apt-get update
sudo apt-get install nginx
When the installation is complete, please start Nginx:
systemctl start nginx
Now test with your browser, open the server IP: http://192.168.1.108/. Replace the IP in the URL with your own IP.

Install and Configure MariaDB
In this tutorial, I will install MariaDB as a replacement for MySQL to take advantage of its better performance. MariaDB is a fork of MySQL maintained by the original MySQL Developer Monty Widenius.
Install MariaDB with apt-get command:
sudo apt-get install mariadb-client mariadb-server
Now you can start MariaDB:
sudo systemctl start mysql
When MariaDB is running, set MariaDB root password to secure the database:
mysql_secure_installation
Enter current password for root (enter for none): PRESS ENTER

Set root password? [Y/n] Y
ENTER YOUR PASSWORD

Remove anonymous users? [Y/n] Y
Disallow root login remotely? [Y/n] Y
Remove test database and access to it? [Y/n] Y
Reload privilege tables now? [Y/n] Y
Now the root password for MariaDB has been set and you can login to MariaDB prompt with your password.
mysql -u root -p

TYPE YOUR PASSWORD
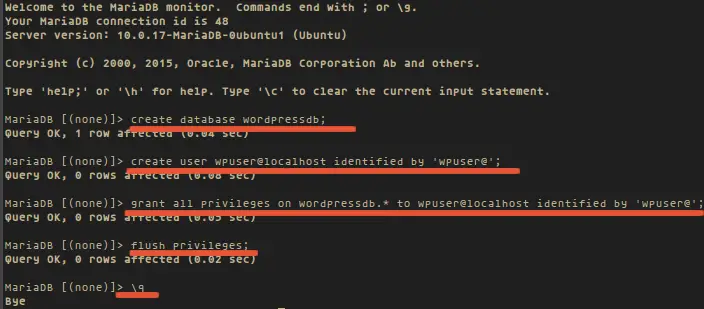
Now create a new database with the name wordpressdb and new user with the name wpuser for the WordPress installation. You can do that with the commands below. Please replace 'wpuser@' with a secure password that will be used ass access credentials for the new WordPress database.
create database wordpressdb;
create user wpuser@localhost identified by 'wpuser@';
grant all privileges on wordpressdb.* to wpuser@localhost identified by 'wpuser@';
flush privileges;
\q
Install and Configure HHVM
Add the HHVM repository to your Ubuntu repository file /etc/apt/sources.list and update the repository:
wget -O - http://dl.hhvm.com/conf/hhvm.gpg.key | sudo apt-key add -
echo deb http://dl.hhvm.com/ubuntu vivid main | sudo tee /etc/apt/sources.list.d/hhvm.list
apt-get update
Now let`s install HHVM:
sudo apt-get install -y hhvm
When the installation is finished, configure the Nginx web server to use HHVM:
sudo /usr/share/hhvm/install_fastcgi.sh
To start HHVM automatically on system boot up, run this command:
sudo update-rc.d hhvm defaults
and we will use HHVM for /usr/bin/php even if you have php-cli installed:
sudo /usr/bin/update-alternatives --install /usr/bin/php php /usr/bin/hhvm 60
Now start HHVM:
systemctl start hhvm
Now it is time to test HHVM, I will test it in the browser and on the server console/terminal.
Create new file called info.php in the /var/www/html/ directory:
cd /var/www/html/
nano info.php
And add the PHP code below:
<?php
phpinfo();
?>
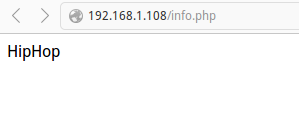
Then access the file in your browser: http://192.168.1.108/info.php. If you can see the word HipHop in your web page, then HHVm is working correctly.
Finally test HHVM in your server console/terminal, type this command:
php info.php
php -v
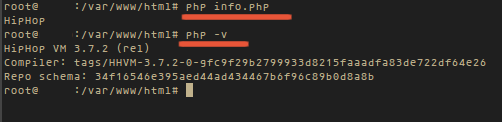
The first command shall show the word "HipHop", the second command the HHVM version.
Installing Wordpress
Download WordPress and extract it:
cd /var/www/html/
wget wordpress.org/latest.zip
unzip latest.zip
Wordpress is extracted into the "wordpress" directory, you will have to move all WordPress files and directories to /var/www/html/, you can do this with the commands below:
cd /var/www/html/
mv wordpress/* .
rm -rf wordpress/
Now change the owner for WordPress files to the user and group www-data, usually all files under /var/www/html/ directory are owned by www-data user and group. Run these commands to change the file and directory ownership:
find . -type d -exec chown www-data:www-data {} \;
find . -type f -exec chown www-data:www-data {} \;
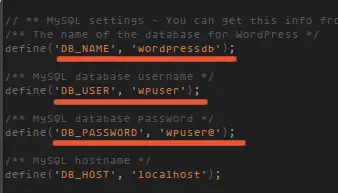
Then rename the file wp-config-sample.php to wp-config.php, and edit the file to set the database name, database user and password that we created during the database setup.
mv wp-config-sample.php wp-config.php
nano wp-config.php
DB_NAME = wordpressdb
DB_USER = wpuser
DB_PASSWORD = wpuser@
Now edit the nginx virtualhost file /etc/nginx/sites-available/default with nano, and add index.php :
rm -f index.nginx.html
nano /etc/nginx/sites-available/default

And then restart Nginx:
systemctl restart nginx
When Nginx is restarted, try to access server IP: http://192.168.1.108/, you will be redirected to the WordPress Installation.
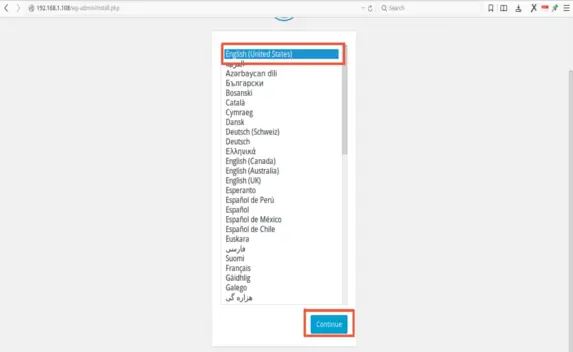
Please choose your language, example: English(United States) and press the button Continue.
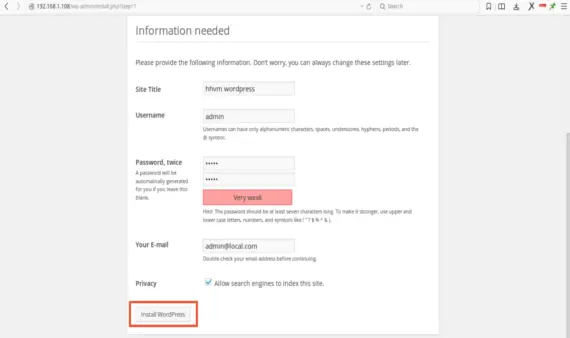
Now fill in the username, password that shall be used to authenticate the WordPress administrator and your email address and press the Install Wordpress button.
Wait until the installation is finished, then login to the WordPress site: http://192.168.1.108/wp-login.php and input your username and password, or visit WordPress home page http://192.168.1.108/.
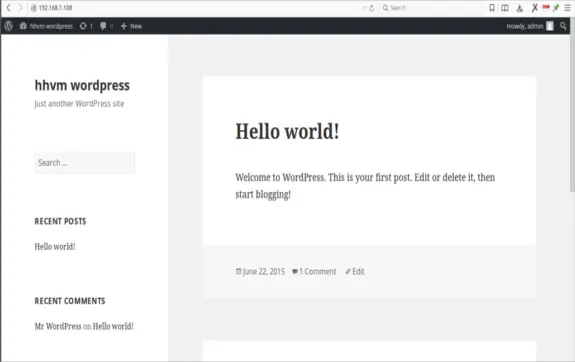
Wordpress is now installed with HHVM under Nginx web server in your Ubuntu 15.04 server.
Conclusion
HHVM is an open source project designed to execute programs written in Hack and PHP language that runs PHP applications faster and with less memory consumption than the traditional ZEND engine. The latest WordPress version runs fine on HHVM.

