Docker: Installation and Basic usage on Ubuntu 15.04
This tutorial exists for these OS versions
- Ubuntu 18.04 (Bionic Beaver)
- Ubuntu 16.04 (Xenial Xerus)
- Ubuntu 15.04 (Vivid Vervet)
On this page
Docker is an open-source project that provides an open platform for developers and sysadmins to build, package, and run applications anywhere as a lightweight container. Docker automates the deployment of applications inside software containers. Docker development has been started by Solomon Hykes as an internal project at dotCloud, an enterprise PaaS (platform as a service), the software is now maintained by the docker community and Docker Inc. More about Docker can be found in the documentation here https://docs.docker.com/.
Docker requires a 64-bit architecture for installation and Linux Kernel must be 3.10 or newer. I will use Ubuntu 15.04 here with 3.19 kernel version.
Things to know about Docker
Here the basic terms in the docker world that you should know.
Docker Images
A Docker image is the basic template for a Docker container. An image usually contains the OS and applications that readily installed. The Docker image is used to run the container, you can find many images with a variety of operating systems and software that has been installed in the Docker Hub https://hub.docker.com/. Docker Images can also be based on a Dockerfile.
Docker Container
Docker Container is an image which can be read and written to that runs on top of the Docker image. Docker is using the union-file-system as backend for the container, any changes that are made in the container will be saved in a new layer above the base image. The container is the layer where we install applications in. Each container that runs isolated in the host machine and therefore, provides a secure application platform.
Docker Registry
Docker registry is a repository for Docker images. It provides public and private repositories. The public Docker registry is called the Docker Hub. Here we can push and pull our own images.
Installing Docker on Ubuntu 15.04
In this section, you will be guided to install docker. Before you install the software, check the kernel version and the OS architecture.
Run the command:
uname -a

You can see that I`m using ubuntu 15.04 - 64 bit and the kernel version is 3.19.
Now install docker with the apt command:
sudo apt-get install -y docker.io
Wait until the installation has been completed, then you can start Docker with the systemctl command:
systemctl start docker
Enable docker to run at system boot:
systemctl enable docker
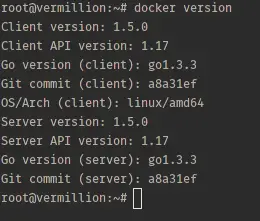
You might also want to check the docker version:
docker version
Now docker is installed in your system. You can start making a container by downloading a Docker Image from the Docker Registry.
Basic Usage of Docker
In this section, I will show you commonly used options of the docker command. E.g. how to download a docker image, build a container and how to access the container.
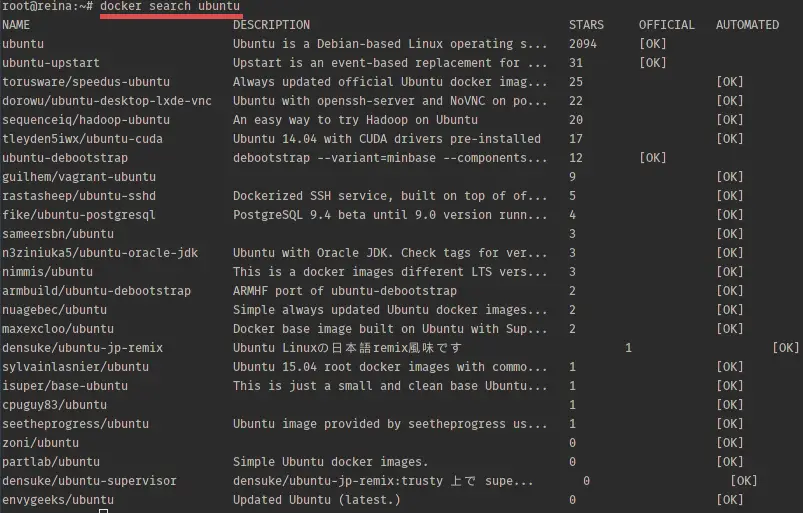
To create a new container, you should start by choosing a base image with the OS, e.g. ubuntu or centos or another. You can search for a base image with the docker search command:
docker search ubuntu
This command will show you all ubuntu images. You can try by yourself docker search centos etc.
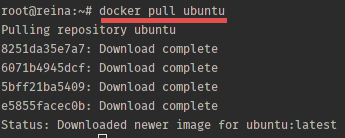
Now it's time to download the base image to our server, use the command:
docker pull ubuntu
Tdocker pull imagename command will download an image to your server from docker registry/DockerHub.
Now you can see all downloaded images by using the command:
docker images
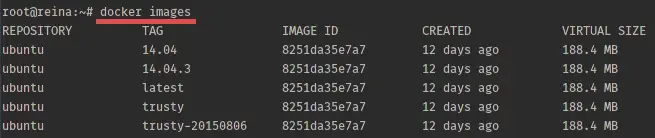
The Ubuntu image was downloaded from DockerHub/Docker Registry. The next step is to create a container from that image.
To create the container, you can use docker create or docker run.
docker create ubuntu:14.04
docker create command will create a new container but not start it. So now you can use run command :
docker run -i -t ubuntu:14.04 /bin/bash
This command will create and run a container based in ubuntu 14.04 image and run a command /bin/bash inside the container, you will be automatically inside the container after running the command.
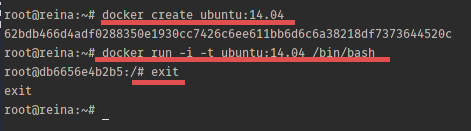
The container will stop when you leave it with the command exit. If you like to have a container that is running in the background, you just need to add the -d option in the command.
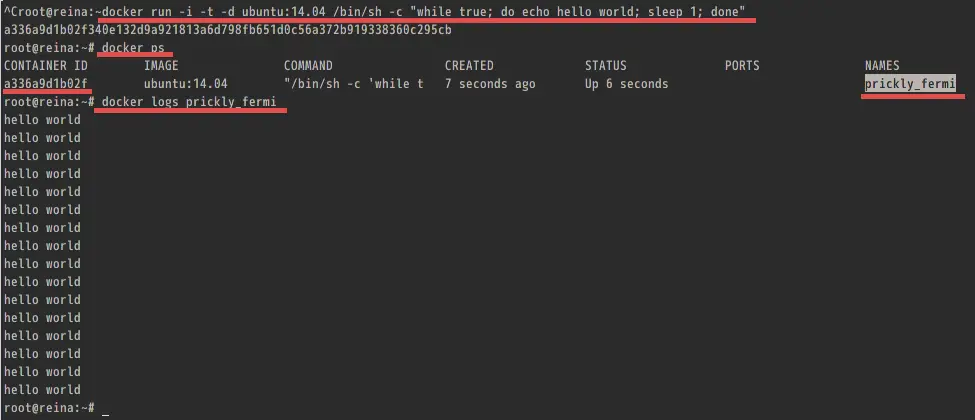
docker run -i -t -d ubuntu:14.04 /bin/sh -c "while true; do echo hello world; sleep 1; done"
/bin/sh -c "while true; do echo hello world; sleep 1; done" this is bash script to echo "hello word" forever.
Now you can see the container running in the background by using command:
docker ps
or if you want to see the logs result from that bash command you can use command:
docker logs NAMES/ContainerID
How can I access the shell of container that runs in the background mode? This command will connect you to the shell of the container:
docker exec -i -t NAMES/ContainerID

You can see the hostname and the container ID are equal, this means that you are inside of the container shell. When you type `exit` on that shell you will leave that shell but the container is still running.
Another command that you will use often is:
docker stop NAME/ContainerID
This will stop the container without deleting it, so you can start it again with the command:
docker start NAME/ContainerID
If you like to remove the container, stop it first and then remove it with the command:
docker rm NAME/ContainerID
This is just a short introduction on the installation and basic usage of Docker on Ubuntu, you can find the detailed Docker documentation page here.
Conclusion
Docker is an open source container virtualisation platform which helps developers to deploy their applications and system administrators to manage applications in a safe virtual container environment. Docker runs on the Intel / AMD 64-bit architecture and the kernel should be higher 3.10 version. With docker you can build and run your application inside a container and then move your containers to other machines running docker without any worries.

