How to install a wireless hotspot with captive page on Linux using CoovaChilli
The purpose of this article is to demonstrate how you can turn a Linux based computer or laptop into a wireless hotspot where users can be authenticated via a captive portal page. For this task, the primary controller software will be CoovaChilli. This software is an ideal hotspot management solution for hotels, restaurants, supermarkets, parks, and any place offering WiFi Internet.
Prerequisites
- A Linux distribution. In this article, I will be using Fedora 20. Later versions 21/22 should work fine.
- Development libraries for needed for source package compilations.
- A working MySQL server installation.
- A wired network device that connects to the Internet.
- Ability to run sudo commands.
- A wireless network device that supports Access Point mode. To see if your wireless device supports AP mode run:
sudo iw phy |grep -A 5 -i 'Supported interface modes' | grep '*'
Install CoovaChilli dependencies
yum install libnl3-devel libtalloc-devel iptables
Install hostapd
Hostapd allows your computer to function as an Access Point (AP) WPA/WPA2 Authenticator. Other functionalities include Radius authentication services, although we'll not use that here.
Most Linux distributions (including Fedora) have pre-packaged versions of hostapd and can be installed using te package management software. For example in Fedora, CentOS and other Red-Hat based Linux distros, a simple command will install this package:
yum install hostapd
However, to install the latest version of hostpad, we will need to download and compile the sources. This can be done easily as follows:
cd /usr/src
sudo git clone git://w1.fi/hostap.git
This will download both hostapd the server daemon, and wpa_supplicant sources. We are interested in the former, so will change to the hostapd sources:
cd hostap/hostapd
Hostapd does not have a 'configure' command, so before we compile hostapd, we need to change the install prefix. A a quick and simple way to change the default install directory is by using sed:
sed -i “s:export BINDIR ?= /usr/local/bin/:export BINDIR ?= /usr/sbin:g” Makefile
Next, copy default config file:
cp -v defconfig .config
we'll need to change some defaults in the configuration file:
vim .config
Uncomment the following options:
CONFIG_LIBNL32=y # Use libnl 3.2 libraries
CONFIG_IEEE80211N=y # Enables IEEE 802.11n support
CONFIG_WNM=y # Enables Network Management support
CONFIG_IEEE80211AC=y # Enables IEEE 802.11ac support
CONFIG_DEBUG_FILE=y # Support for writing debug log to file
Run make and install:
make
sudo make install
To check if hostapd is properly installed, run:
hostapd -v
The above command will show you the version and credits
Configure hostapd
Create hostapd config file using sample file:
sudo mkdir /etc/hostapd
sudo cp -v /usr/src/hostap/hostapd/hostapd.conf /etc/hostapd/
sudo vim /etc/hostapd/hostapd.conf
Change the following parameters in hostapd.conf file:
driver=nl80211
interface=wlan0 # Change this to your wireless device
ssid=KAMPALA-3 # Change this to your SSID
hw_mode=g
channel=6 # Enter your desired channel
ieee80211n=1 # Enable IEEE 802.11n
wpa=1
wpa_passphrase=myverysecretpassword
wpa_pairwise=TKIP CCMP
rsn_pairwise=CCMP
Create directory for hostapd sockets:
sudo mkdir /var/run/hostapd
Set status of WiFi interface to 'UP' and unblock Wifi if soft switch is on:
sudo rfkill unblock wifi
sudo ip link set dev wlan0 up
Test and start hostapd:
sudo hostapd -d /etc/hostapd/hostapd.conf
If all goes well, the hostapd daemon should start and not quit.
Next, create a systemd service file. By now, most Linux distributions use systemd to control services:
sudo vim /etc/systemd/system/hostapd.service
[Unit]
Description=Hostapd IEEE 802.11 AP, IEEE 802.1X/WPA/WPA2/EAP/RADIUS Authenticator
After=dnsmasq.service

[Service]
Type=forking
PIDFile=/var/run/hostapd.pid
ExecStartPre=/bin/mkdir -p /var/run/hostapd
ExecStart=/usr/sbin/hostapd /etc/hostapd/hostapd.conf -P /var/run/hostapd.pid -B

[Install]
WantedBy=multi-user.target
Enable the service to start automatically at boot:
sudo systemctl enable hostapd.service
Freeradius
Since we will require clients to authenticate before accessing the Internet, installation of a radius server is needed. FreeRadius is an open source based radius server. It can also be installed using your favorite Linux package manager such as yum or apt. But since we want to install the latest version, we'll compile from source.
Download freeradius:
cd /tmp/
wget -c ftp://ftp.freeradius.org/pub/freeradius/freeradius-server-3.0.9.tar.bz2
Unpack sources and change to install location:
sudo tar jxvf freeradius-server-3.0.9.tar.bz2 -C /usr/src/
cd /usr/src/freeradius-server-3.0.9
Run configure script ensuring that you use the correct prefix and library path for your setup:
sudo ./configure --prefix=/usr --libdir=/usr/lib64 --sysconfdir=/etc --localstatedir=/var/ --enable-fast-install=no
Proceed to compile and install:
sudo make
sudo make install
If you run into the following error
mkdir: cannot create directory ‘/etc/raddb/’: File exists
make: *** [/etc/raddb/] Error 1
Run the following, to fix it:
rmdir /etc/raddb
make install && make install
Add radiusd group and user:
sudo groupadd -r radiusd
sudo useradd -r -M -c "Radius Server User" -g radiusd radiusd -s /sbin/nologin
Confgure freeradius MySQL tables
Start MySQL server if it is not running. As mentioned above, initialization process is via systemd, so:
sudo systemctl -q is-active mysqld.service || sudo systemctl start mysqld.service
Make sure service start even at boot:
sudo systemctl enable mysqld.service
Create radius database:
mysqladmin -u root -p[MYSQL_ROOT_PASSWORD] create radius
Generate database tables using MySQL schema:
sudo cat /etc/raddb/mods-config/sql/main/mysql/schema.sql | mysql -u root -p[MYSQL_ROOT_PASSWORD] radius
Create MySQL radius user and set privileges on radius database:
mysql -u root -p[MYSQL_ROOT_PASSWORD] radius

GRANT ALL PRIVILEGES ON radius.* to [FREERADIUS_DB_USER]@localhost IDENTIFIED by '[FREERADIUS_DB_PASS]';
Configure the SQL radius module:
sudo vim /etc/raddb/mods-available/sql
Uncomment and or change the following parameters:
driver = "rlm_sql_mysql"
dialect = ”mysql”
server = "localhost"
port = 3306
login = "FREERADIUS_DB_USER"
password = "FREERADIUS_DB_PASS"
read_clients = yes
Add chillispot SQL counters:
sudo vim /etc/raddb/mods-available/sqlcounter
Add this line at the end of the above file:
$INCLUDE ${modconfdir}/sql/counter/${modules.sql.dialect}/chillispot.conf
Next link sql, sqlcounter to modules available:
sudo ln -s /etc/raddb/mods-available/sql /etc/raddb/mods-enabled/sql
sudo ln -s /etc/raddb/mods-available/sqlcounter /etc/raddb/mods-enabled/sqlcounter
Configure radius clients
sudo vim /etc/raddb/clients.conf
Change the password to the password used above for FreeRadius MySQL database:
secret = [FREERADIUS_DB_PASS]
Configure radius server:
sudo vim /etc/raddb/radiusd.conf
Under security section, change the user and group to name created during install:
user = radiusd
group = radiusd
allow_vulnerable_openssl = yes
IMPORTANT: Don't do this. You really should update to recent versions of OpenSSL
Under the instantiate section (Near line 728), add the following counter modules:
chillispot_max_bytes
noresetcounter
Configure the default virtual server under sites-available:
sudo vim /etc/raddb/sites-available/default
Under authorize section:
Comment the following:
#filter_username
Uncomment the following:
auth_log
unix
Change the following:
'-sql' to sql
Add the following at the end of authorize section:
chillispot_max_bytes
noresetcounter
Next under accounting section, Uncomment the following:
radutmp
Changethe following:
'-sql' to sql
Next under session section, Uncomment the following:
radutmp
sql
Next under post-auth section, Uncomment the following:
reply_log
Change the following:
'-sql' to sql
Configure the inner tunnel requests virtual server under sites-available:
sudo vim /etc/raddb/sites-available/inner-tunnel
Under authorize section, change the following:
'-sql' to sql
Add the following at the end of authorize section:
chillispot_max_bytes
noresetcounter
Next under the session section, Uncomment the following:
sql
Next under post-auth section, Uncomment the following:
reply_log
Change the following:
'-sql' to sql
Add the following MySQL counters for Chillispot:
sudo vim /etc/raddb/mods-config/sql/counter/mysql/chillispot.conf
sqlcounter chillispot_max_bytes {
counter_name = Max-Total-Octets
check_name = ChilliSpot-Max-Total-Octets
reply_name = ChilliSpot-Max-Total-Octets
reply_message = "You have reached your bandwidth limit"
sql_module_instance = sql
key = User-Name
reset = never
query = "SELECT IFNULL((SUM(AcctInputOctets + AcctOutputOctets)),0) FROM radacct WHERE username = '%{${key}}' AND UNIX_TIMESTAMP(AcctStartTime) + AcctSessionTime > '%%b'"
}
Change ownership of config and log directories:
sudo touch /var/log/radius/radutmp
sudo chown -R radiusd:radiusd /etc/raddb
sudo chown -R radiusd:radiusd /var/log/radius
Create Admin User in radius MySQL database:
echo "INSERT INTO radcheck (UserName, Attribute, Value, Op) VALUES ('[ADMIN_USER]', 'Cleartext-Password', '[ADMIN_PASSWORD]', ':=');" | mysql -u radius -p[FREERADIUS_DB_PASS] radius
Start radius for initialization and testing purposes
sudo /usr/sbin/radiusd -X
Open a new terminal window to test connections:
radtest [ADMIN_USER] [ADMIN_PASSWORD] 127.0.0.1 0 [FREERADIUS_DB_PASS]
If you get a message like this one, then you are done with the minimal and required radius setup for the next steps:
Received Access-Accept Id 174 from 127.0.0.1:1812 to 0.0.0.0:0 length 20
But before leaving radius aside, create a systemd service file for your radius server:
sudo vim /etc/systemd/system/radiusd.service
[Unit]
Description=FreeRADIUS high performance RADIUS server.
After=mysqld.service syslog.target network.target
[Service]
Type=forking
ExecStartPre=-/bin/mkdir /var/log/radius
ExecStartPre=-/bin/mkdir /var/run/radiusd
ExecStartPre=-/bin/chown -R radiusd.radiusd /var/log/radius
ExecStartPre=-/bin/chown -R radiusd.radiusd /var/run/radiusd
ExecStartPre=/usr/sbin/radiusd -C
ExecStart=/usr/sbin/radiusd -d /etc/raddb
ExecReload=/usr/sbin/radiusd -C
ExecReload=/bin/kill -HUP $MAINPID
[Install]
WantedBy=multi-user.target
Enable the service to start automatically at boot:
sudo systemctl enable radiusd.service
Install Haserl
Haserl is needed for the embedded miniportal included in CoovaChilli.
Download haserl:
cd /tmp
wget -c http://superb-dca2.dl.sourceforge.net/project/haserl/haserl-devel/haserl-0.9.35.tar.gz
Upack the tarball:
sudo tar zxvf haserl-0.9.35.tar.gz -C /usr/src/
cd /usr/src/haserl-0.9.35/
Compile and install:
./configure --prefix=/usr –libdir=/usr/lib64
(Make sure you change to correct library or desired prefix)
make
sudo make install
Install CoovaChilli
CoovaChilli is an open source based captive portal software. It started out from the deprecated chilli project. After installation and configuration of coovachilli is done, you will be able to redirect your WiFi hotspot clients to a login page, i.e. captive portal where they can log in and access the Internet.
Download the latest sources for coovachilli:
cd /usr/src
sudo git clone https://github.com/coova/coova-chilli.git
Configure and Compile coova :
cd /usr/src/coova-chilli
sh bootstrap
./configure --prefix=/usr --libdir=/usr/lib64 --localstatedir=/var --sysconfdir=/etc --enable-miniportal --with-openssl --enable-libjson --enable-useragent --enable-sessionstate --enable-sessionid --enable-chilliredir --enable-binstatusfile --enable-statusfile --disable-static --enable-shared --enable-largelimits --enable-proxyvsa --enable-chilliproxy --enable-chilliradsec --with-poll
(Make sure you change to correct library or desired prefix)
make
sudo make install
Configure CoovaChilli
All configuration files are located under: /etc/chilli. You will need to create a config file with your sites modifications as follows:
sudo cp -v /etc/chilli/defaults /etc/chilli/config
sudo vim /etc/chilli/config
Change the following parameters to match your environment:
HS_WANIF=eth0 # WAN Interface toward the Internet
HS_LANIF=wlan0 # Subscriber Interface for client devices
HS_NETWORK=10.1.0.0 # HotSpot Network (must include HS_UAMLISTEN)
HS_NETMASK=255.255.255.0 # HotSpot Network Netmask
HS_UAMLISTEN=10.1.0.1 # HotSpot IP Address (on subscriber network)
HS_RADSECRET=[FREERADIUS_DB_PASS] # Set to be your RADIUS shared secret
HS_UAMSECRET=[FREERADIUS_DB_PASS] # Set to be your UAM secret
HS_ADMUSR=[ADMIN_USER]
HS_ADMPWD=[ADMIN_PASSWORD]
Add the chilli ipup.sh script. The purpose of these script is to prepare the system to act as a router. You may also wish to add other commands e.g. Setting the gateway.
sudo vim /etc/chilli/ipup.sh
#!/bin/sh
#
# Allow IP masquerading through this box
/usr/sbin/iptables -t nat -A POSTROUTING -o eth0 -j MASQUERADE
IMPORTANT: Change the Internet device to the correct one.
Make script executable:
sudo chmod 755 /etc/chilli/ipup.sh
Enable coovachilli so it starts up at boot time:
sudo systemctl enable chilli
Start coovachilli:
sudo systemctl start chilli
Testing your captive portal
Before you begin testing, make sure you can first access the internet locally.
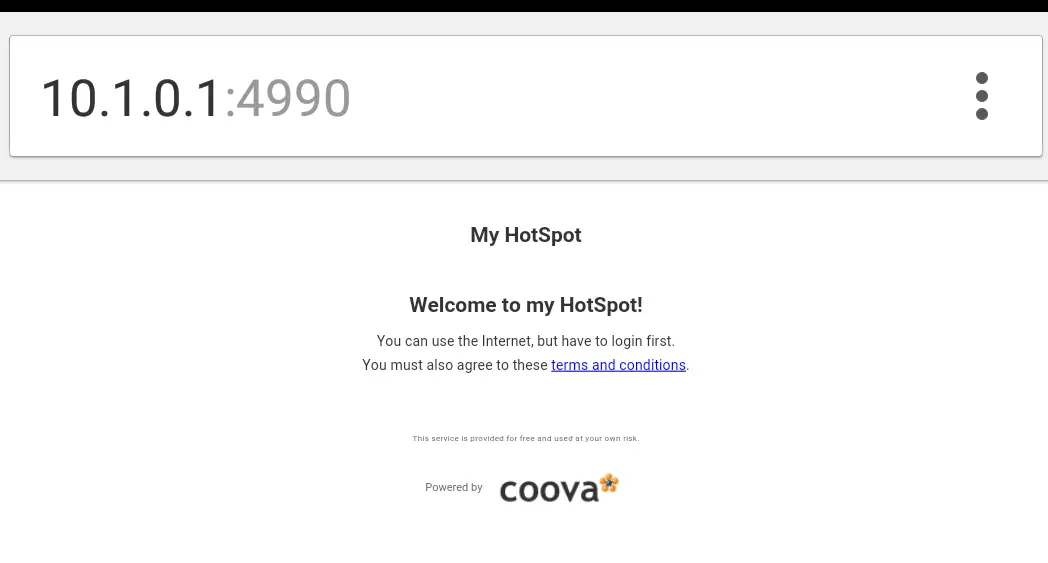
Then using a wireless client like smartphone or laptop, open your favourite web browser. Go to any URL/ website of your choice.
If your followed the above steps, then you will be redirected to the captive portal page as shown below:
User Management
To add users so they can access the Internet using your hotspot, run the following command for each user. You can automate it using a script if you wish.
echo "INSERT INTO radcheck (UserName, Attribute, Value, Op) VALUES ('[LOGIN_NAME]', 'Cleartext-Password', '[LOGIN_PASSWORD]', ':=');" | mysql -u radius -p[FREERADIUS_DB_PASS] radius
That's it folks!
Follow me at: @jzikusooka

