How to stitch photos into a panorama with Hugin Panorama Creator on Linux
On this page
Almost every modern digital camera offers the ability of “on the fly” panorama creation, but often you will find the result of this automated process not to meet expectations. For this reason, it's best to take the sequence of photos as individual continuous images and then you use some kind of software tool to stitch them together in a proper way. There are many ways to do this on Linux, and one of them is by using the Hugin Panorama Creator that normally should be available in your distribution's repository.
Steps to create a panorama image
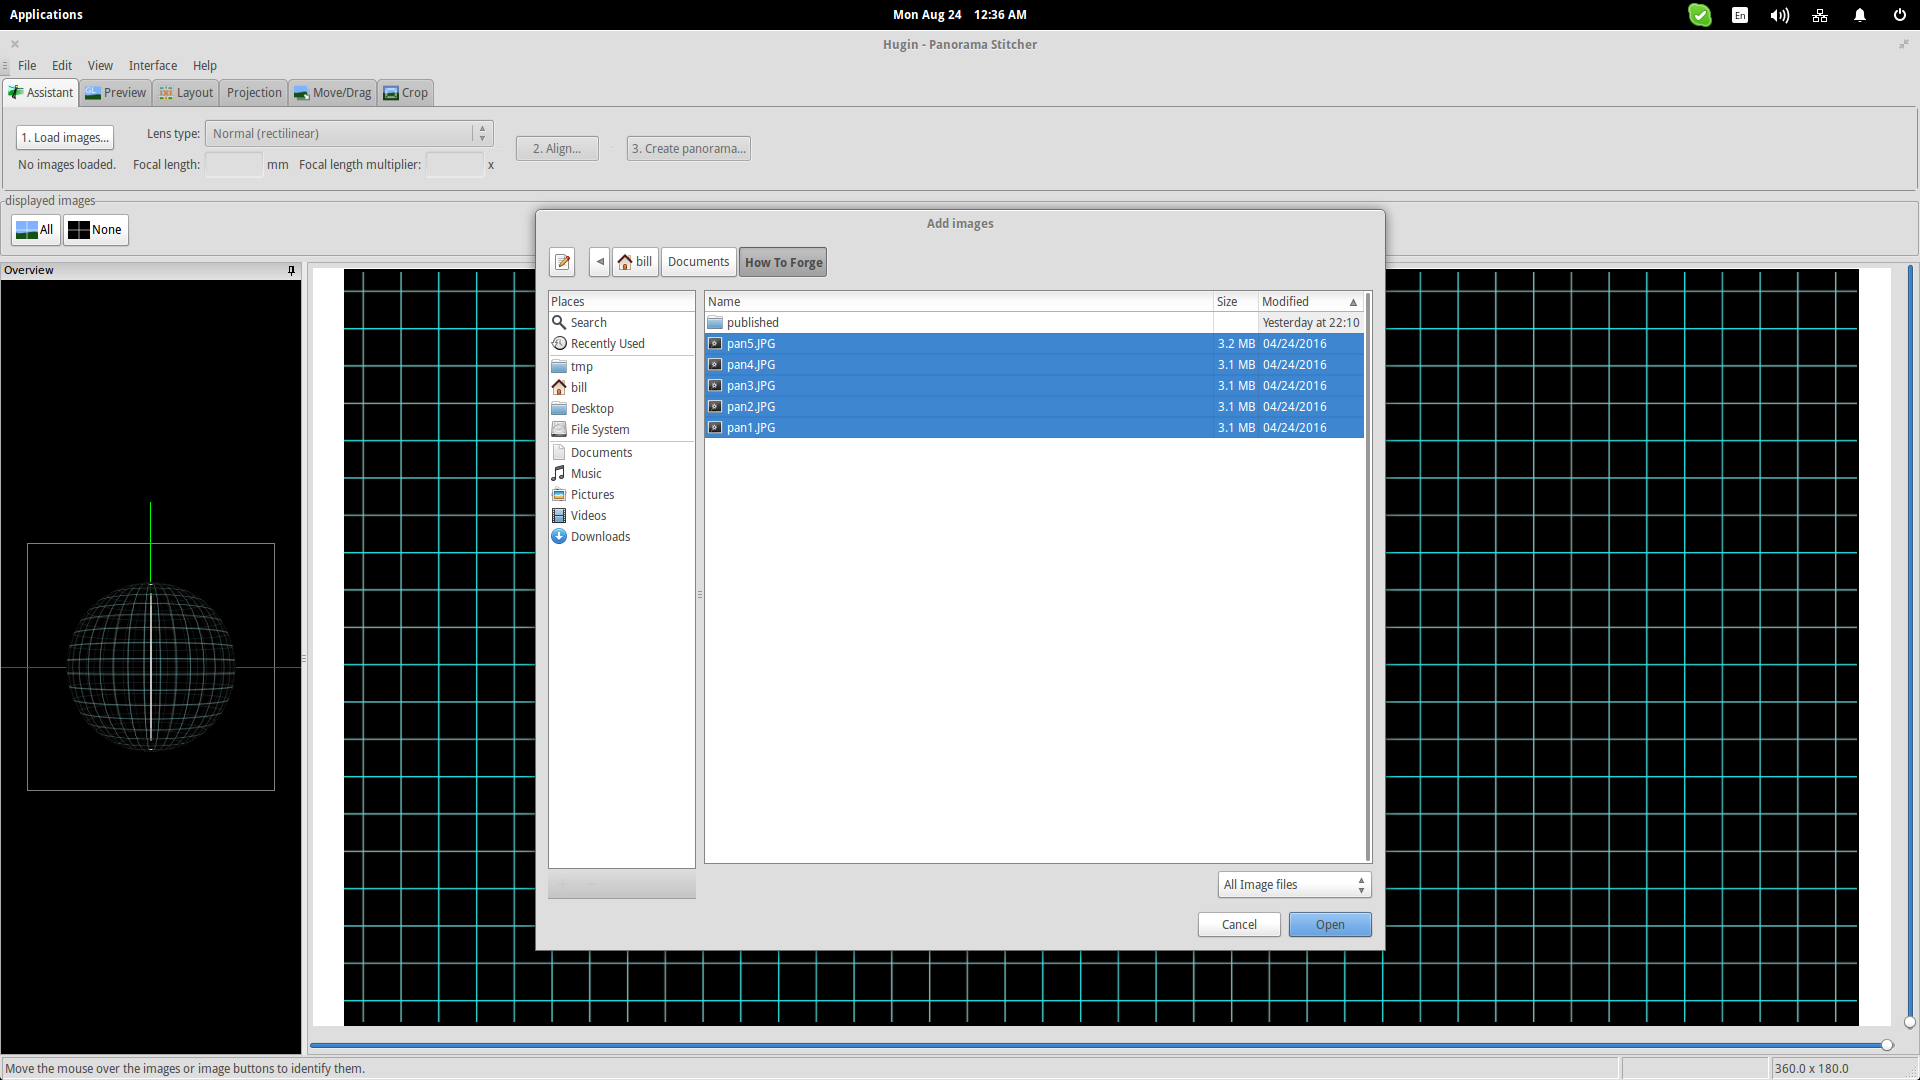
Open the tool and press the “Load Images” button located on the top left of the “Assistant” tab. This will open up a file manager dialog that will let you navigate to the location of your photos. Select your pics by holding the ctrl button and press “Open”.

The next step is to press the “Align” button and Hugin will start analyzing your photos to position them properly. This will hopefully take care of image alignment, straightening, and final panorama cropping. Note that the second step will work optimally if you choose the lens type in the corresponding options menu. Fisheye lenses which are often used for panoramas won't produce a good result if you won't select it on the menu.
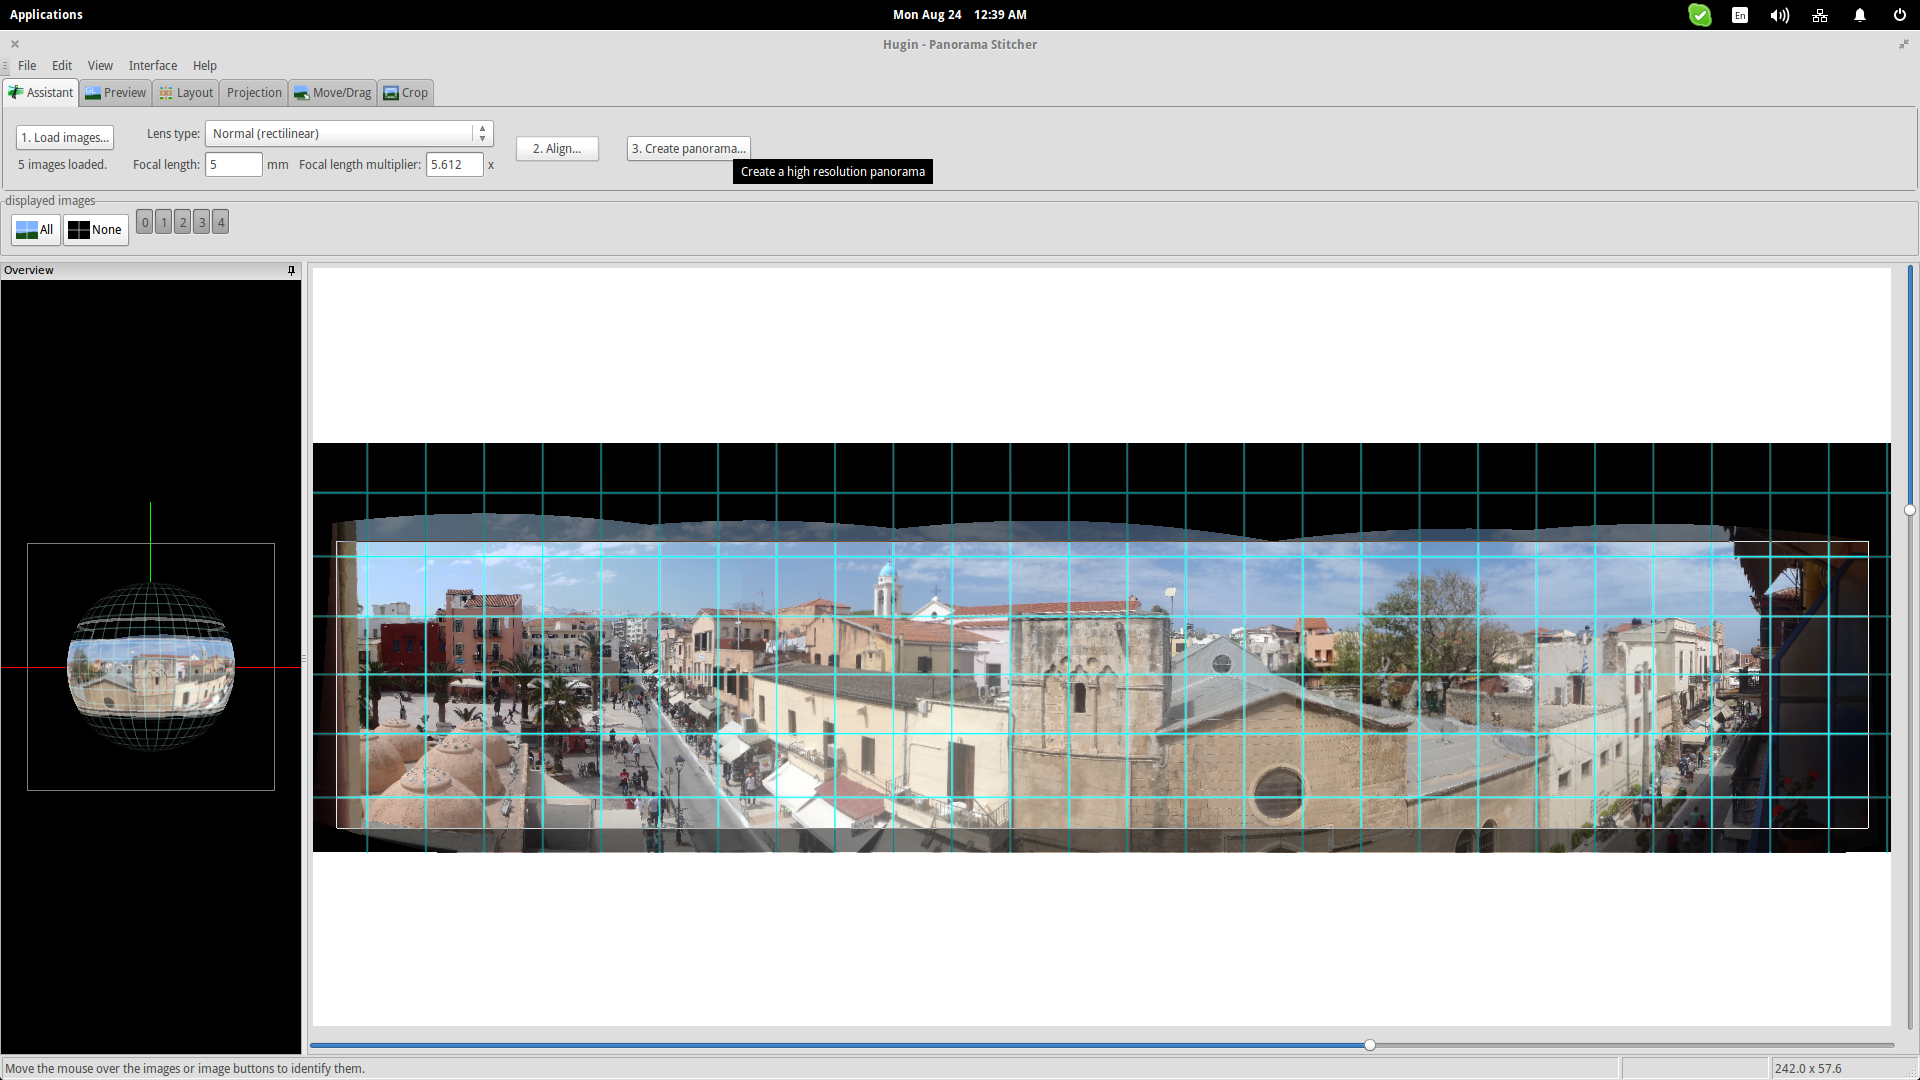
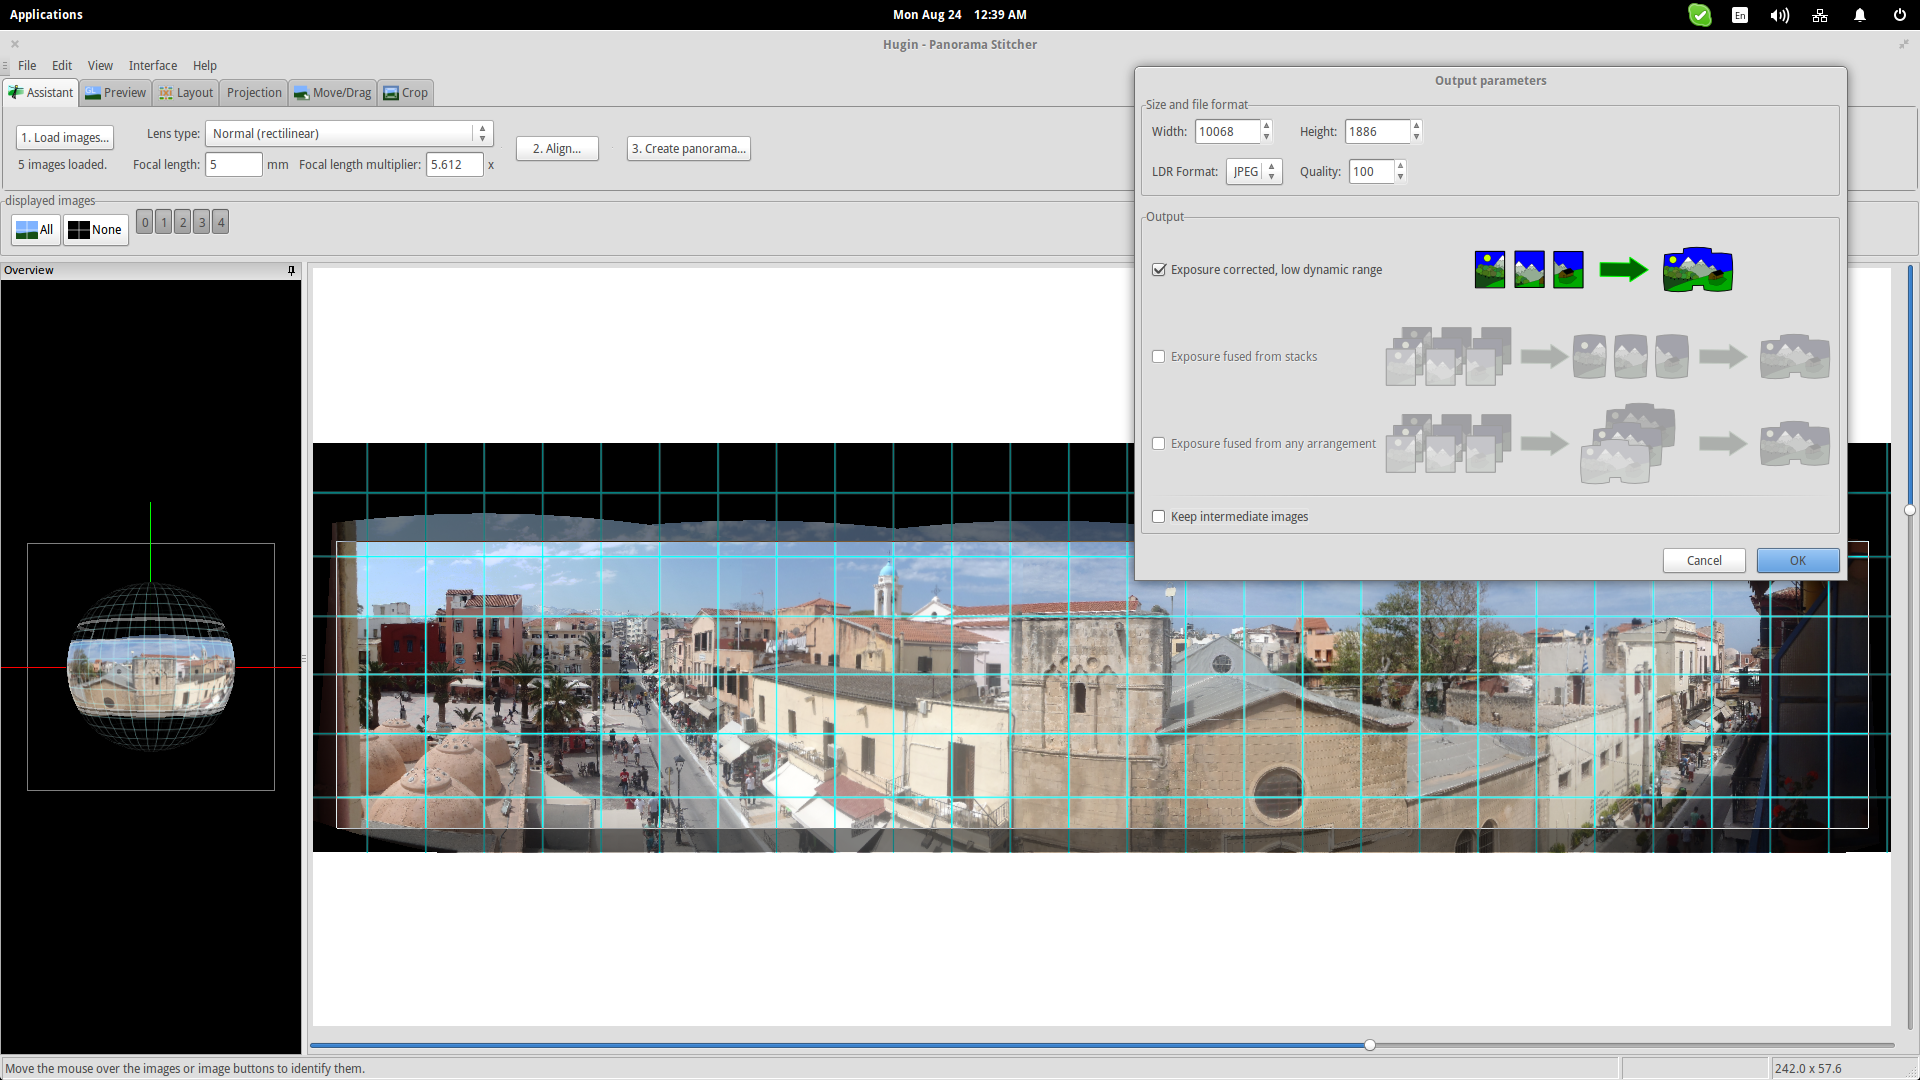
Then you may press the “Create Panorama” button which is the third and final step of the assistant, and you will be prompt to choose a panorama creation method, image file format and resolution.
That's all really if you're lucky and the result is good enough. Actually, Hugin's image analysis methods are very advanced and you should be unlucky for the result not to be good, but still you can fix this manually.
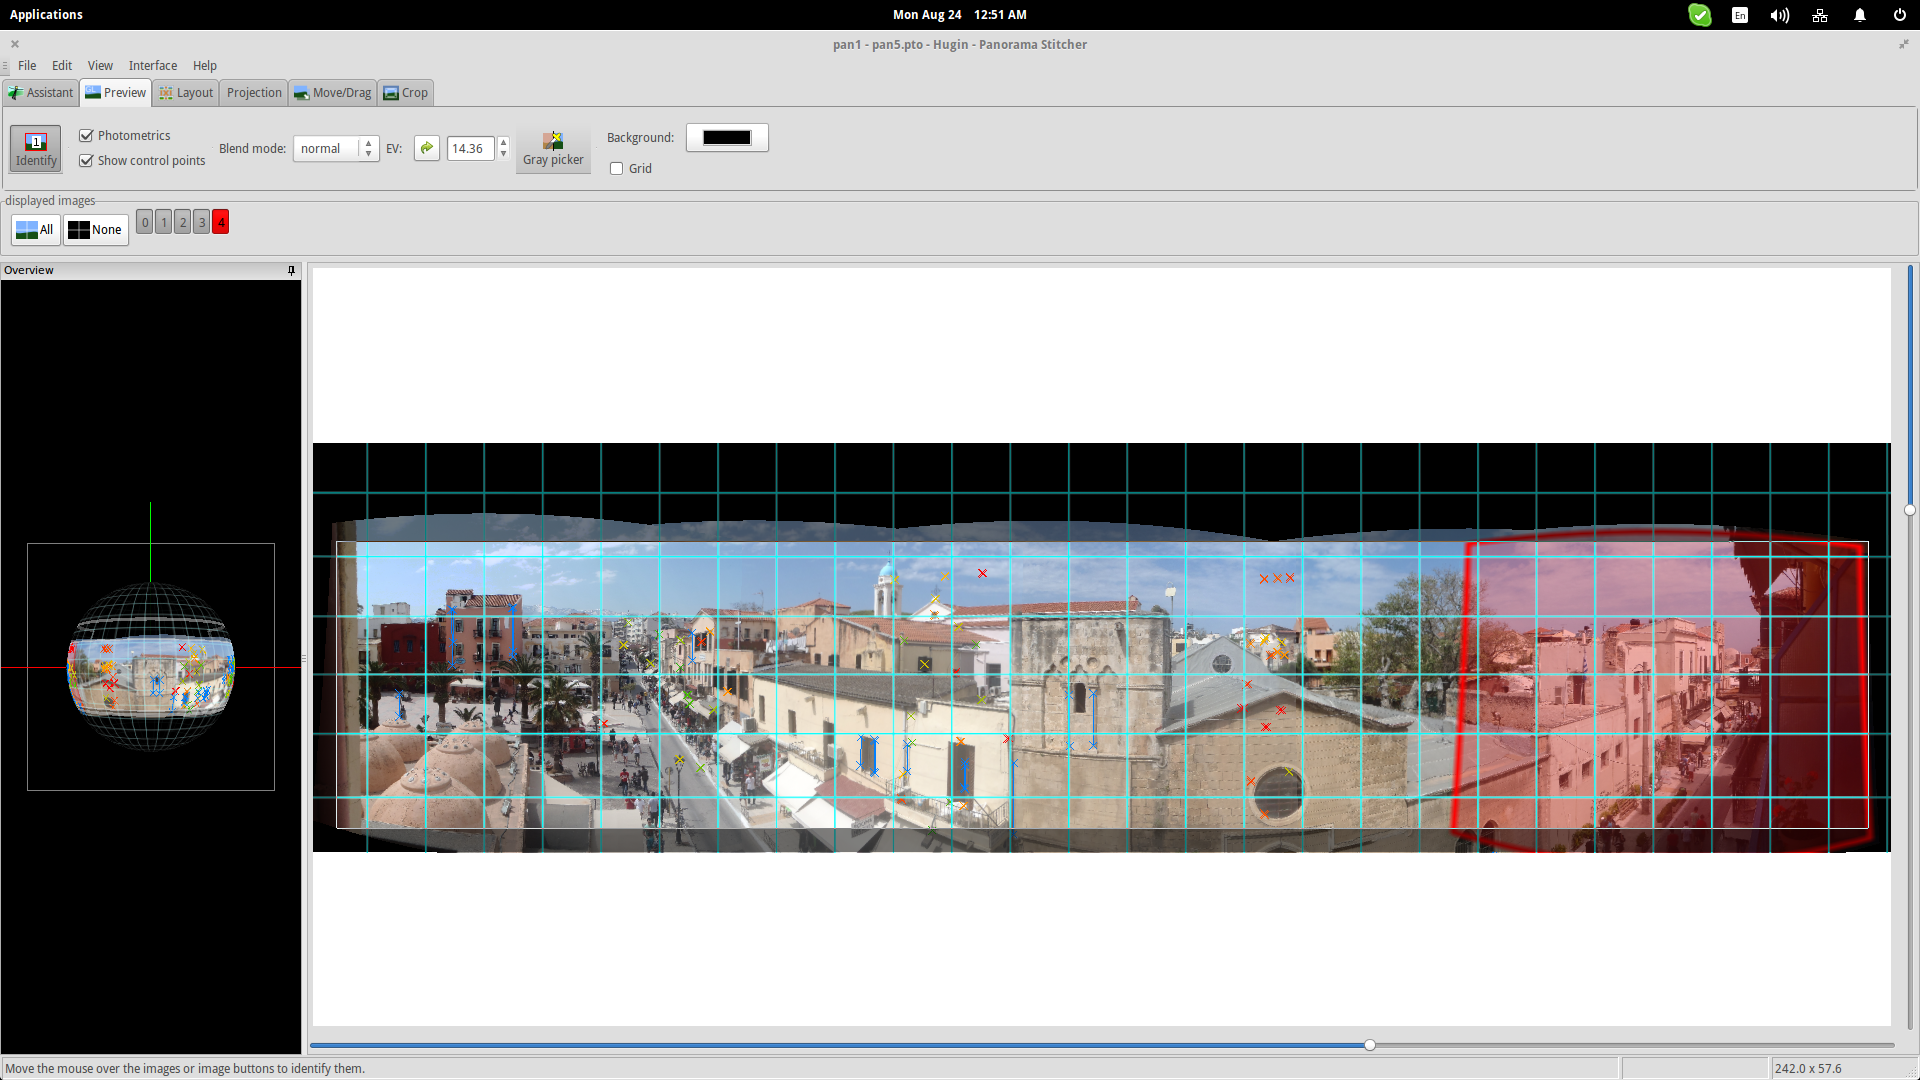
Step into the next section that is the “Preview” tab and select the “Show Control Points” option on the left. This will clarify what points were used by Hugin to “fix” the photos and also the error value which is proportional to the line length. Press the “Identify” button on the top left and hover your mouse over the panorama to reveal the individual images below. This will give you a clear indication of what needs to be done in order to fix things.
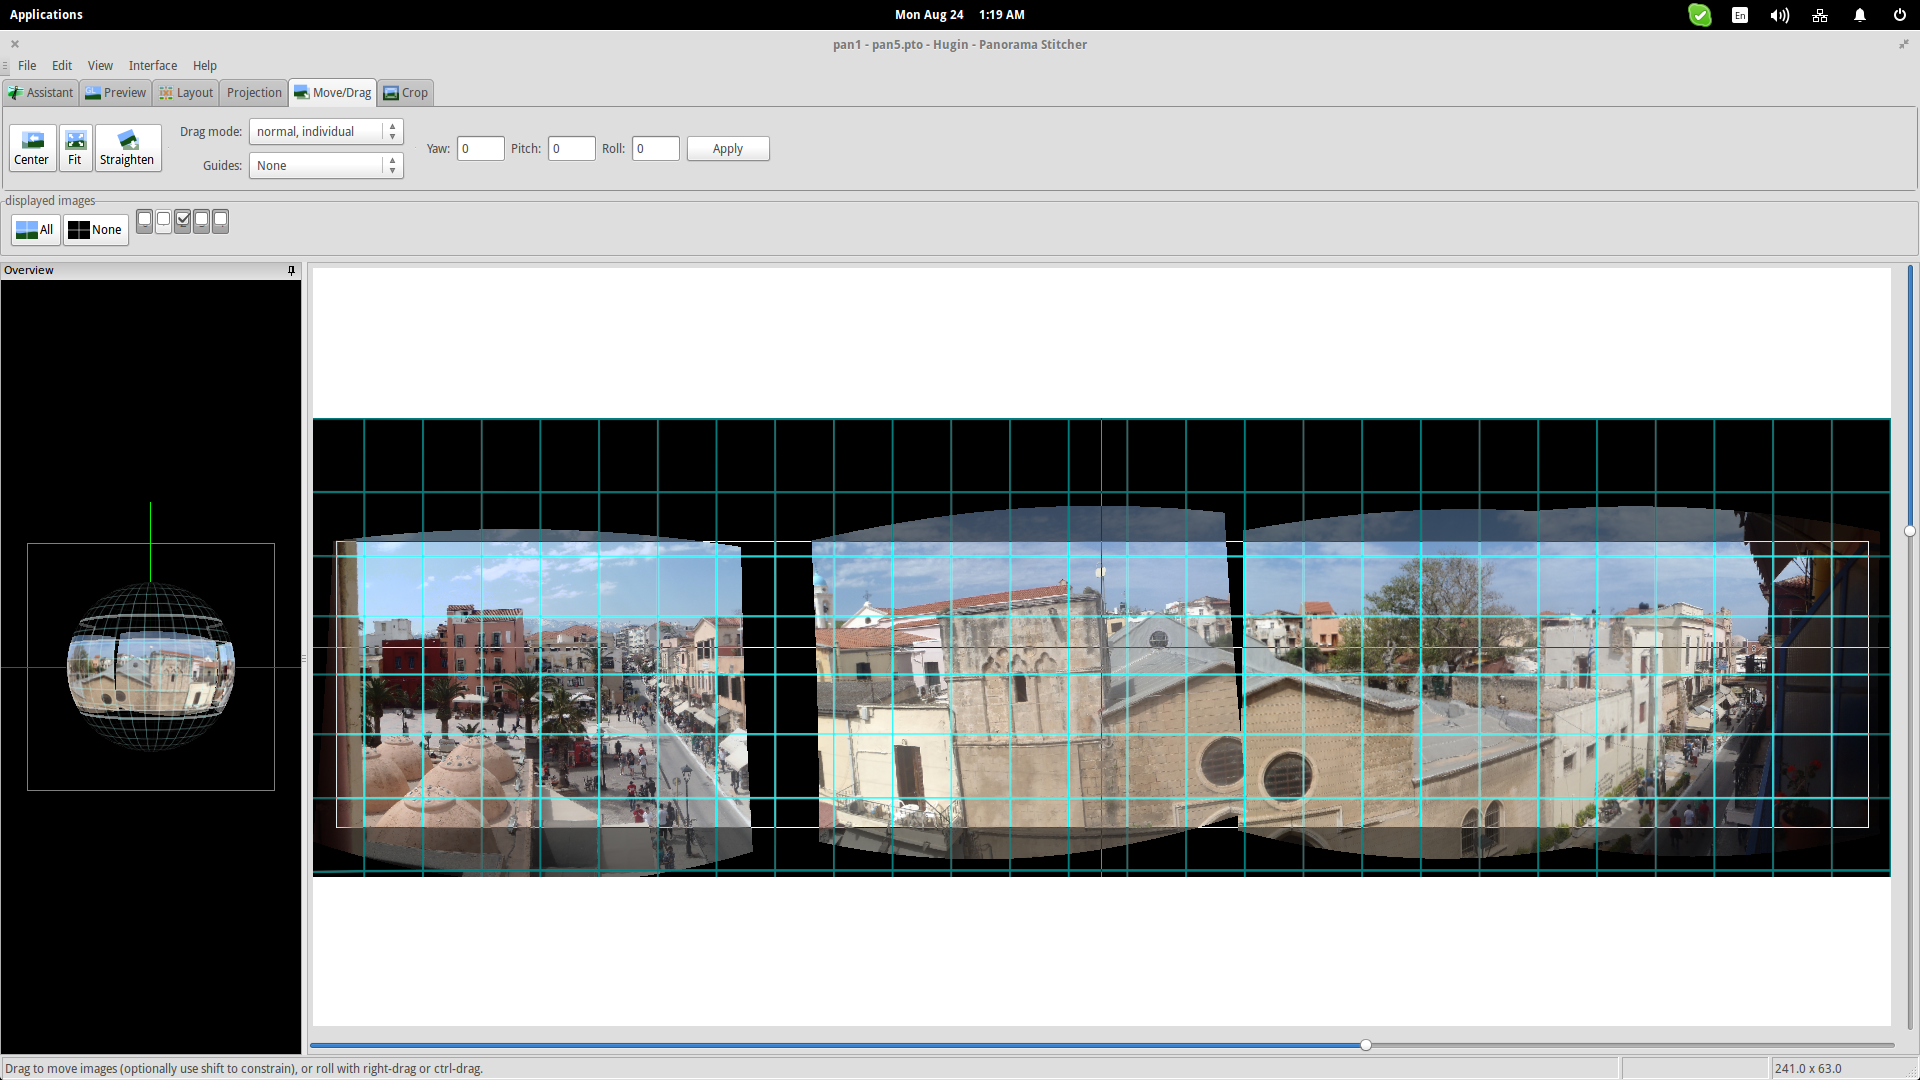
Go to the “Move/Drag” tab and choose the “normal, individual” drag mode from the options menu to fix the position of each image. On the “displayed images” section, you will find some icons that represent the images (five in my case). Select the one you want to drag and do so in the panorama to adjust its position. By clicking those icons lower, you may hide them from view in order to work more unobstructed.
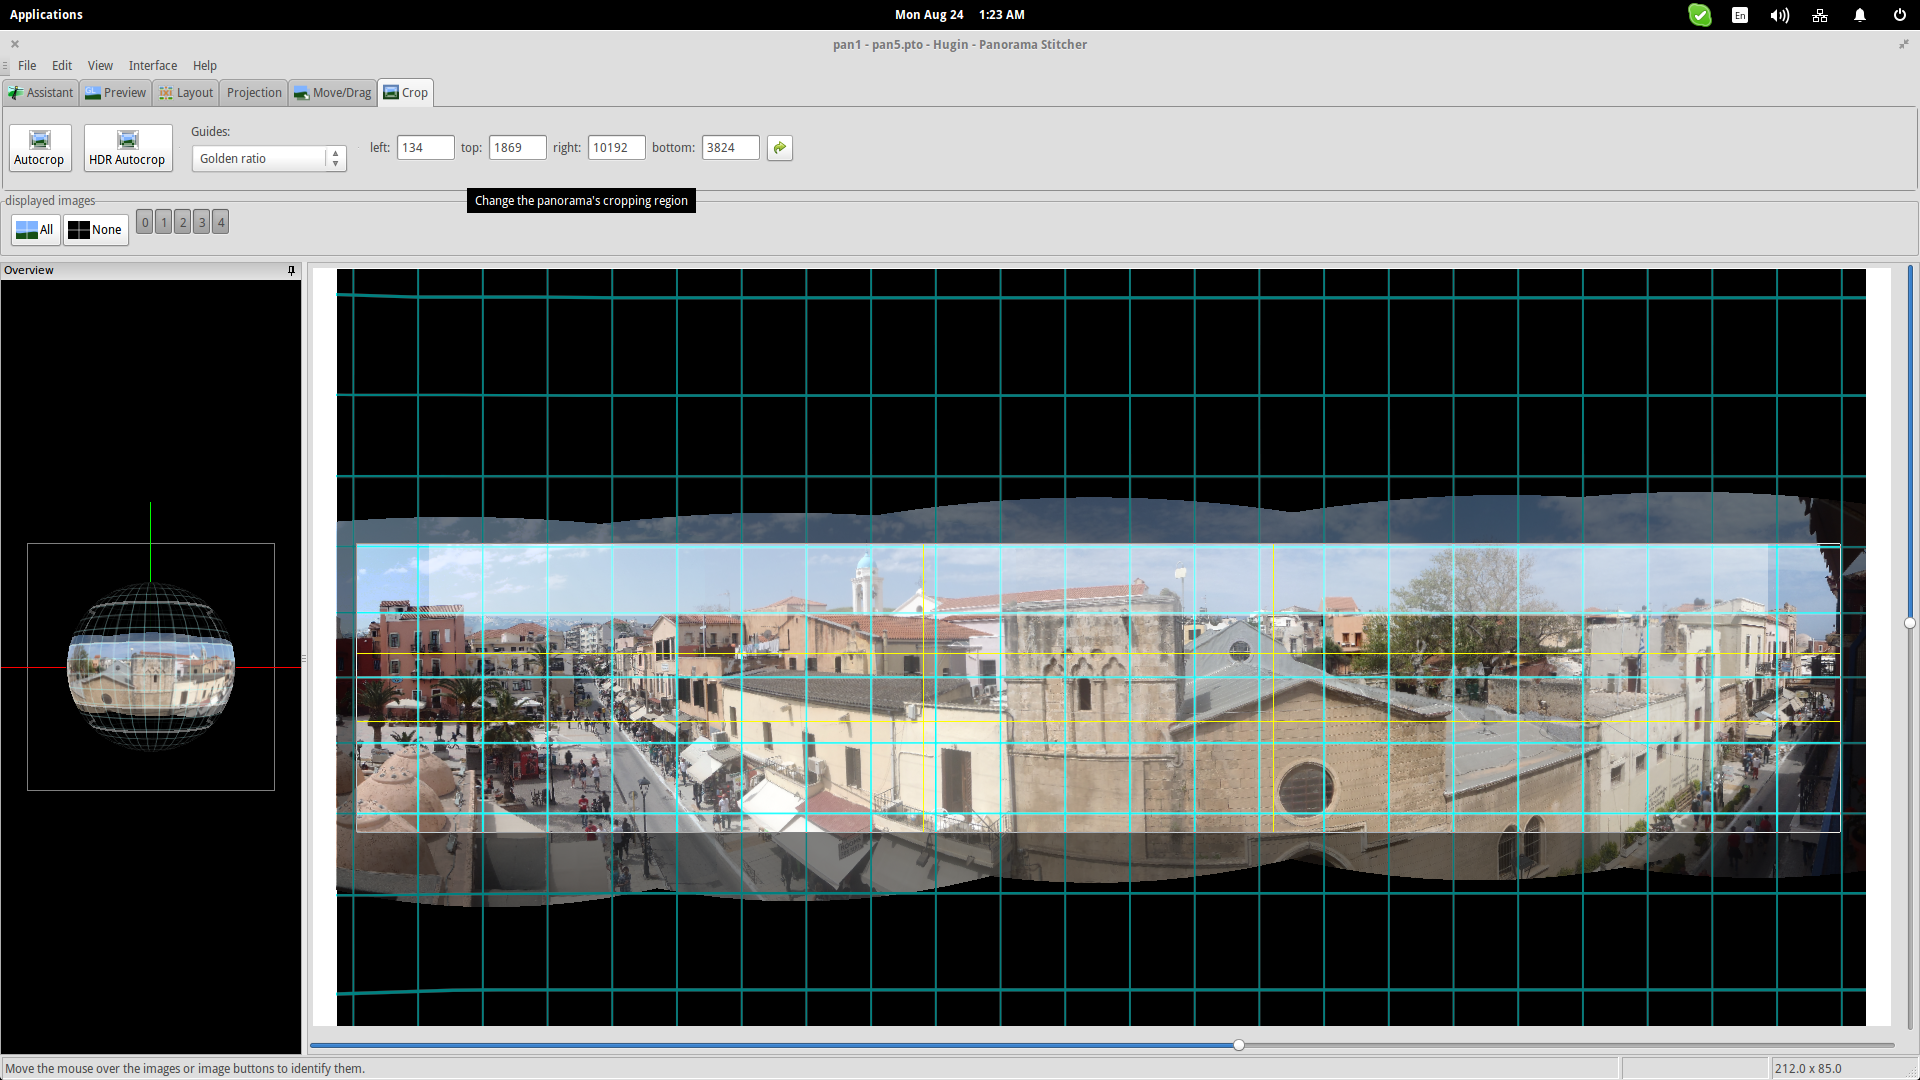
Finally, hop to the final tab that is the “Crop” tab. You can still used the “Autocrop” option to let Hugin do it by itself, but you can also adjust the cropping area by setting the pixel values on the boxes. Use the side and lower bars to set the vertical and horizontal field of view and you're done.