As the name suggest WebSVN provides a Graphical User Interface (GUI) for managing Apache Subversion (SVN) repositories. Using WebSVN we can compare the revision of files & can view the logs of files & directories. WenSVN comes under GNU General Public License( GPL).
Some Key features of WebSVN are listed below :
- WebSVN provides GUI for managing SVN repositories.
- It supports multiple local & remote repositories
- Using this we can view & search logs.
- Comparing revisions of file & directory.
- It allows us to download files & folder.
- Multiple language support.
- It provides option to use customize templates.
- It also provide RSS Feed facility
In this tutorial i will install WebSVN on the same server on which SVN is already installed, in case SVN is not install then refer the URL : Install Apache Subversion (SVN) on RHEL 8 / Rocky Linux 8
Step:1 Install PHP using yum command.
For installing WebSVN on CentOS 7 & RHEL 7 first we need to install PHP if it is not installed.
[root@localhost linuxproject]# yum install php -y
Step:2 Download WebSVN ‘tar.gz’ file using wget command.
[root@localhost ~]# cd /var/www/html/
[root@localhost html]# wget http://websvn.tigris.org/files/documents/1380/49056/websvn-2.3.3.tar.gz
Step:3 Extract the Downloaded ‘tar.gz’ file
[root@localhost html]# tar -zxpvf websvn-2.3.3.tar.gz
Now rename the extracted folder ‘websvn-2.3.3‘ to ‘websvn‘
[root@localhost html]# mv websvn-2.3.3 websvn
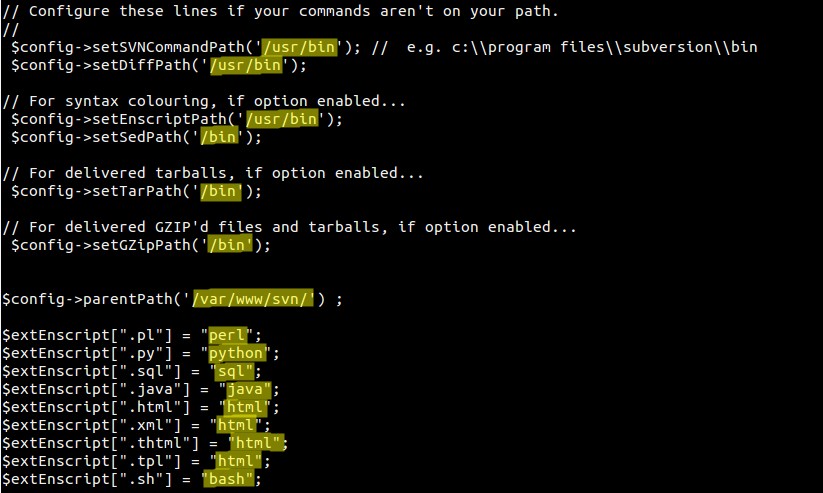
Step:4 Modify WebSVN Configuration File
[root@localhost ~]# cd /var/www/html/websvn/include
[root@localhost include]# mv distconfig.php config.php
Modify and add the following lines in config.php
[root@localhost include]# vi config.php
Restart the Apache service
[root@localhost include]# systemctl restart httpd.service
Step:5 Now Access the WebSVN from browser.
http://<Server’s_ip>/websvn
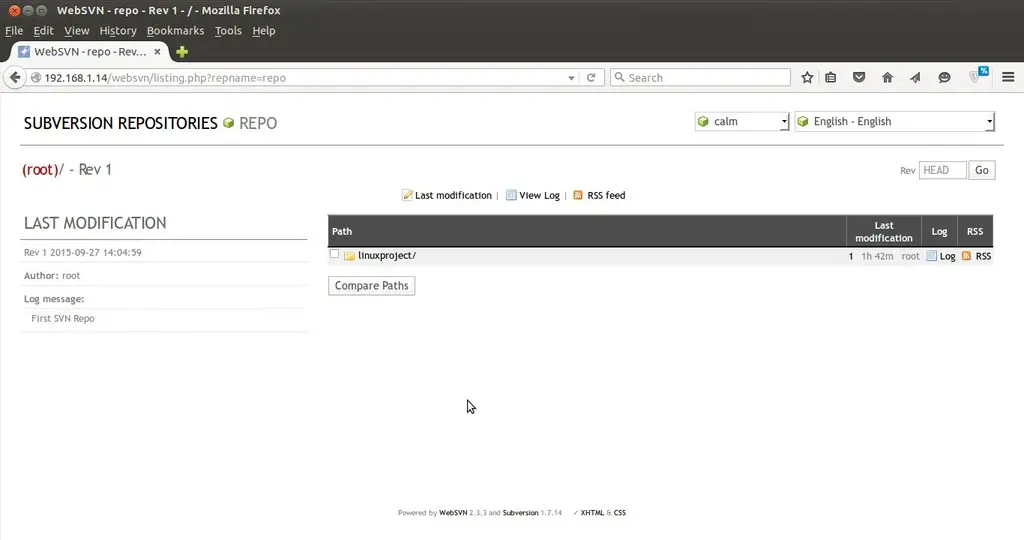
WebSVN installation is completed, now explore it and have fun 🙂