Get started with Sweet Home 3D on Linux
On this page
Sweet Home 3D is an open source interior design application that allows people to draw a layout of their home, test new furniture arrangements before actually trying them out, and finally visit the virtual home in 3D view. It is quite powerful and extensible, but it remains relatively simple to use even for people who know very little or nothing about home design. This tutorial will guide you through the first steps in designing with Sweet Home 3D.
Get Sweet Home 3D
Sweet Home 3 D can be downloaded here for Wondows, OS X, Linux and Solaris:
http://www.sweethome3d.com/download.jsp
Floors and Walls
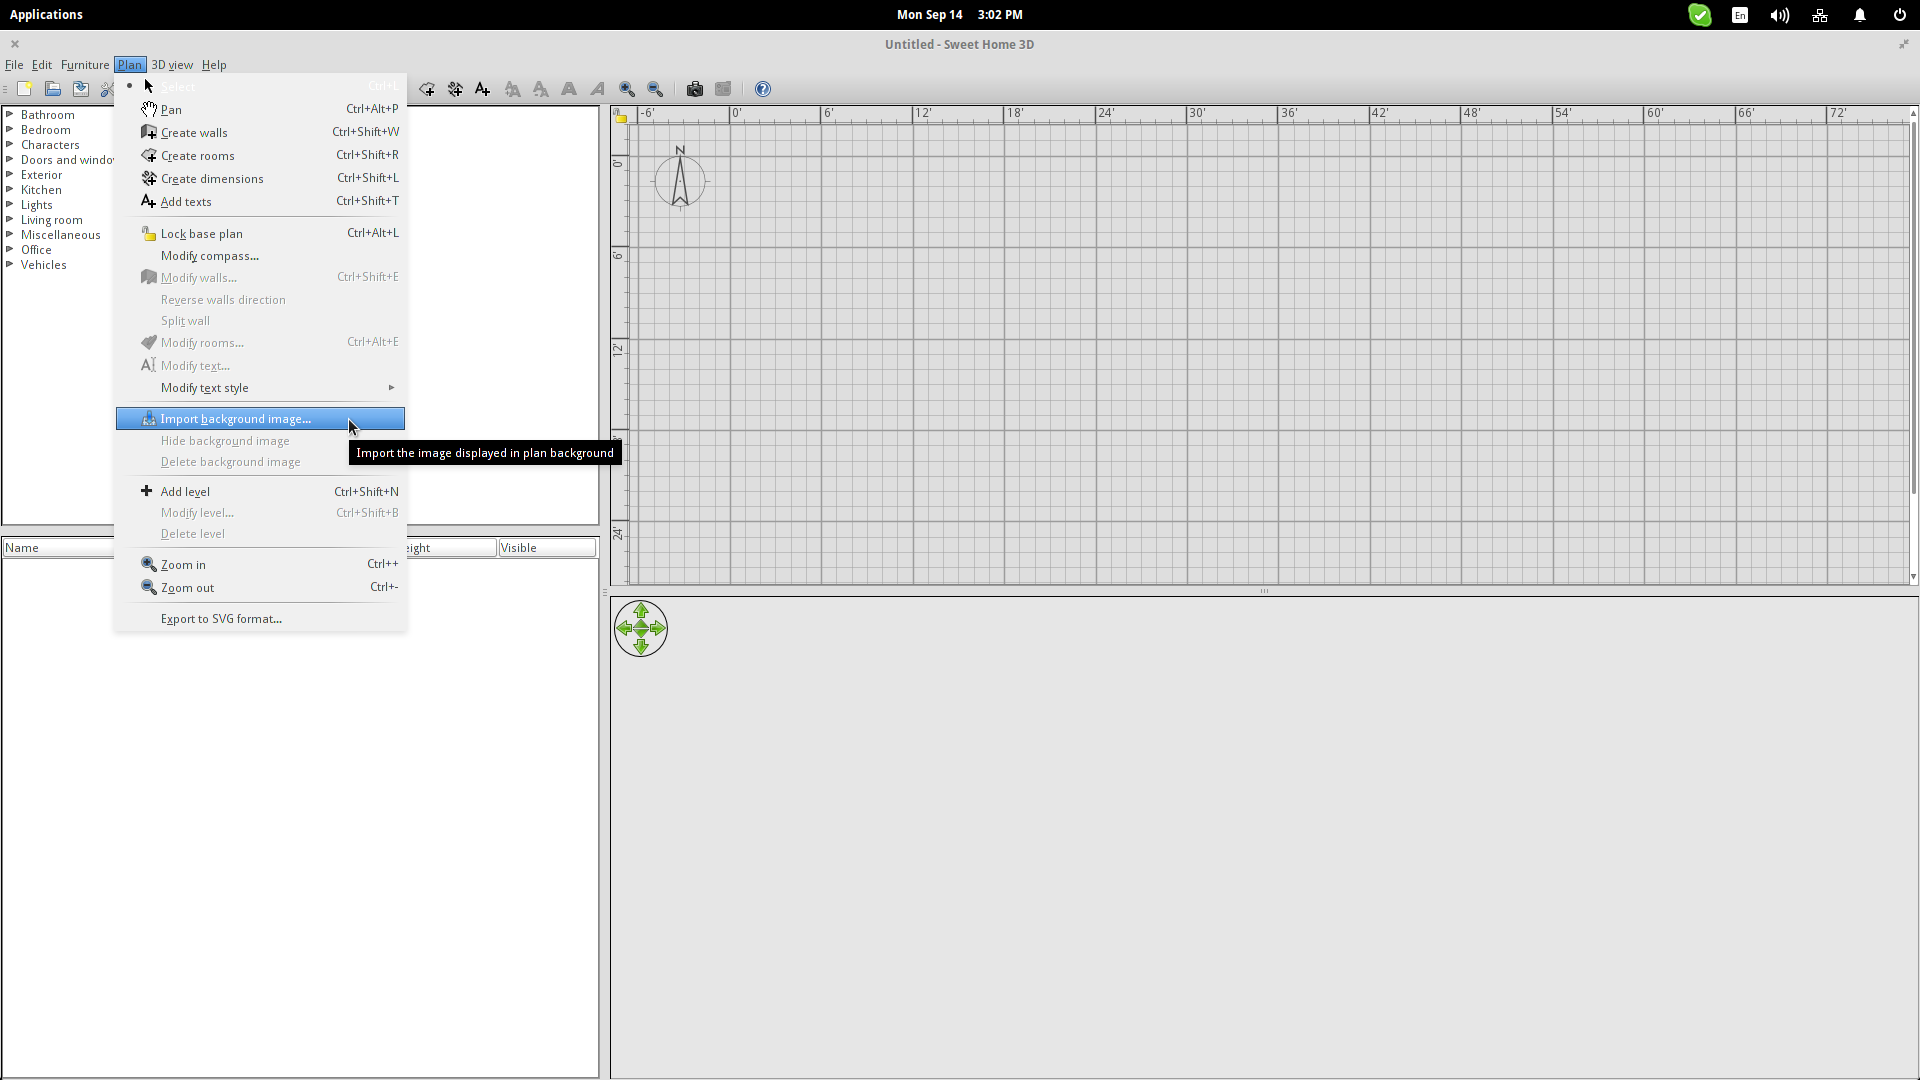
First thing you need to do is to add the floors and walls of the building. If there is an existing floorplan, you can insert it to the software by pressing the “Plan” menu on the top panel and then selecting the “Import Background Image” option,
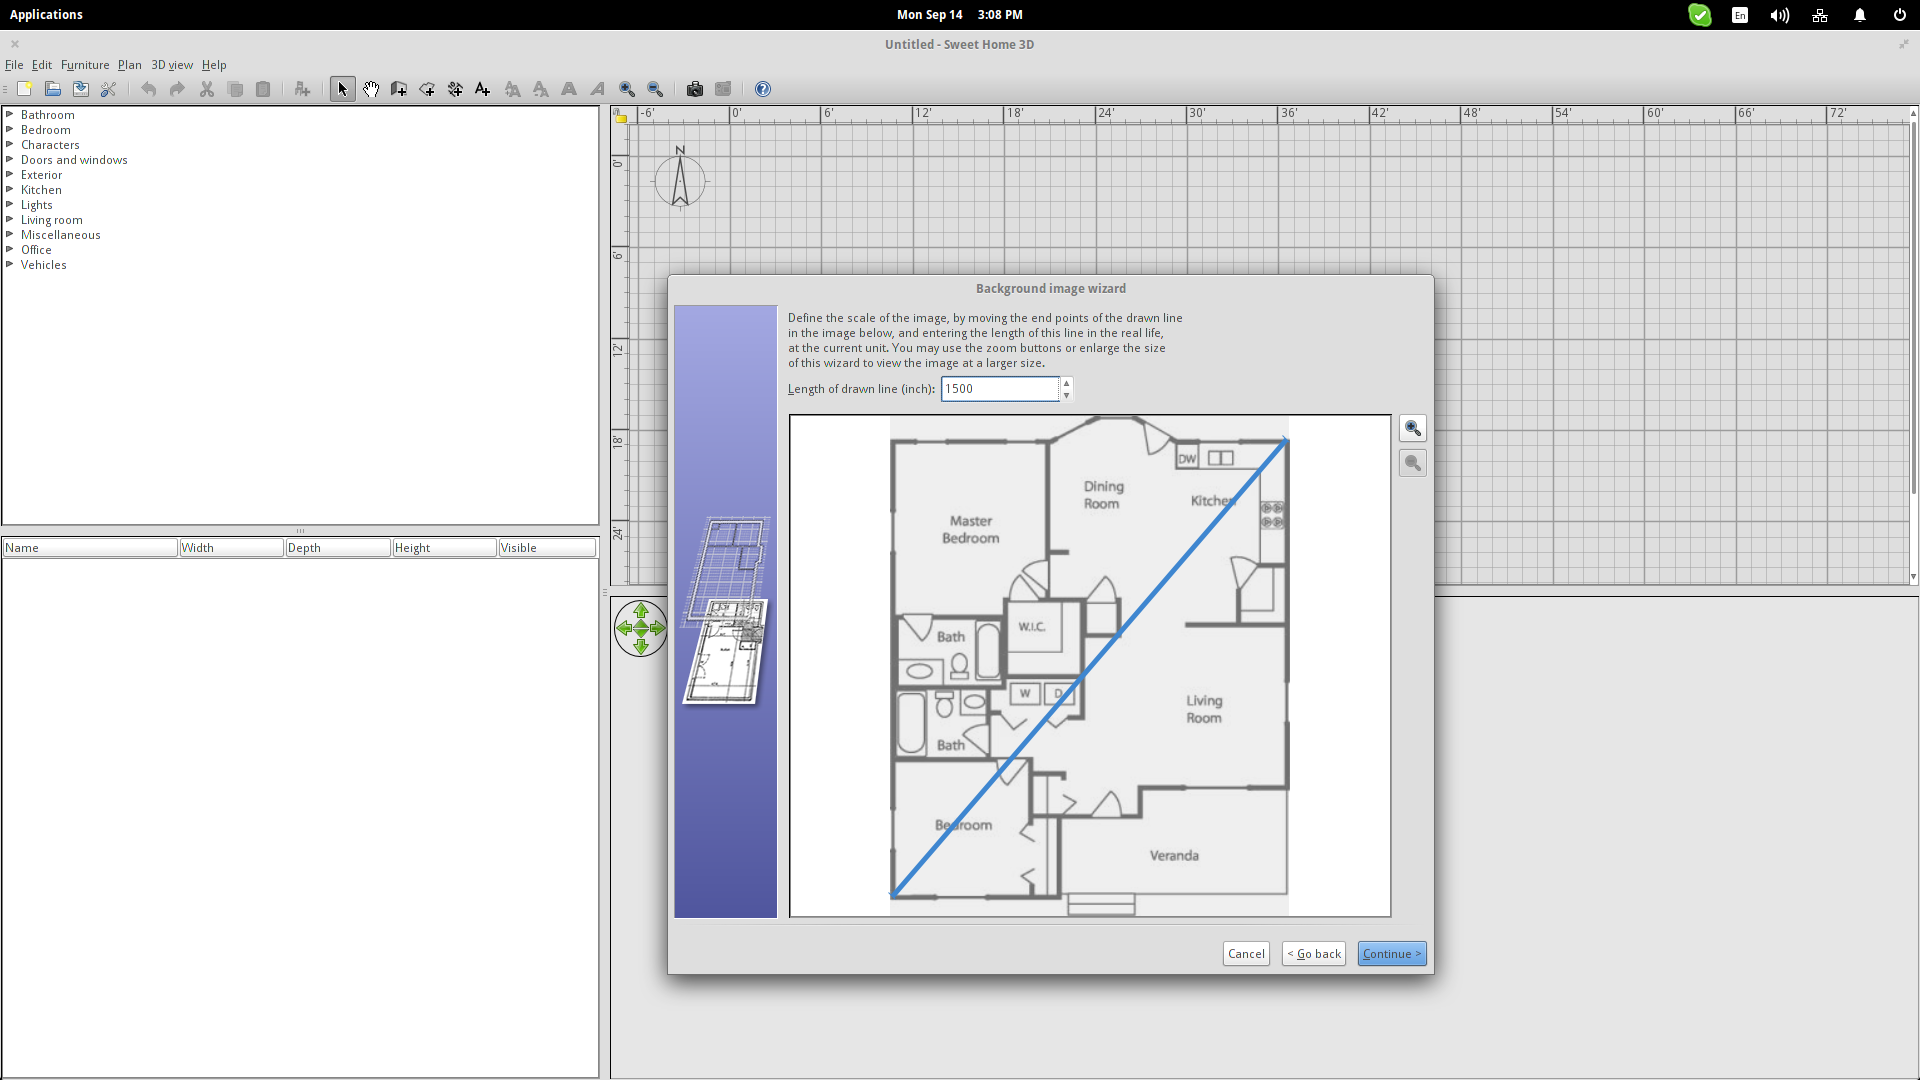
This will prompt you to insert a dimensional analogy for your convenience. The blue line that appears on the preview window will help you do just that. You may drag the line's end points to stretch it to an extend of a known dimension. In the following example, I used a diagonal line that is supposedly at 1500 inches.
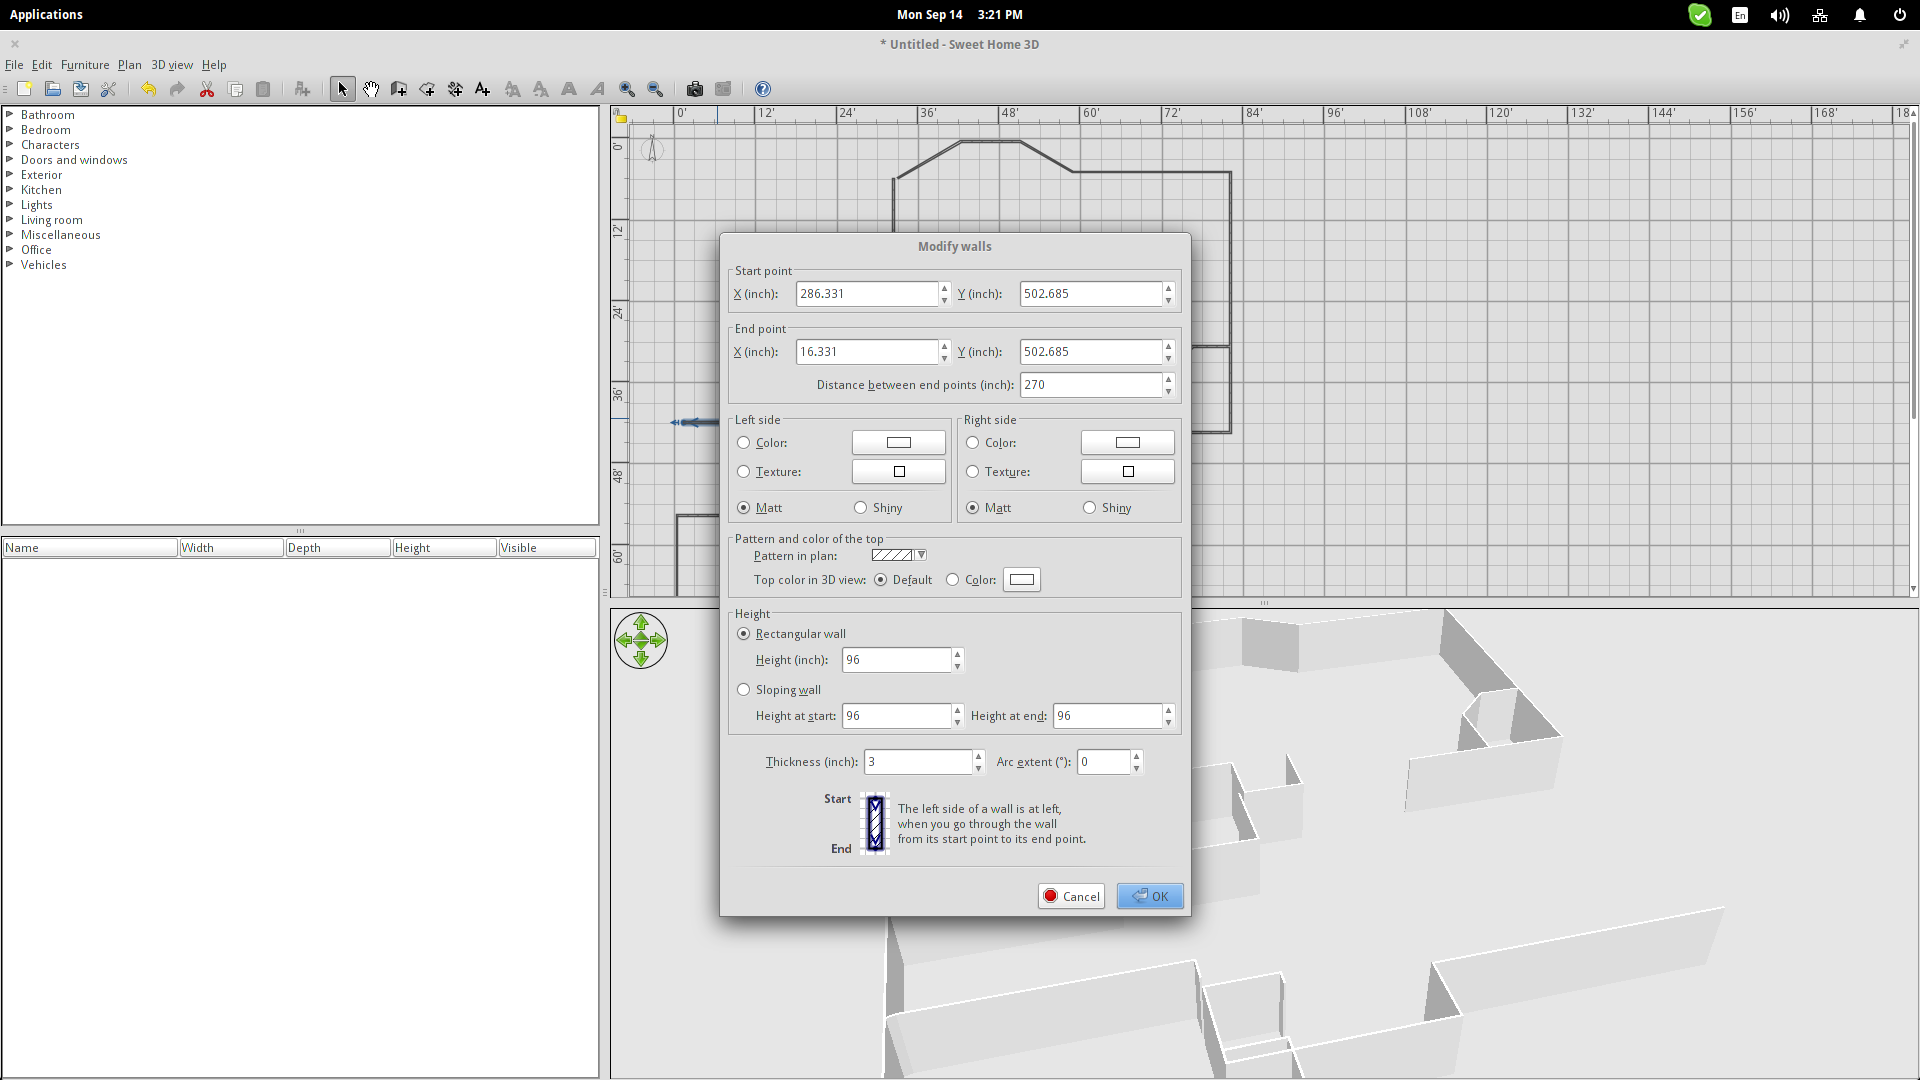
After the plan is inserted into the drawing space, you can start adding the walls by pressing the corresponding button, or by hitting “Ctrl+Shift+W”. One click starts a wall, every next click indicates a wall point, and a double click ends it. Pressing “Shift” will make it easier to draw straight lines in relation to the grid.

Double clicking a wall allows the changing of parameters such as the thickness, color, end point shape etc. So, even if two wall parts are continuous, you should draw them separately or else you won't be able to derive with two distinct walls.
The next step is to add the floors. That's really easy as all you have to do is press the “Create Rooms” icon and double click inside an area that is closed by a wall. Alternatively, you may press “Ctrl+Shift+R” and then select the points of the room and double click the last one to close it.
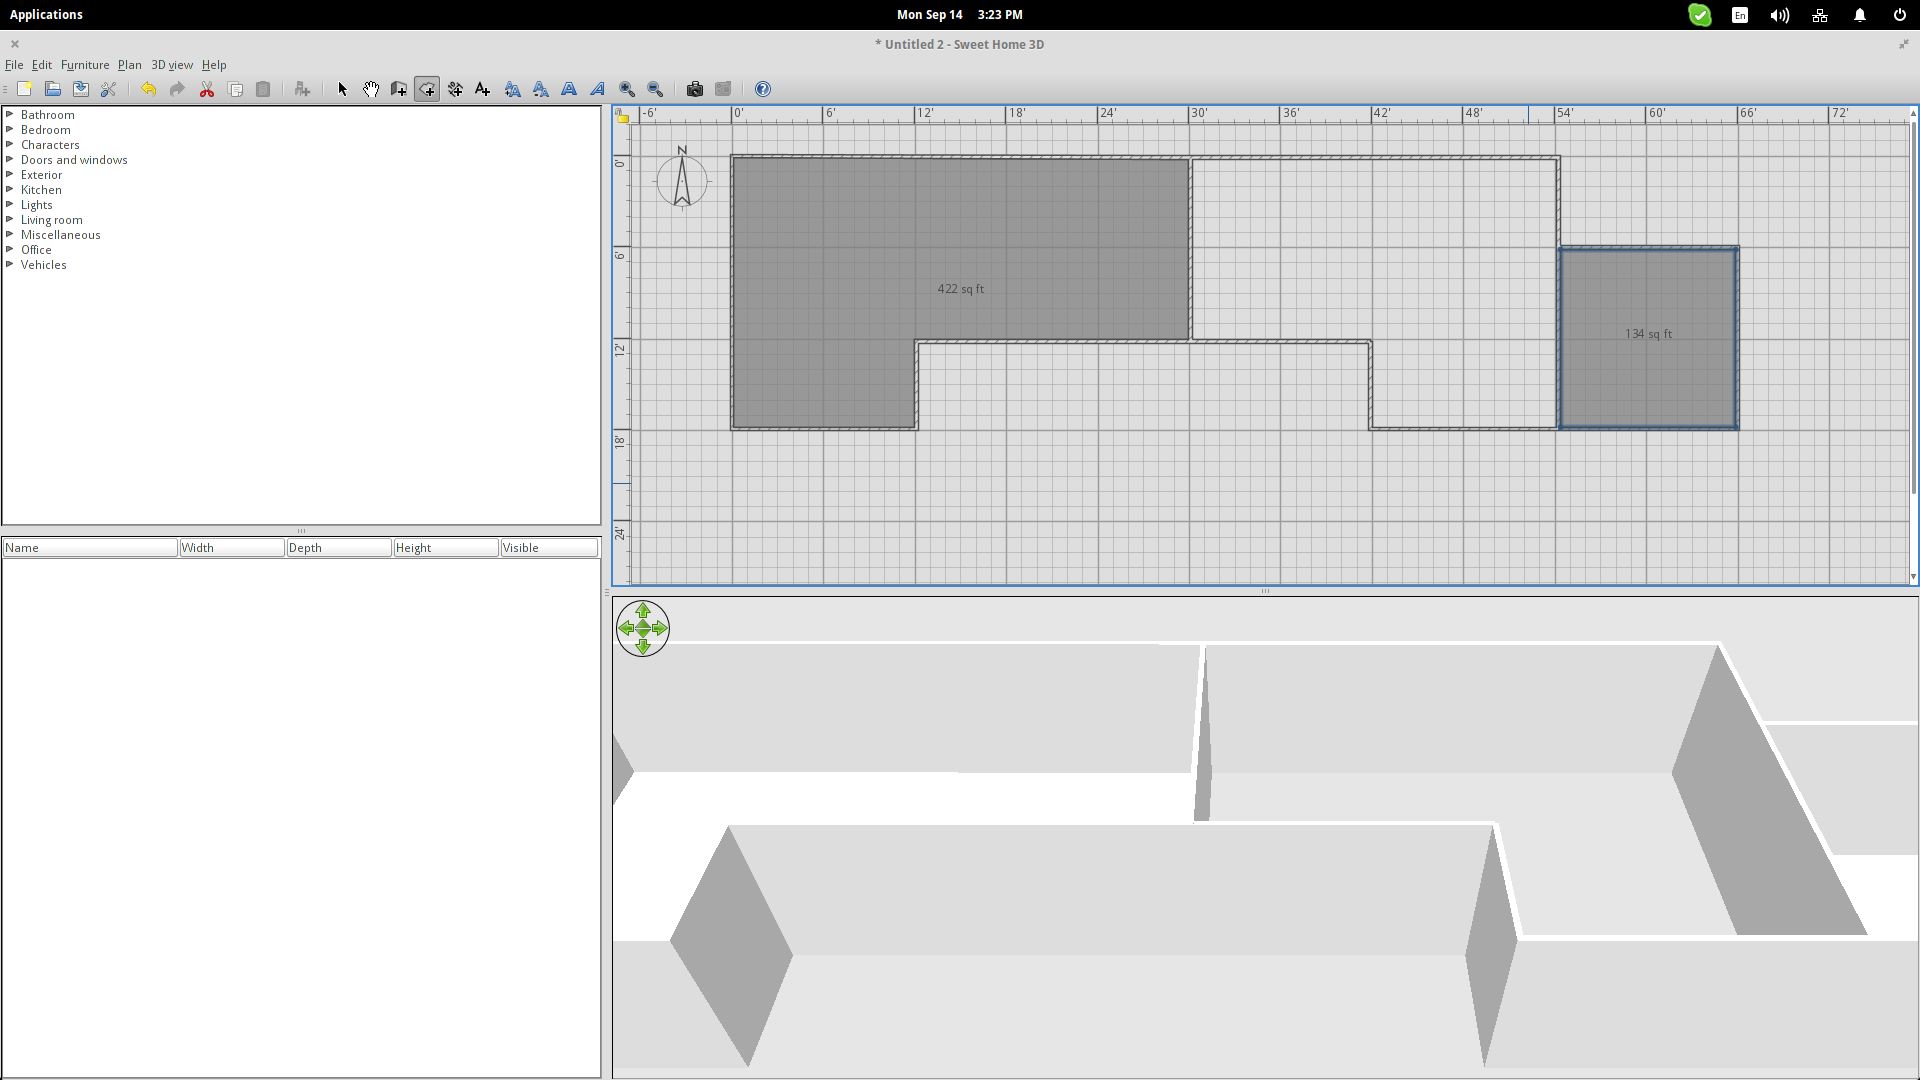
Creating a room, not only adds a floor but it also adds a ceiling. This means that you can build a second floor on top of your first floor rooms by pressing “Ctrl+Shift+N” or by right clicking in the drawing area and selecting the “Add Level” option. Every floor is depicted in a dedicated tab, so you can change between tabs view when working on upper levels. Pressing the “add a tab” button will also add a new floor.
Textures and Furniture
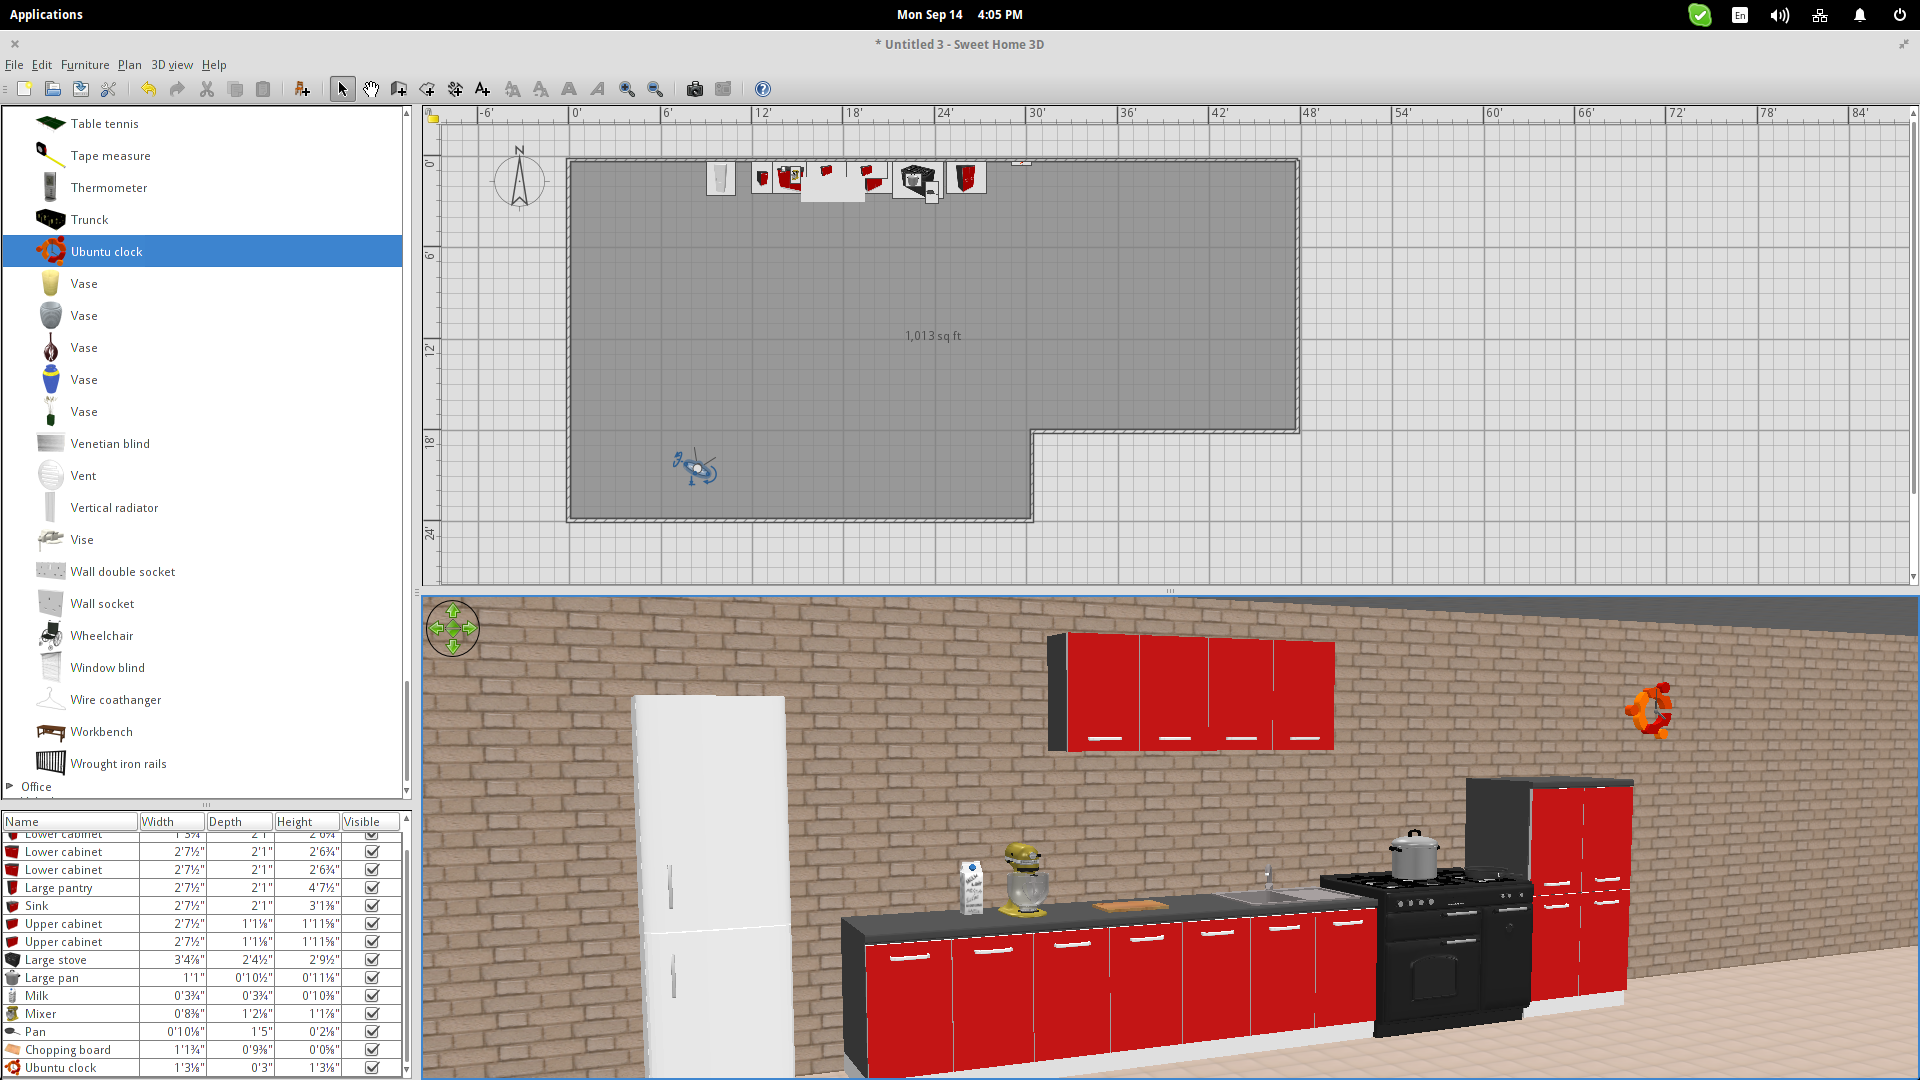
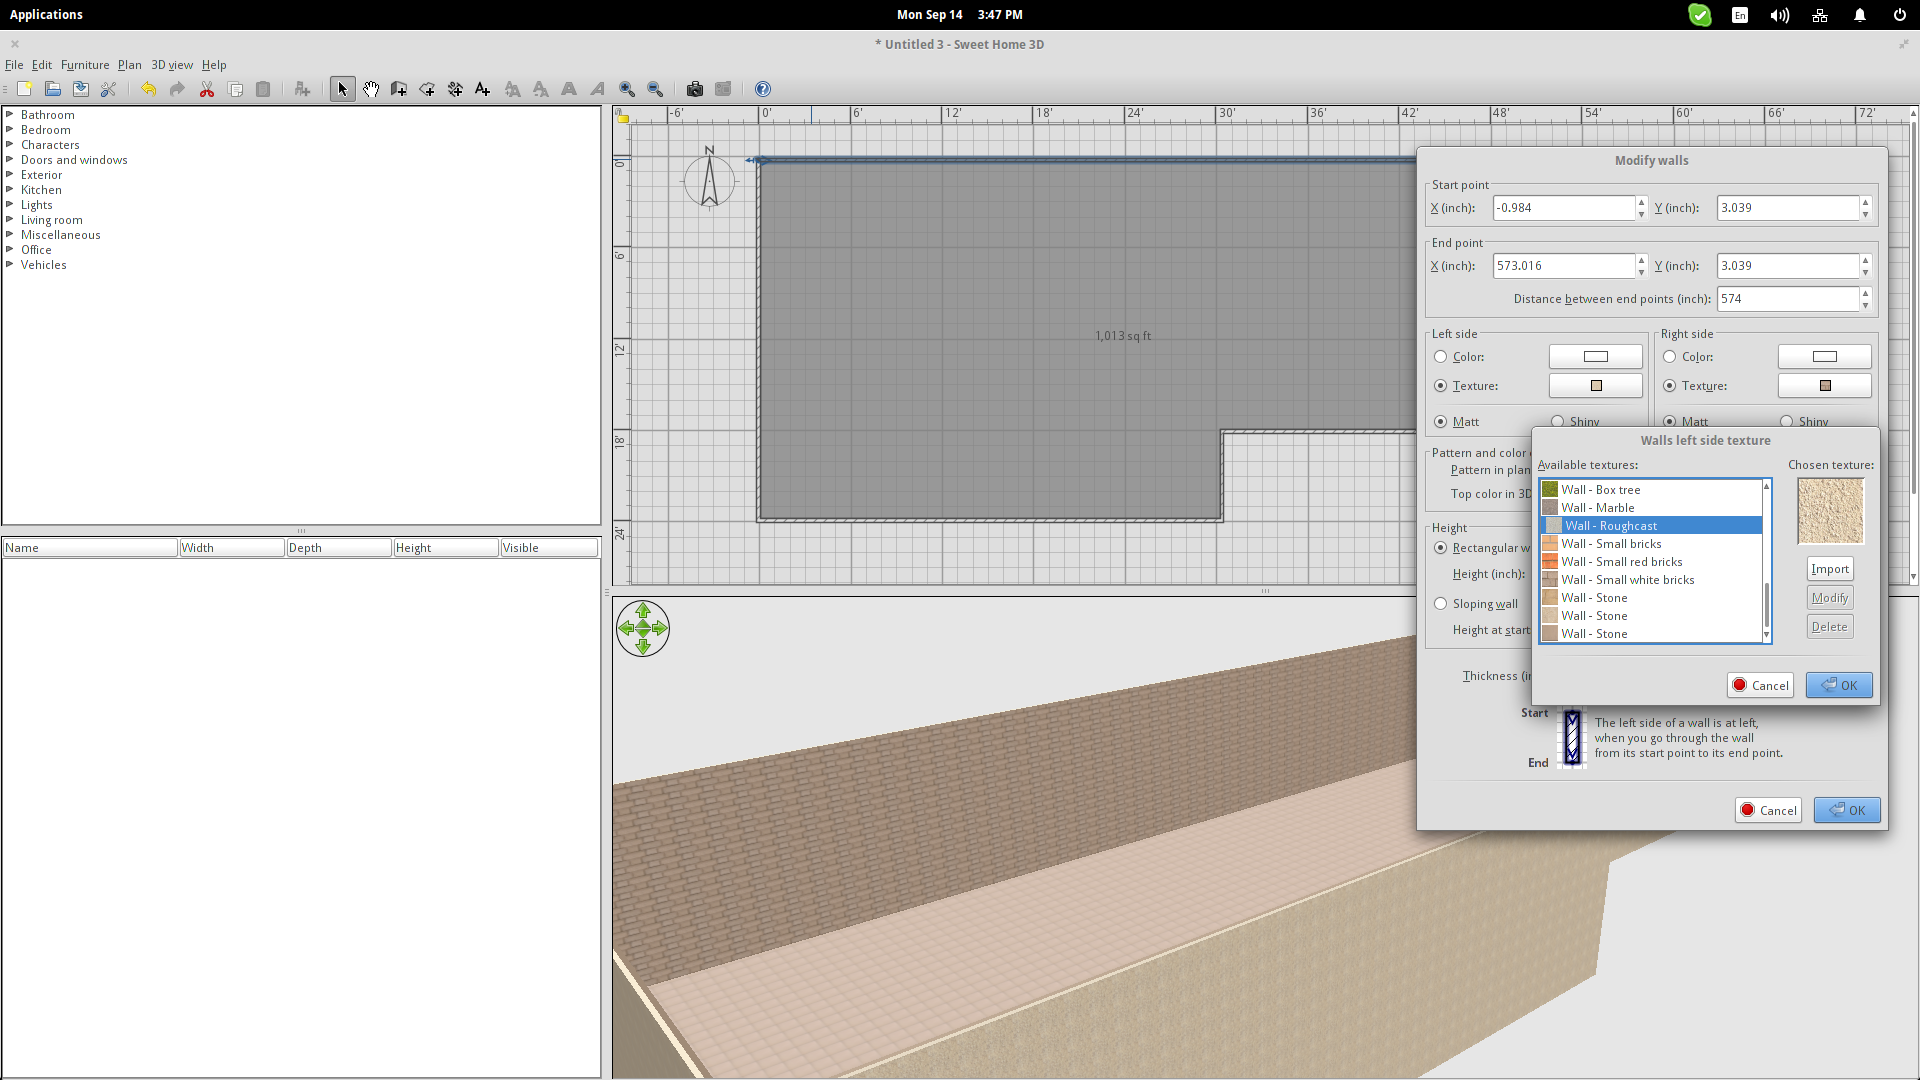
Double click the floor of a room and you'll get a pop-up that contains texture options. You can either colorize the floor, or select one of the available texture options. In the same way, you can add textures to the walls. Note that the walls have two faces, so you can assign two textures as I have done in the following example. I used bricks for the inner face of the walls, and roughcast for the outside.

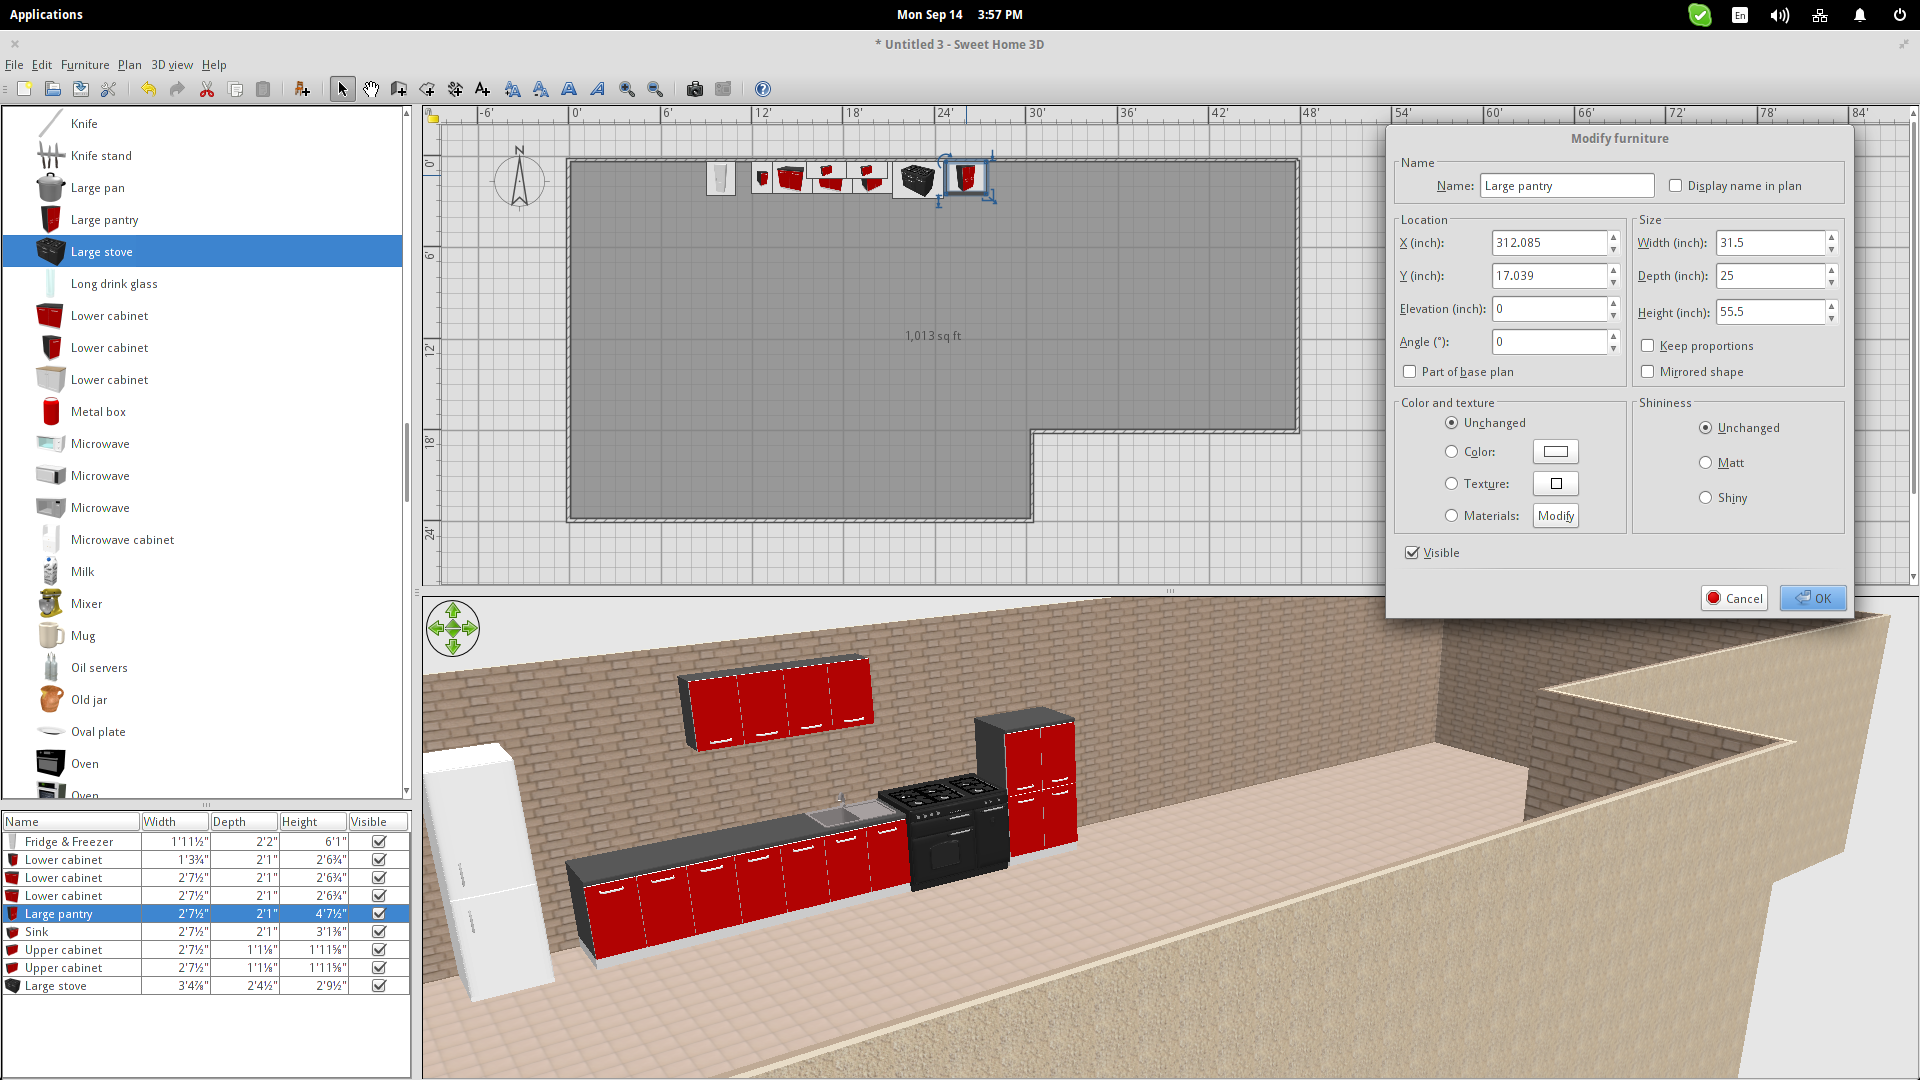
Adding the furniture is as simple as choosing a category from the left and drag and dropping elements in the 2D drawing area. After placement, you can click on the sides of the added item and drag to rotate the object. By double clicking the added item, you get a properties dialog. This is helpful when wanting to change the colors of an item, increase/decrease its size and change its height.
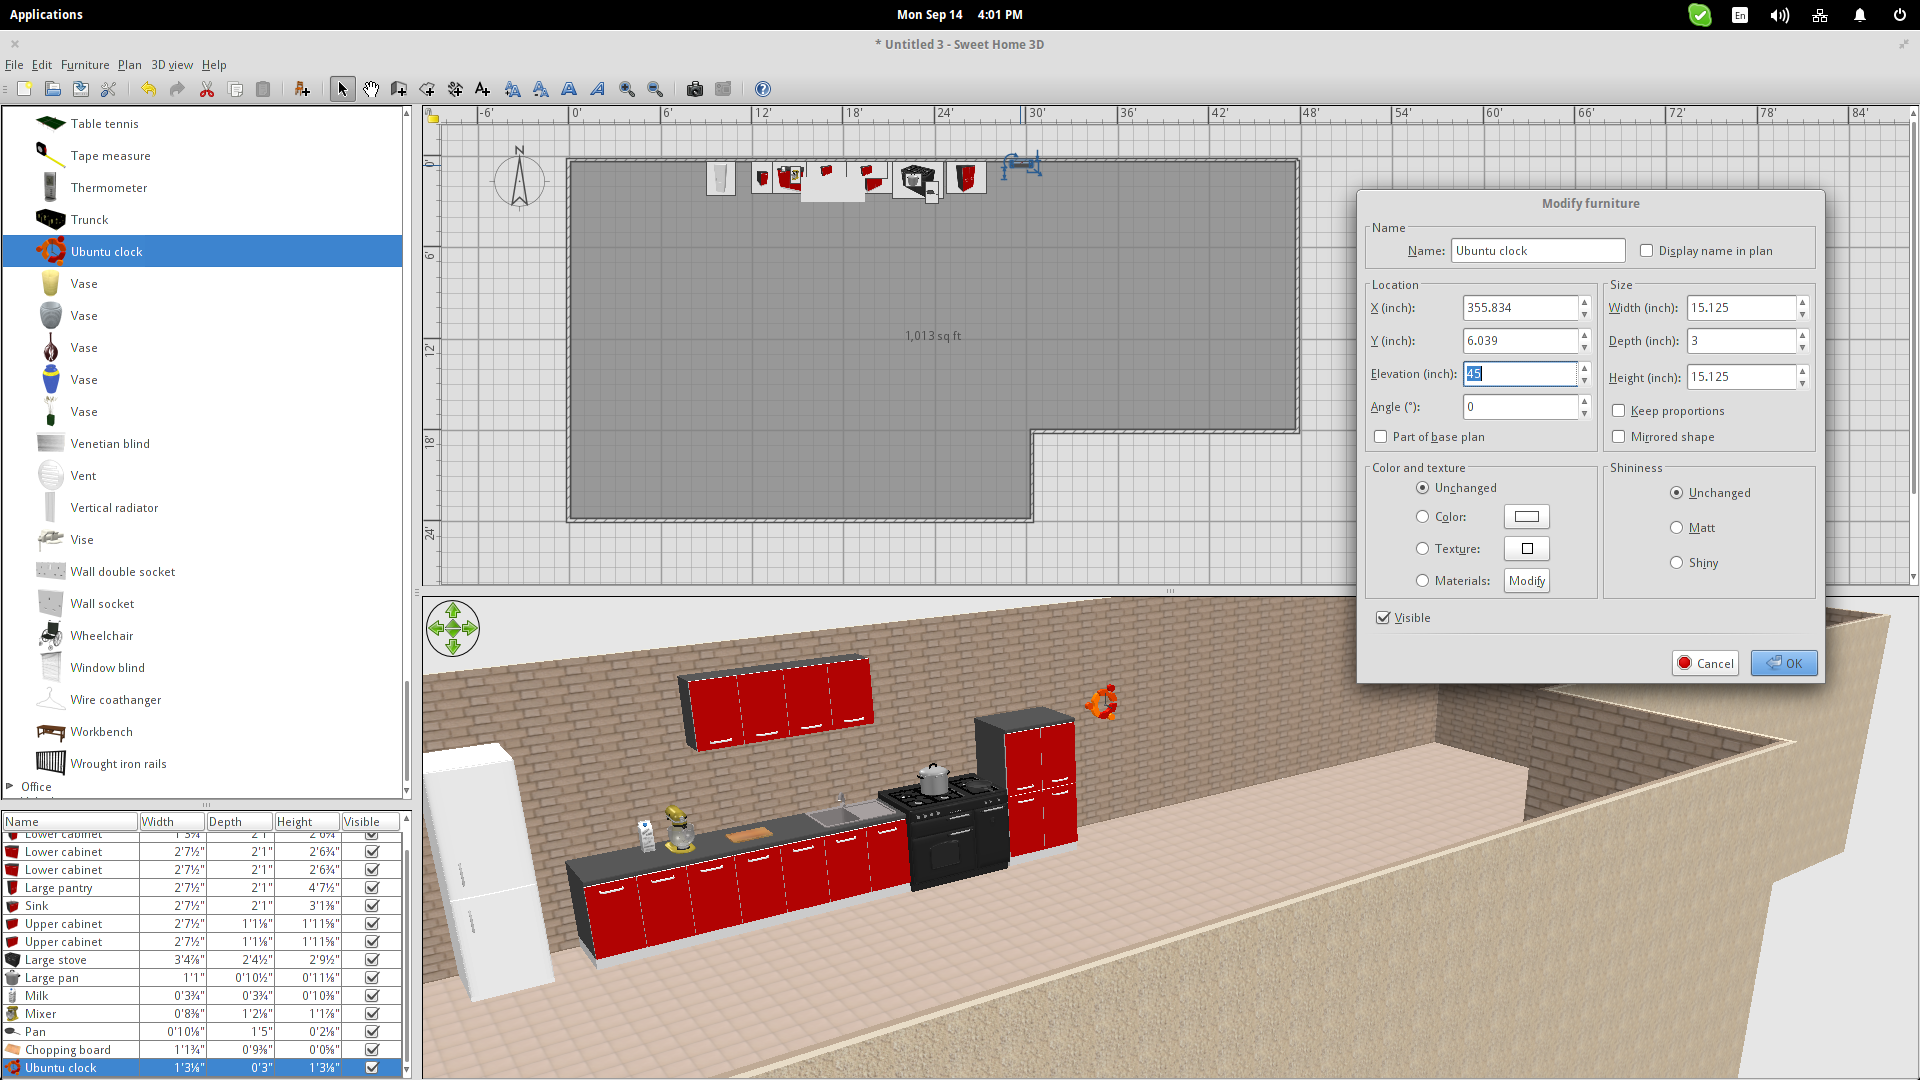
The Ubuntu clock shown in the following picture is too low. To place it higher on the wall, you have to increase its “Elevation” property which is essentially the z” axis of the drawing area.
Finally, you can press “Ctrl+Shift+D” to enter virtual visit mode. In this mode, you can navigate inside the rooms using your arrow keys and mouse. There's also the ability to export the 3D model into .OBJ file, through the “3D View” menu on the top panel.