How to install a Media Center with OSMC and CentOS on a Raspberry Pi 2
The evolution of technology and new advances in the field of entertainment have brought us small and low priced computer systems with low power consumption like the Raspberry PI that are perfectly suited for a home media center. In this tutorial, we will install the OSMC Media Center software on a card Raspberry Pi 2. I use the CentOS Derivative "Scientific OS" as my Desktop operating system to prepare the boot media for the Raspberry Pi.
What is a Raspberry Pi 2?
As defined by the manufacturer, "The Raspberry Pi is a low cost, credit-card sized computer that plugs into a computer monitor or TV, and uses a standard keyboard and mouse. It is a capable little device that enables people of all ages to explore computing, and to learn how to program in languages like Scratch and Python. It’s capable of doing everything you’d expect a desktop computer to do, from browsing the internet and playing high-definition video, to making spreadsheets, word-processing, and playing games."
What is OSMC?
A true concept by the developers is: "OSMC (Open Source Media Center) is a free and open source media player based on Linux that lets you play back media from your local network, attached storage and the Internet. OSMC is the leading media center in terms of feature set and community and is based on the Kodi project."
On a Raspberry PI, OSMC is not only a Media Center but is a complete Operating System that controls the whole hardware and firmware from the card.
Let's get started to install our Media Center. The installation is done in 2 steps: In the first part we install the OSMC installer on our Linux Desktop and start it. The installer then allows us to download and install OSMC on a Micro SD card which is then inserted into the Raspberry Pi 2 as boot media and turns it into a complete Media Center.
Prerequisites
- A (CentOS / Scientific Linux) Linux Desktop to prepare the Micro SD Card.
- A Raspberry Pi 2 that supports to boot from a Micro SD Card.
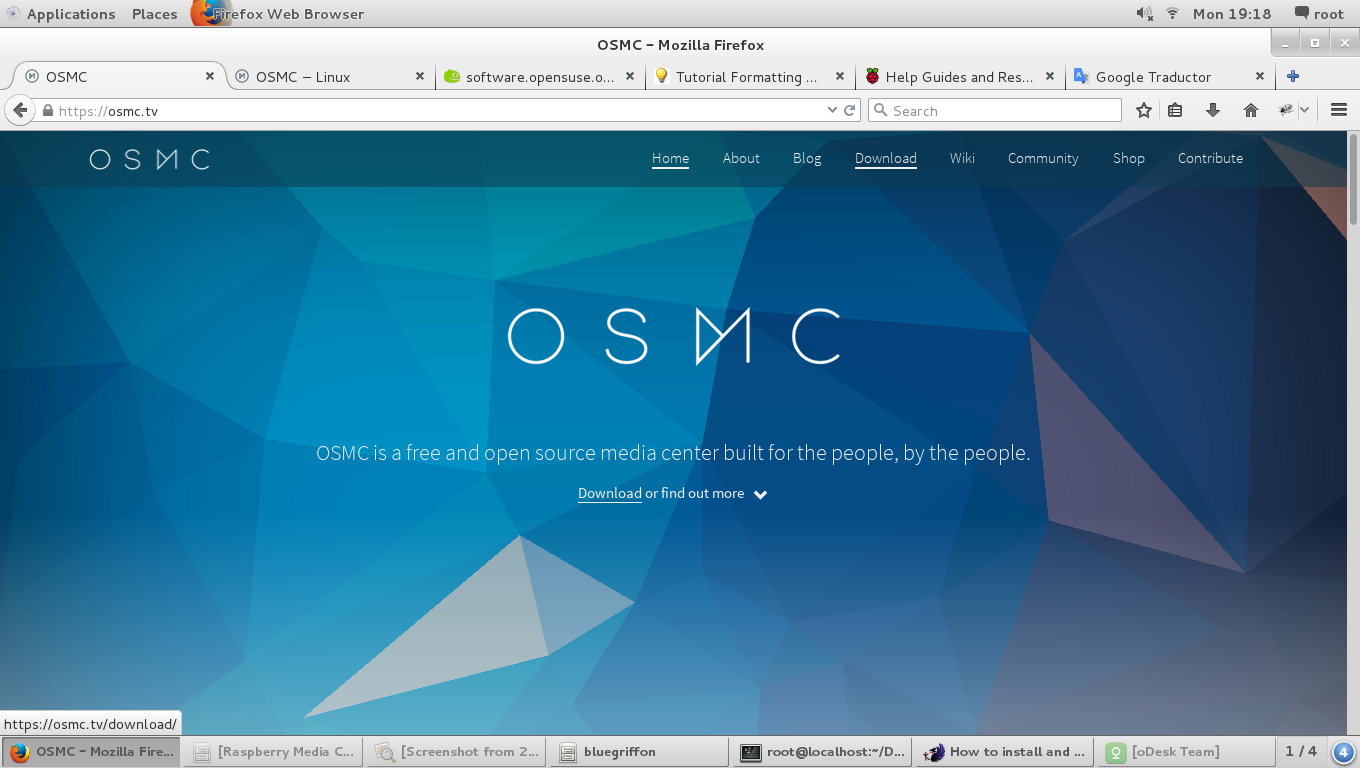
Go to the OSMC site and download the software
As the first step, we visit the OSMC website, as shown below:
And click on the Download link to store OSMC on our Desktop: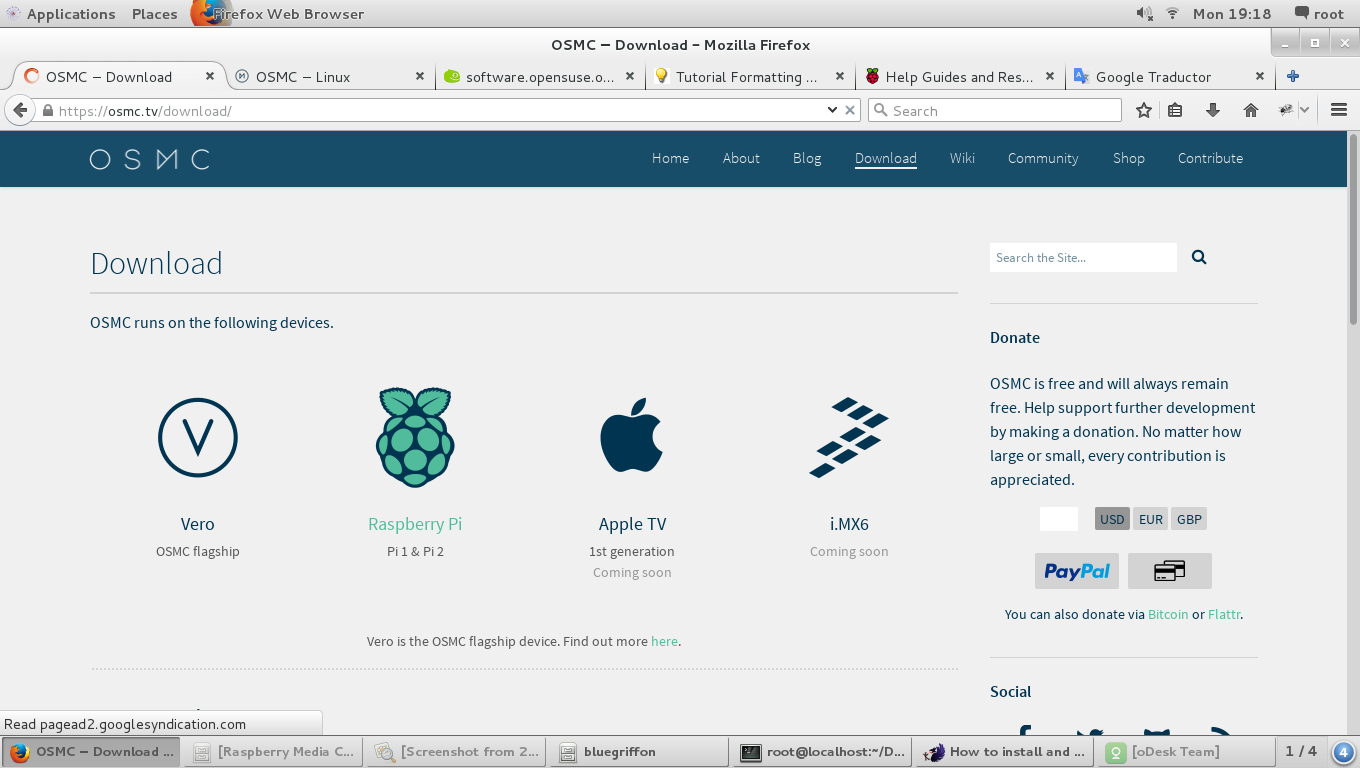
Choose the Raspberry Pi Icon, this link will redirect you to the operating system selector were we choose the OS to be installed on the raspberry PI card.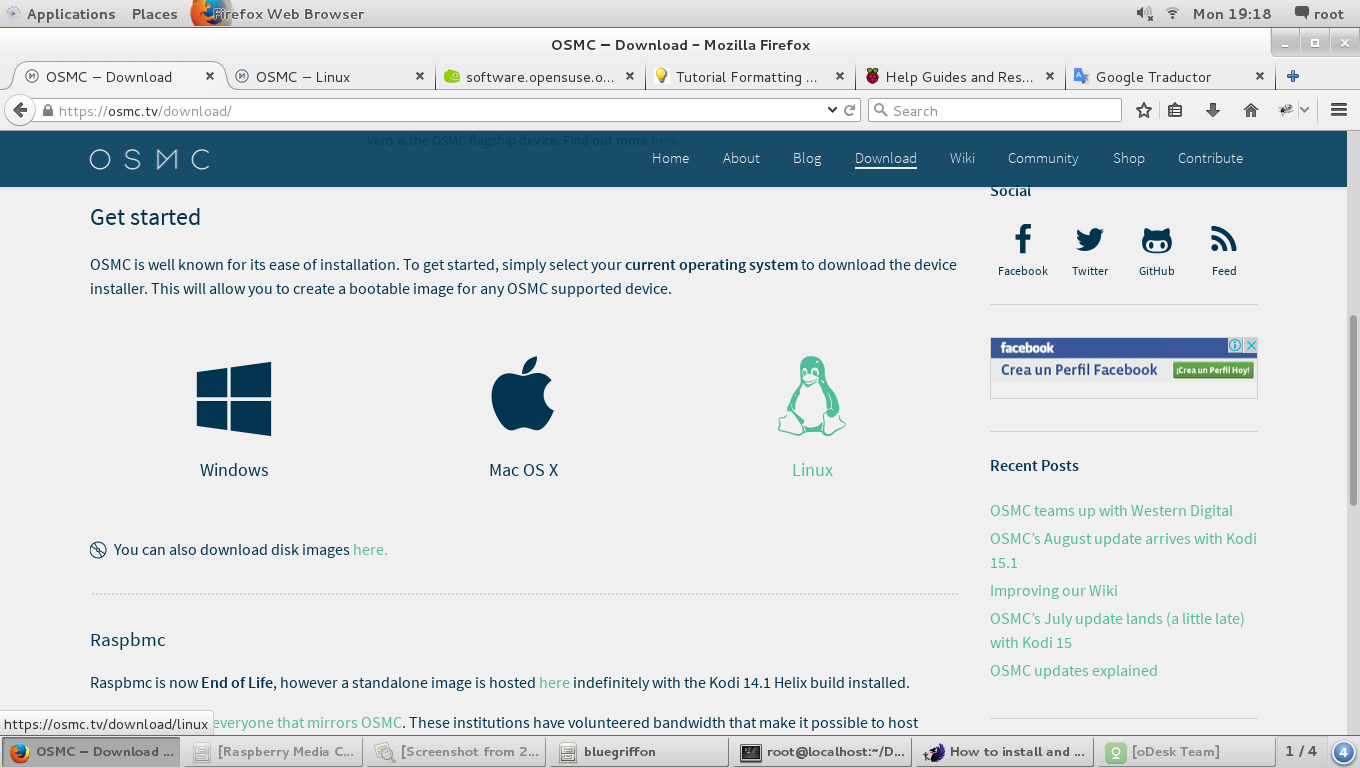
Choosing the Linux image here and the next page will open: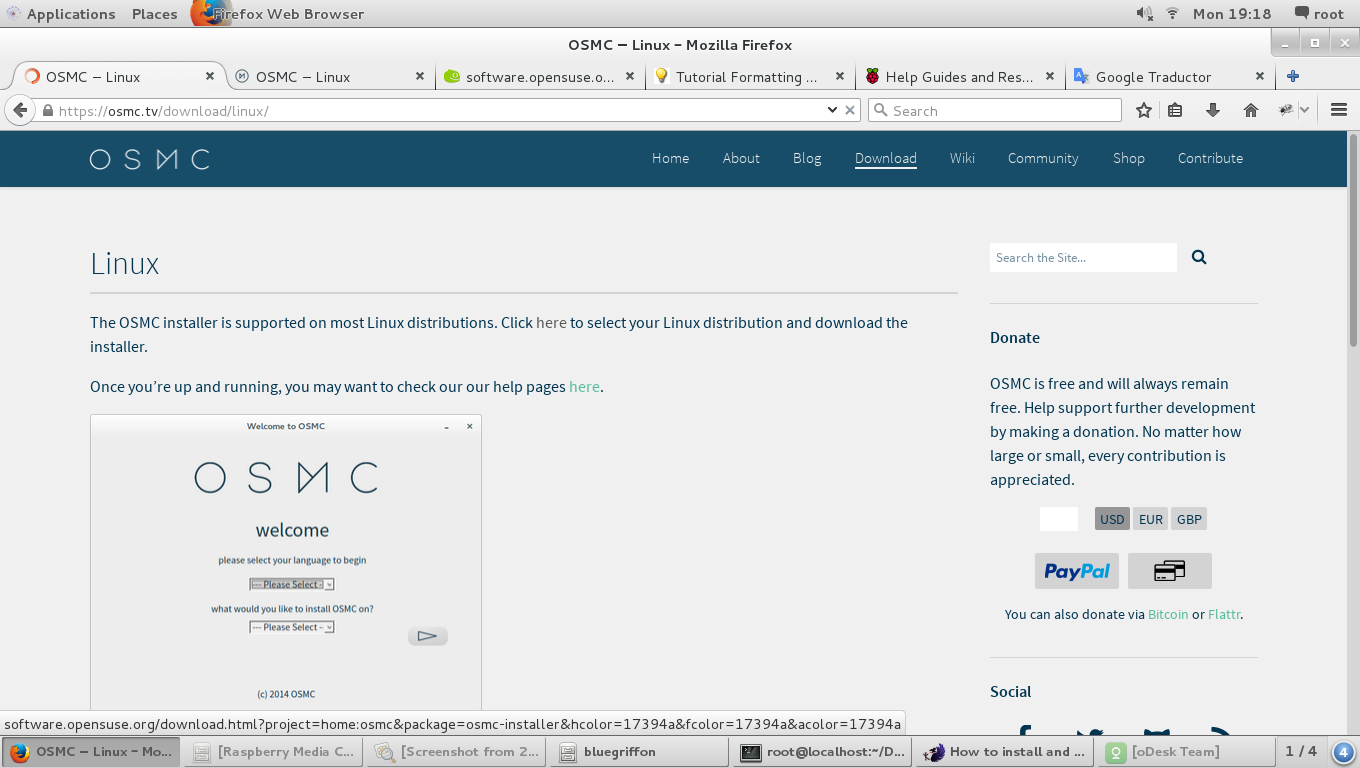
To select the preferred Linux distribution, click on "here" link: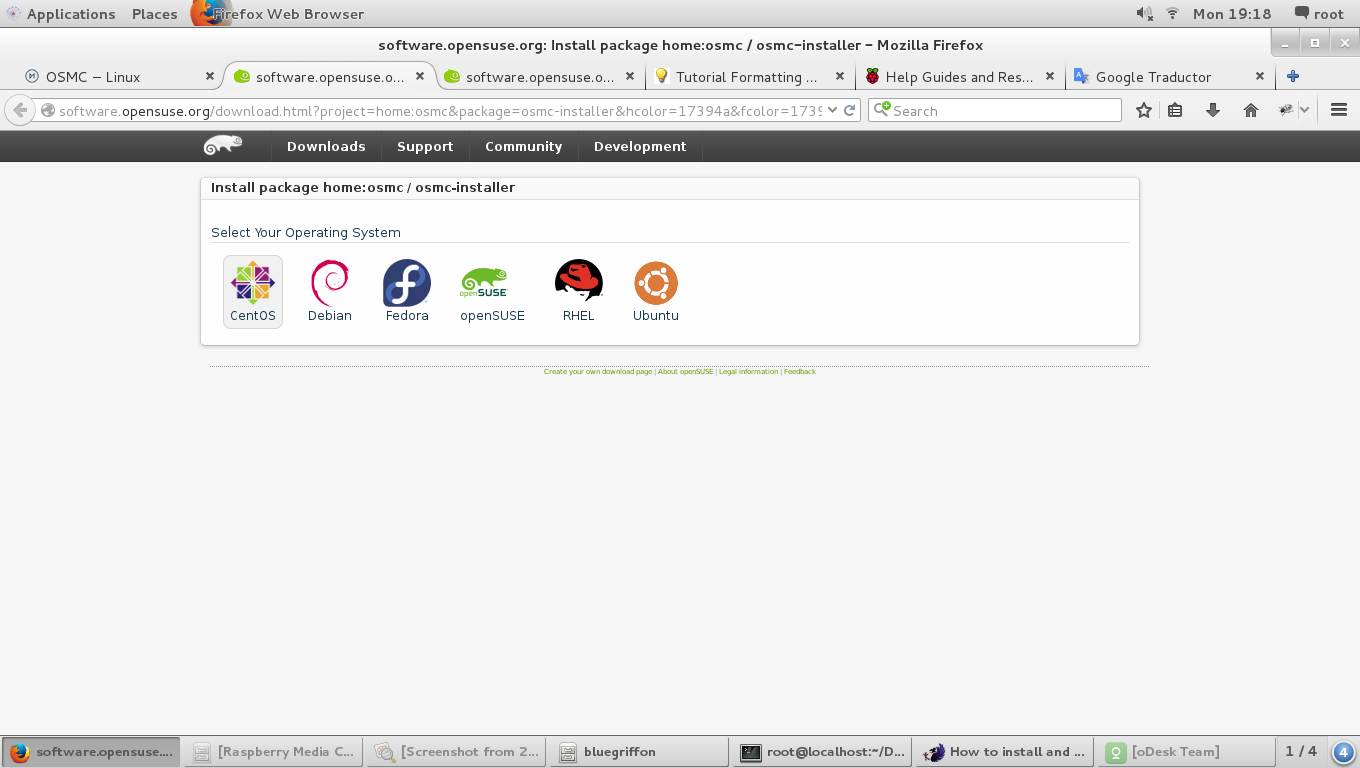
My preferred distribution is Scientific Linux 7.1, which is based on CentOS (RHEL), so, I chose the CentOS icon link: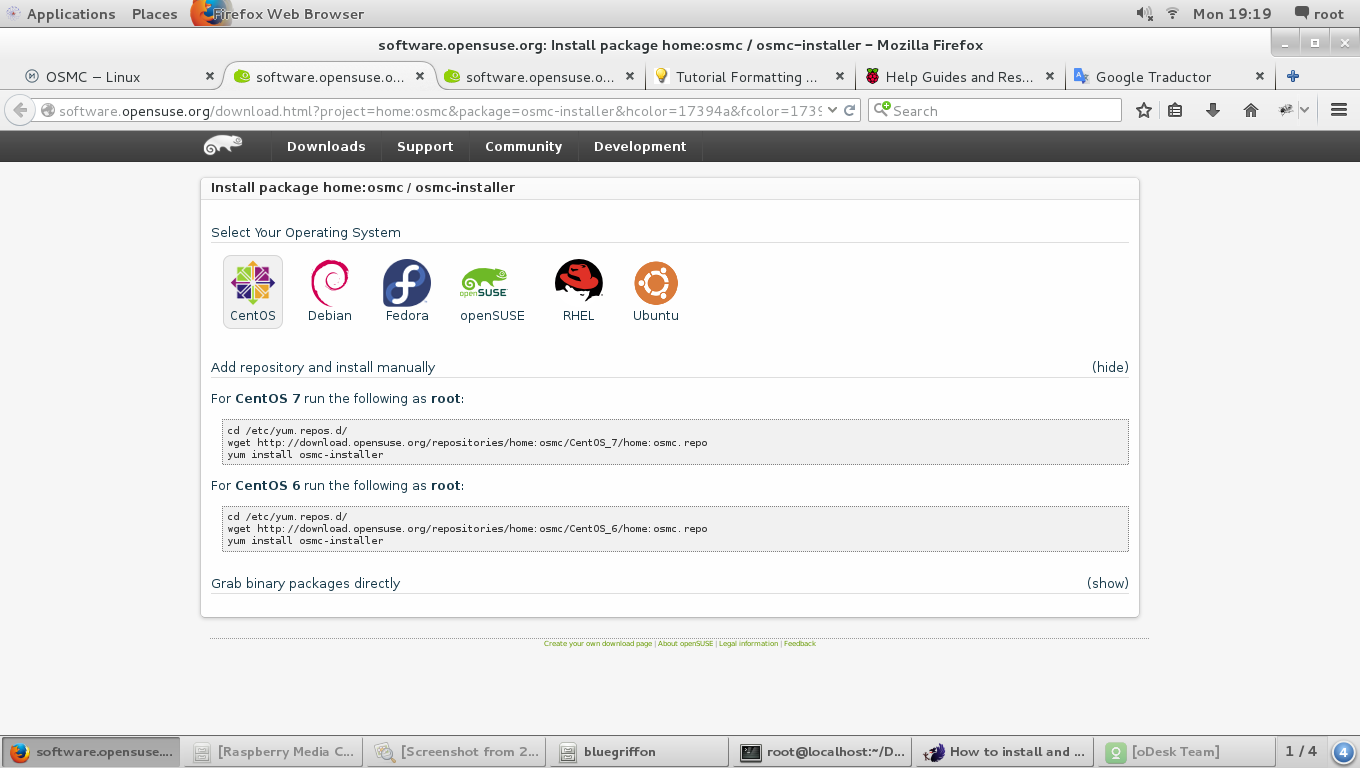
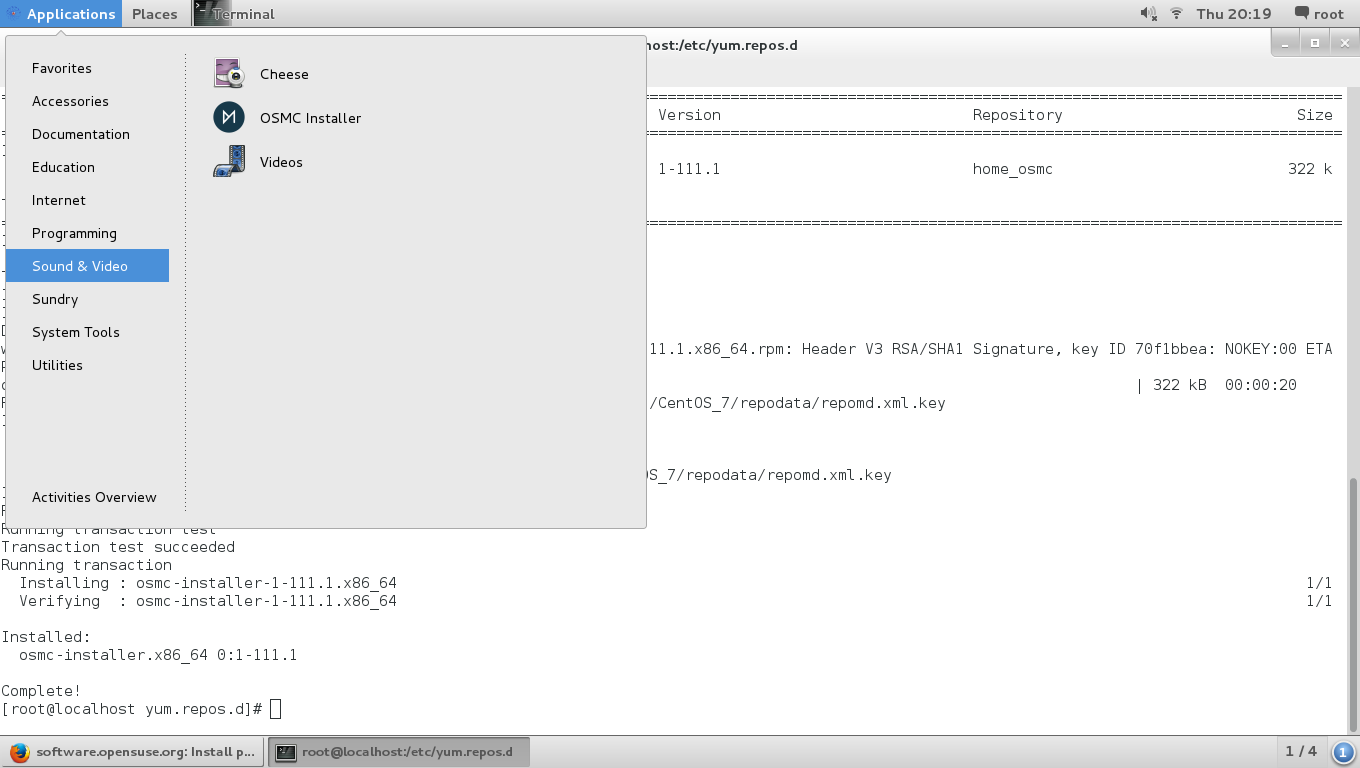
Please find below the commands that shall be typed in a terminal Window:
cd /etc/yum.repos.d/
wget http://download.opensuse.org/repositories/home:osmc/CentOS_7/home:osmc.repo
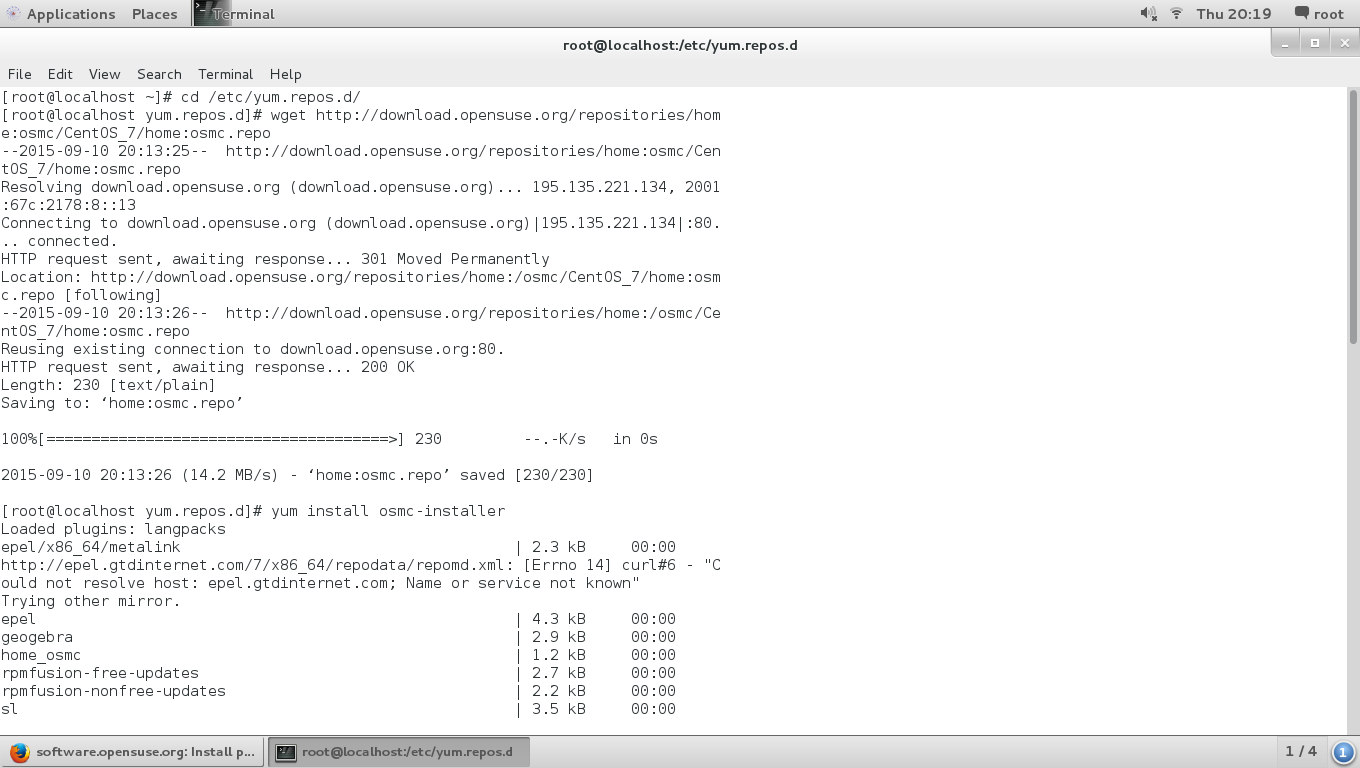
yum install osmc-installer
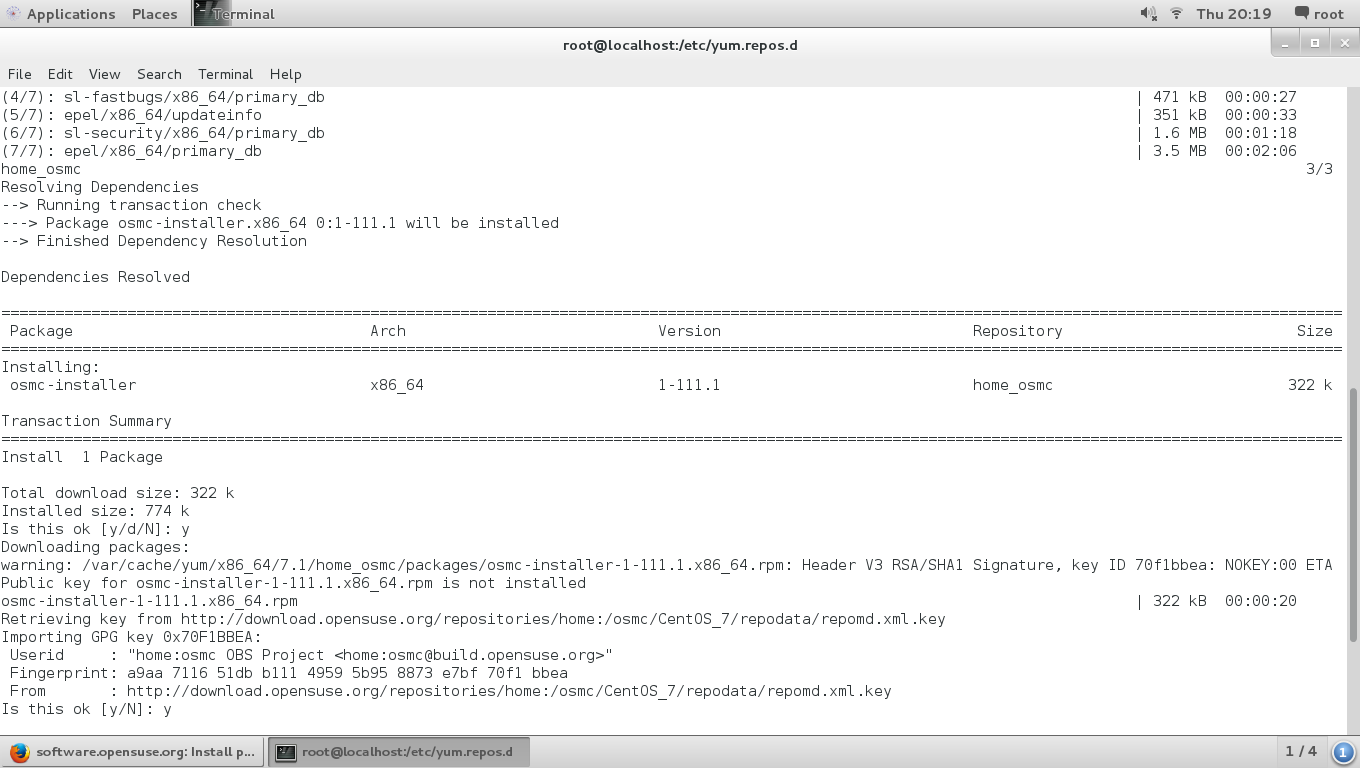
This installer will ask twice for the permission to install some packages, we have to type 'y' to grant the permission.
Once finished the installation of the OSMC installer, I have to look in the tab 'Applications', in 'Sound & Video' section to start the OSMC application.
Then, I have to choose the version I want to be installed, for this tutorial I chose 2015.07-1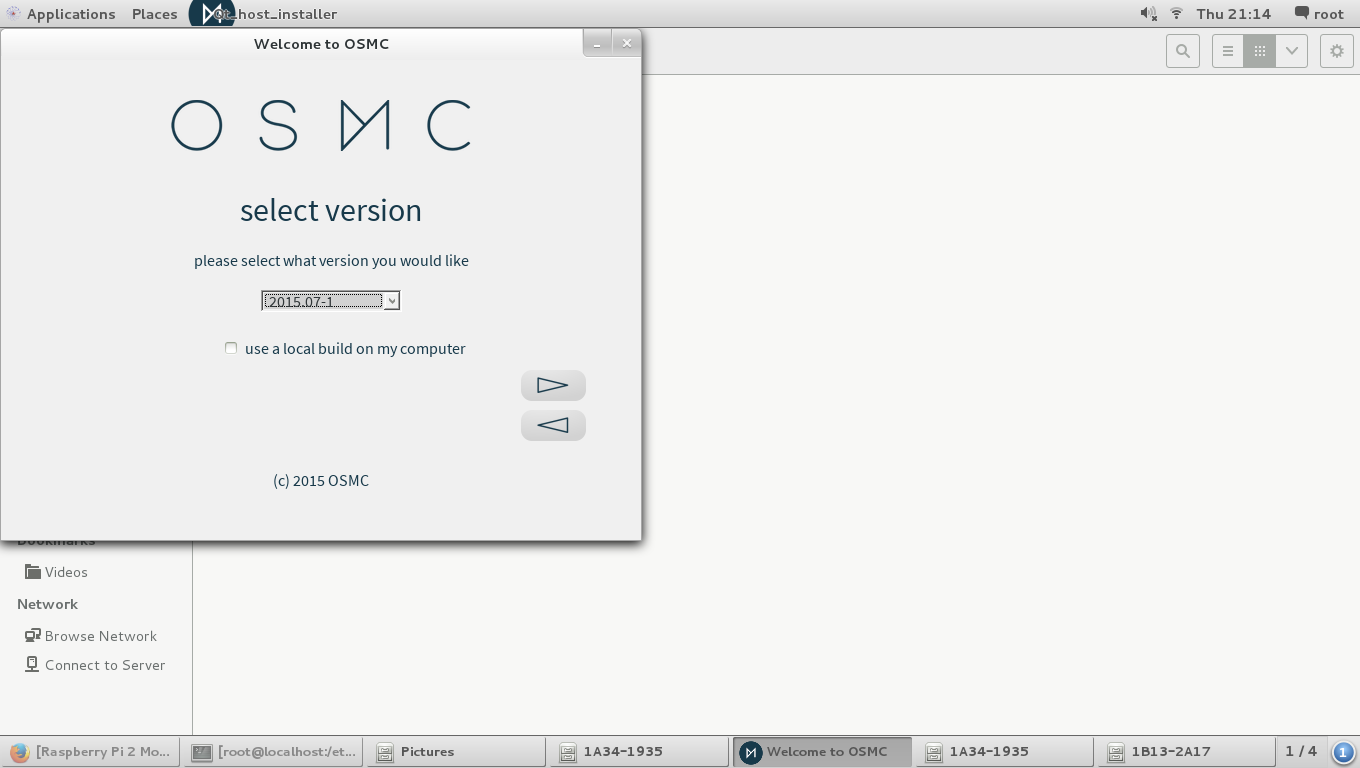
To install OSMC in our Raspberri Pi 2, we must set it up, either on a micro SD Card or USB Stick, please note that these devices are fully formatted and partitioned and all data will be permanently lost. If you are going to use an SD Card you must put it in a USB Card Reader.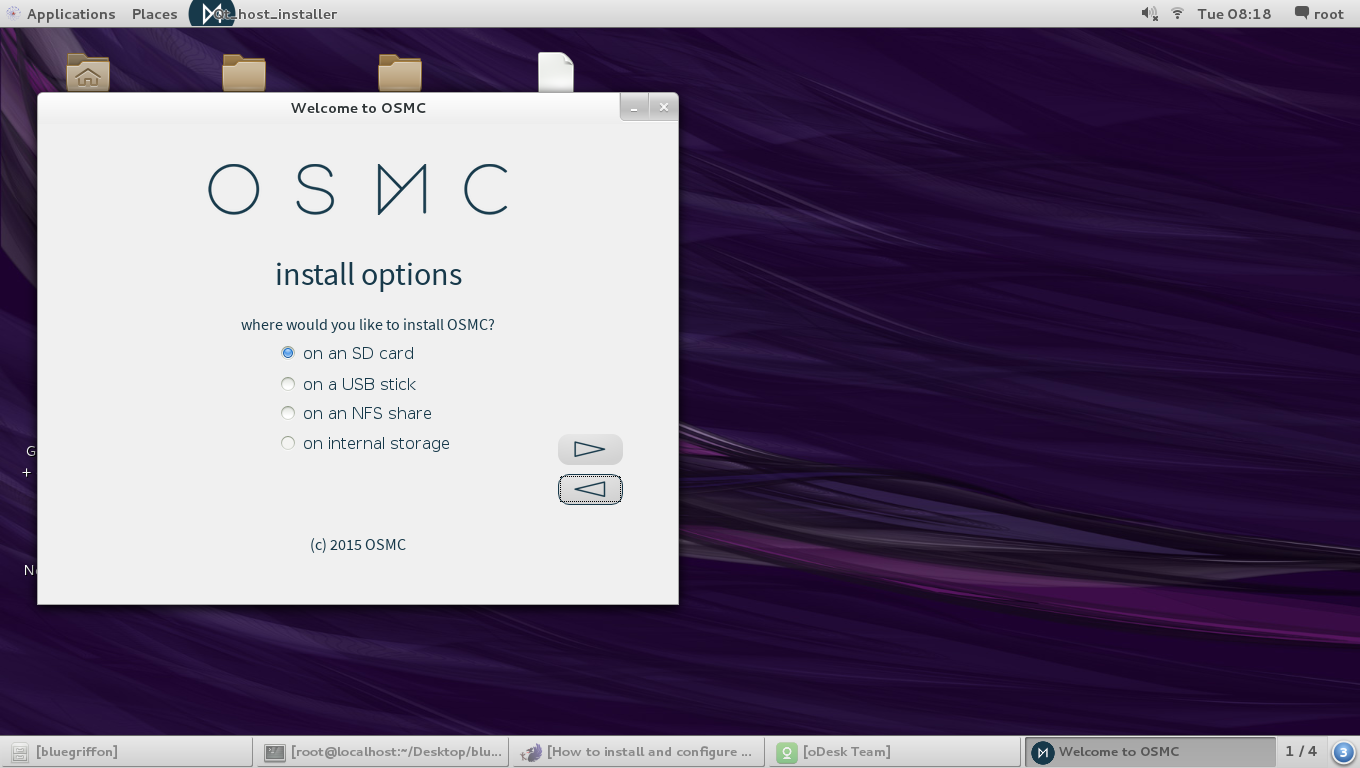
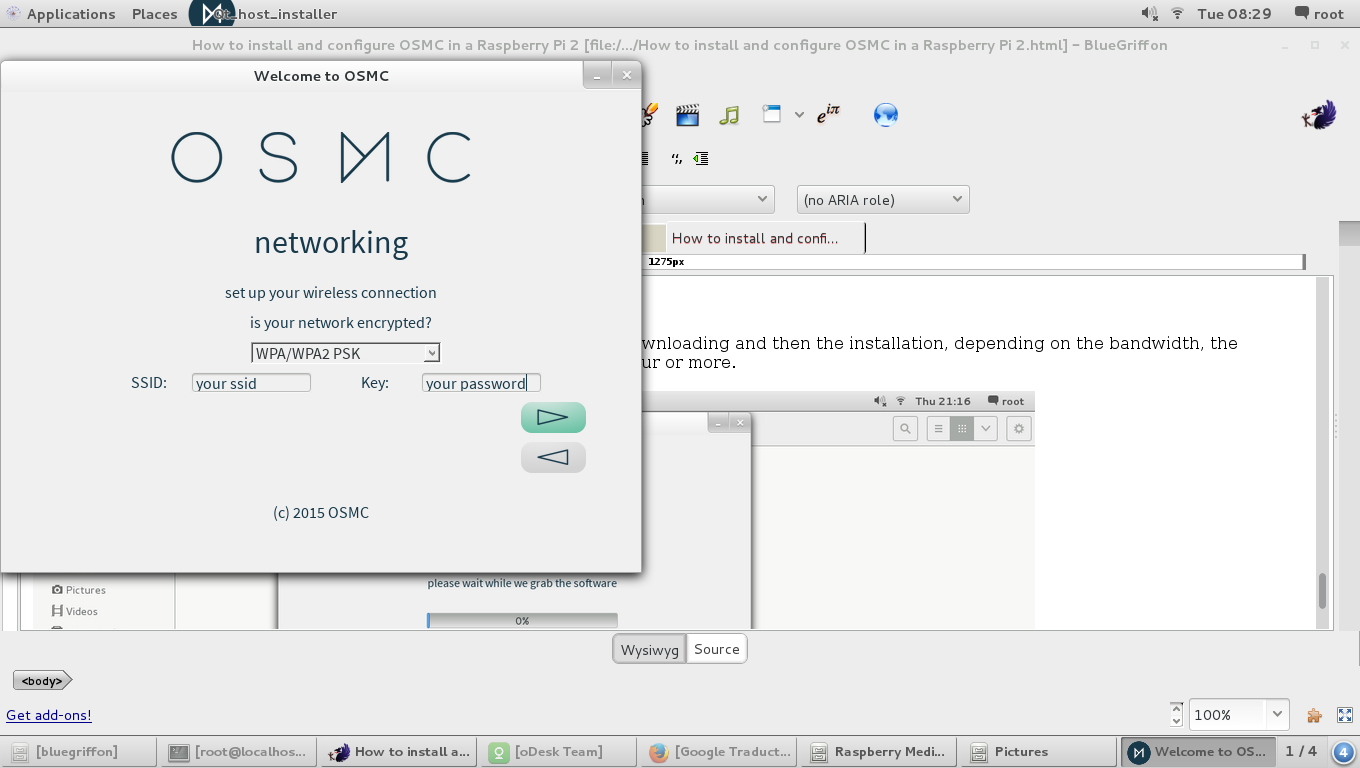
I have to choose the preferred network connection: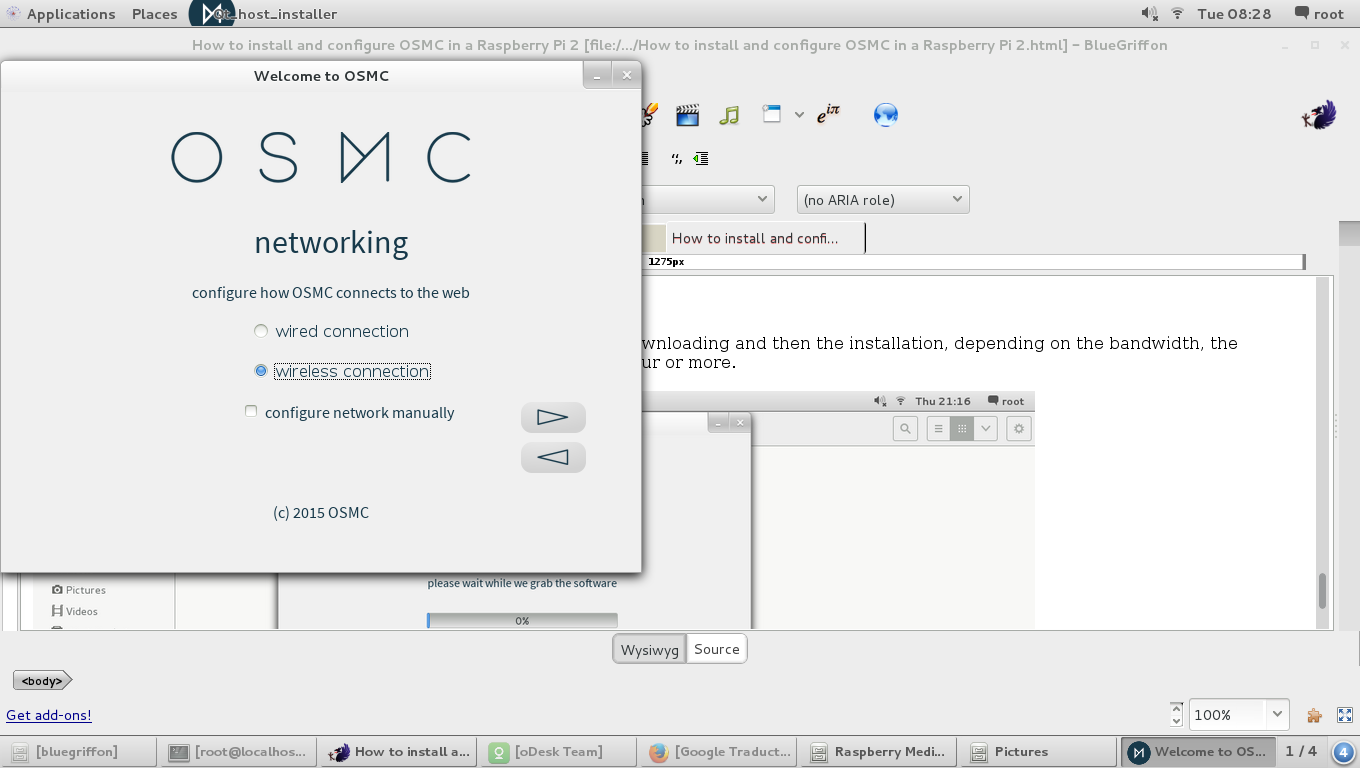
And then choose the preferred storage device, it is recommended to use a +4GB storage device:
I have to accept the agreement.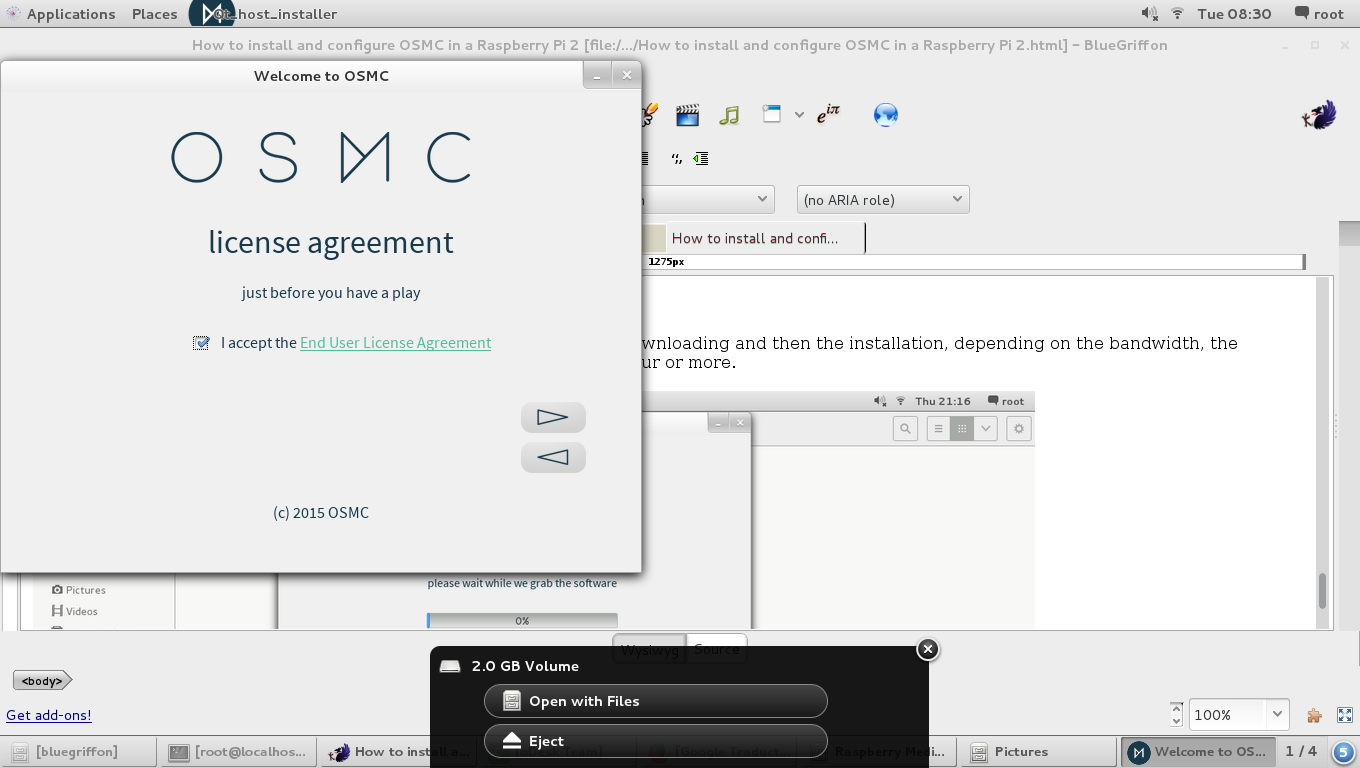
Once we 'pre-configure' the installation, the wizard begins the OSMC downloading and then the installation, depending on the bandwidth, the download and installation process can take several minutes, even an hour or more.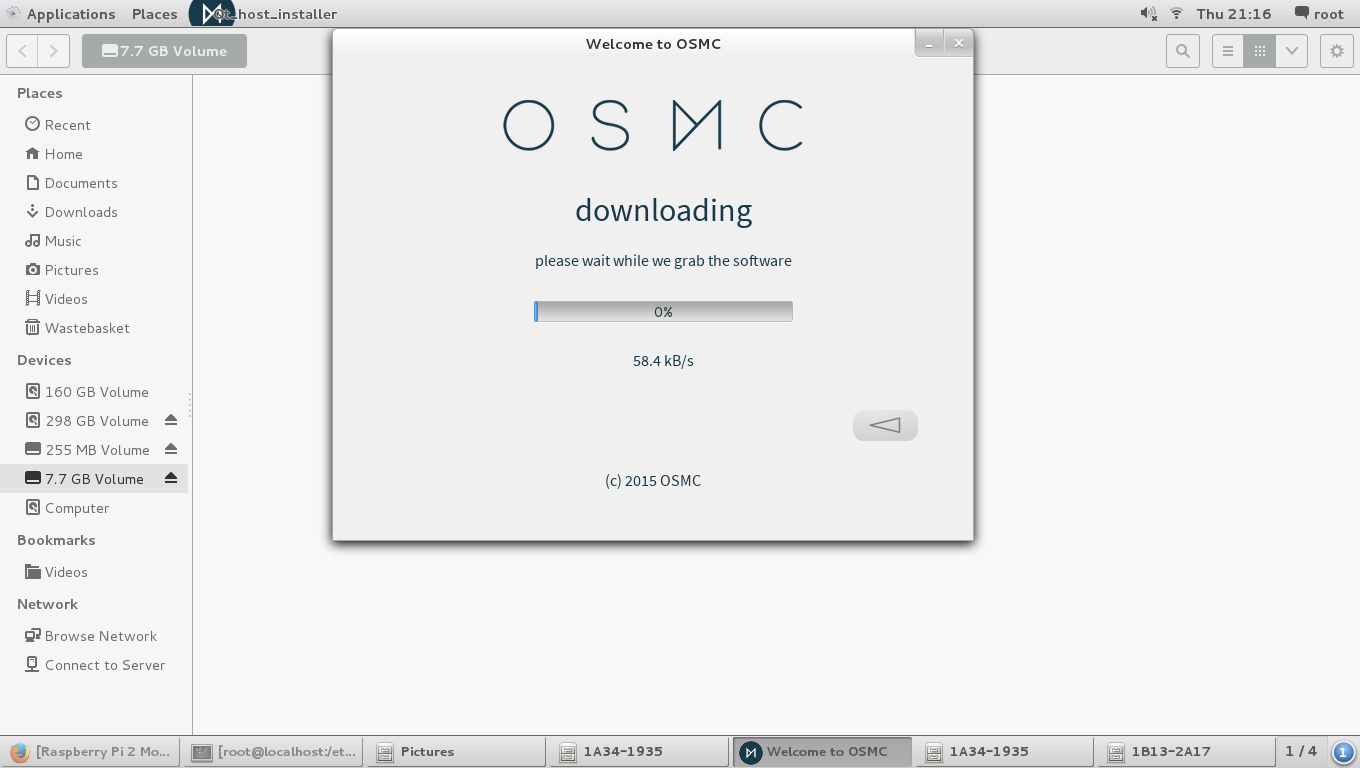
When the installation is finished we only have to insert the Micro SD card to the raspberry and go to enjoy the media center.
Important!!
If you will use the HDMI port as your video/audio interface you should have on mind that OSMC, by default, uses this as DVI output, which means that you may have no audio output on your TV/Monitor. To solve this, the option that I recommend is:
- Step 1: Put your SD Card in a Card reader and then put on your USB port.
- Step 2: OSMC automatically makes two partitions on the SD Card. In one of them you should search for the file called 'config.txt', once you find it open it and add the next line:
hdmi_drive=2
- Step 3: Save the file and put it back on your Raspberry Pi 2. It is recommended that before any change on this file make a backup of the original file.
Enjoy your Media Center and any question I would be happy to answer.
References
- Raspberry Pi Foundation, https://www.raspberrypi.org/, UK registered charity 1129409
- OSMC, https://www.osmc.tv/, 2015

