How to use Avogadro molecule editor and visualizer in education on Linux
Avogadro is a molecule editor and visualizer, and one of the most advanced open source scientific software tools. It features many capabilities that can be useful in teaching as education can be much more effective when theory is combined with the actual depiction of realistic models. Here is a basic tutorial on how to use Avogadro in education. Please note that I am using the latest stable release which is version 1.1.1, but there is also a version 2.0.7 which is a complete re-write of the application.
Get Avogadro
Molecule Modeling with Avogadro
Let's showcase the building of a water molecule in order to get the idea behind the modeling techniques used in Avogadro. First, click on the “Element” button on the left and choose the “other” option to open up a periodic table of elements. From there you can click any element and then insert it on the drawing space by simply clicking at any point.
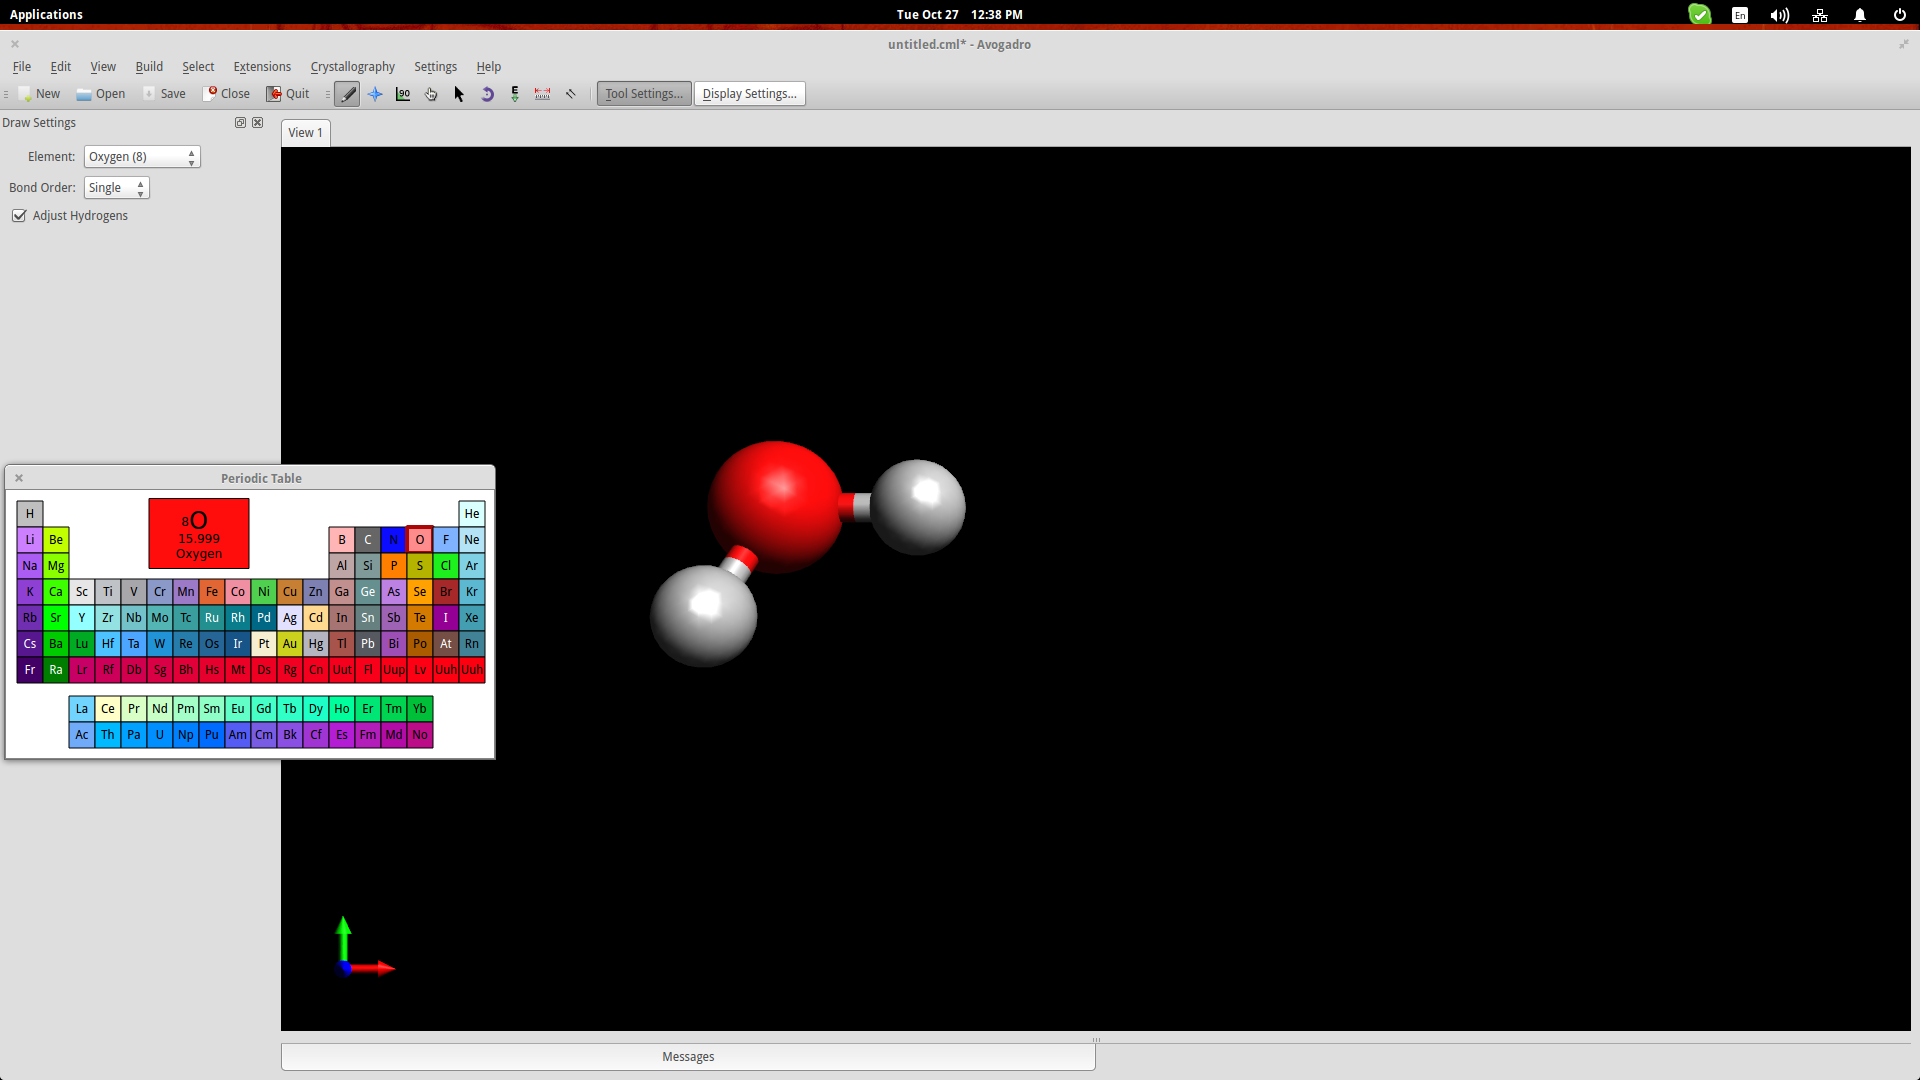
As you may have noticed, Avogadro has automatically bonded two hydrogen atoms to the one oxygen atom that I added. This is because I had checked the “Adjust Hydrogens” option. If you want to work with anions/cations, you should uncheck this box and then you can bond the added elements by left clicking the added atoms and dragging the cursor to another atom. Clicking on the created bond will change its type (double, triple etc.).
Press F10 to enter the Manipulation Tool mode. While in this mode, right click will allow you to pan the view, zoom in/out is performed using the mouse wheel, and view ordination can be adjusted by dragging the cursors in the drawing area. Double clicking the molecule will automatically center the view on it.
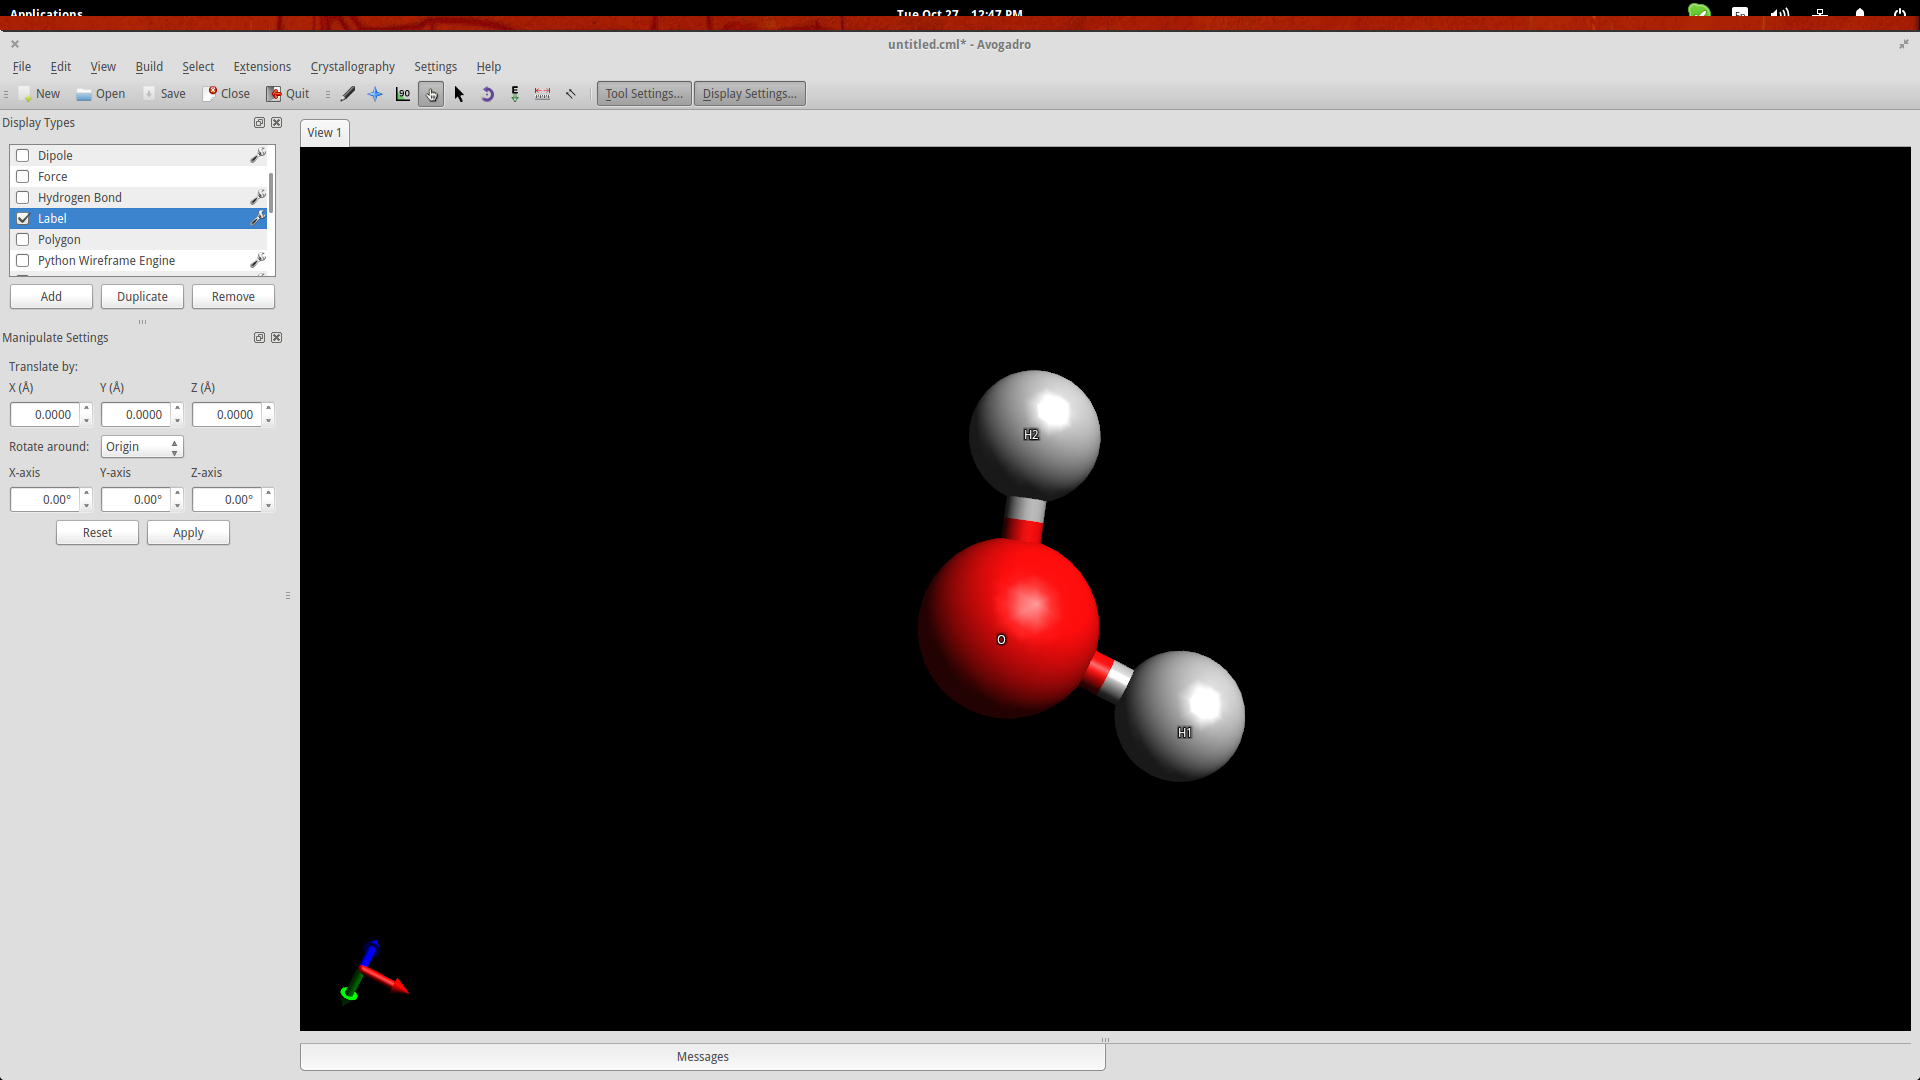
While in the same mode, you may also drag the individual atoms to change their position in space.
However, atoms form molecules in a particular way and all bonds have specific distances and energies. You can set those accurately by using the measurement tool. Invoke it by pressing F12 and then select the three atoms with the second being the oxygen atom because the second point acts as the reference point for the angle measurement.
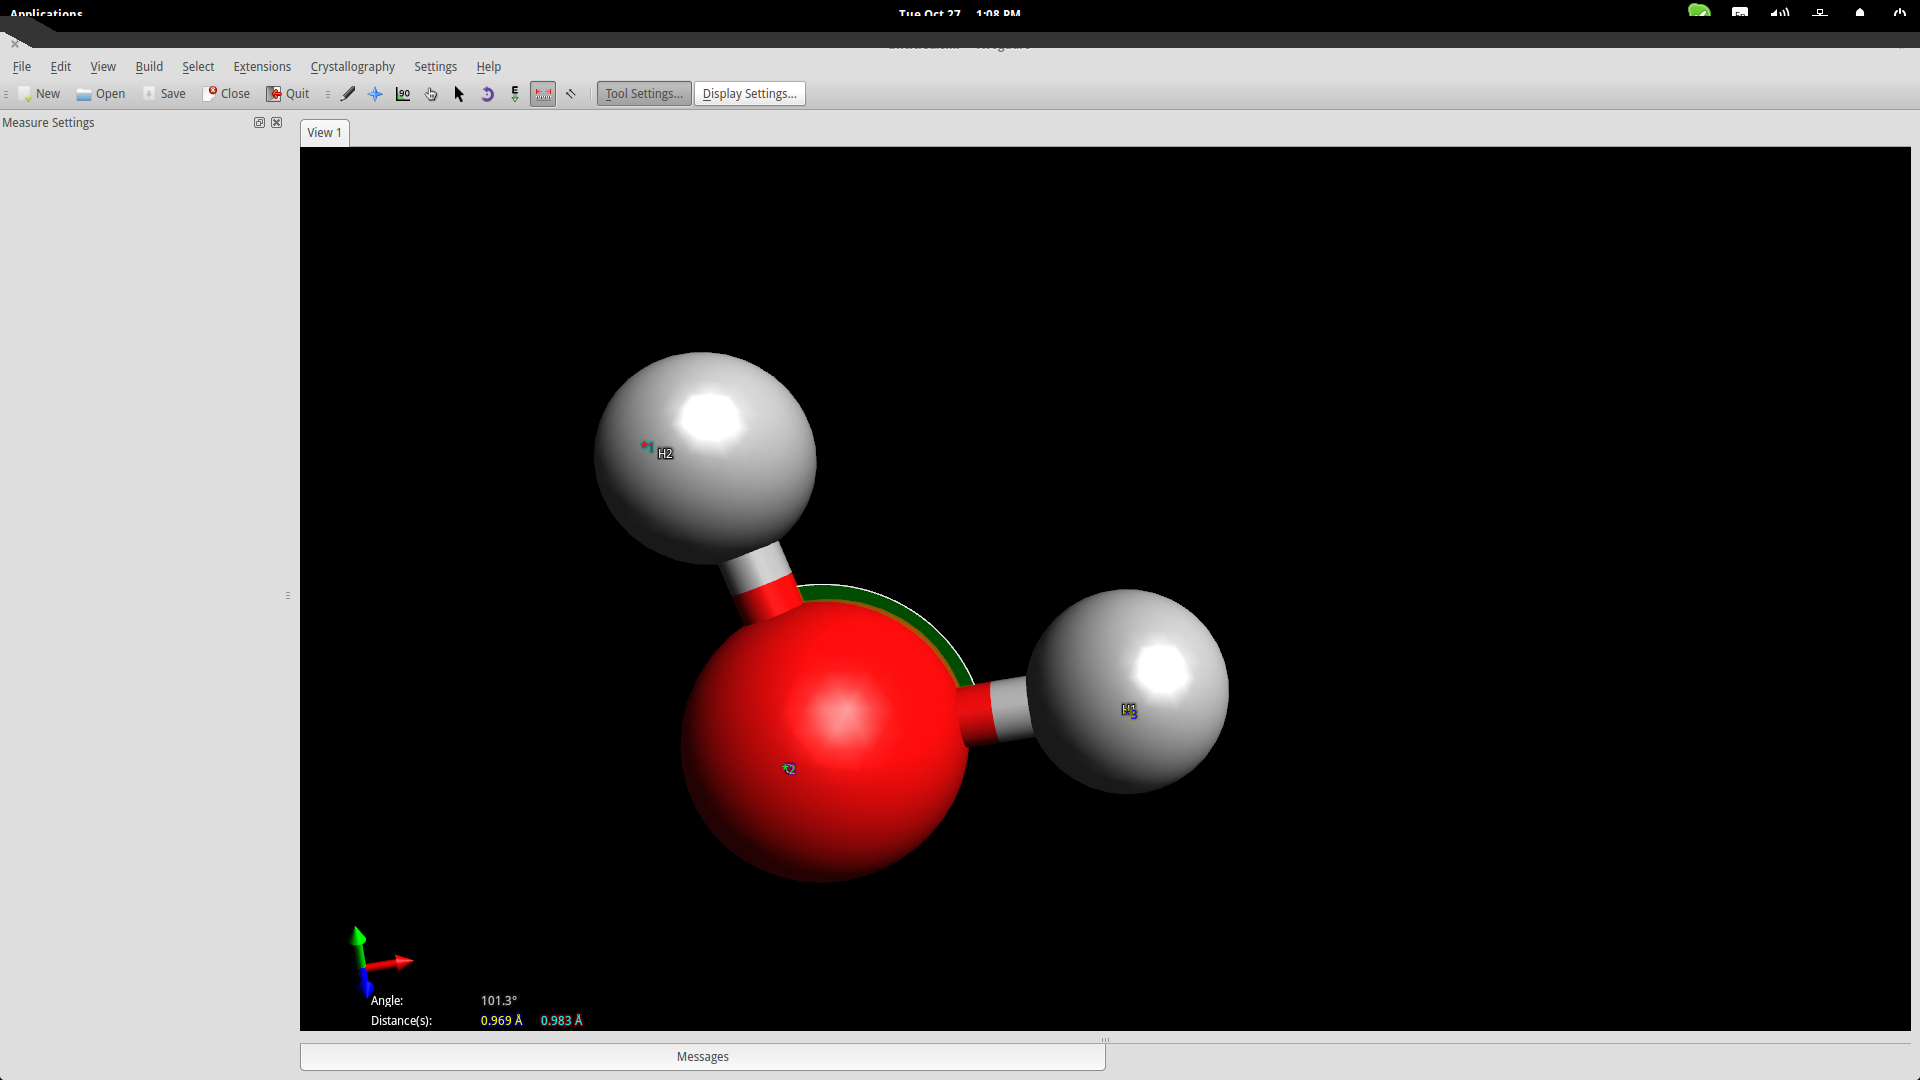
The bond distances seem to be a little bit longer than in reality, while the angle is slightly less than it should be, but we are within the accepted range for education purposes so let's proceed to the next step.
Force Simulation
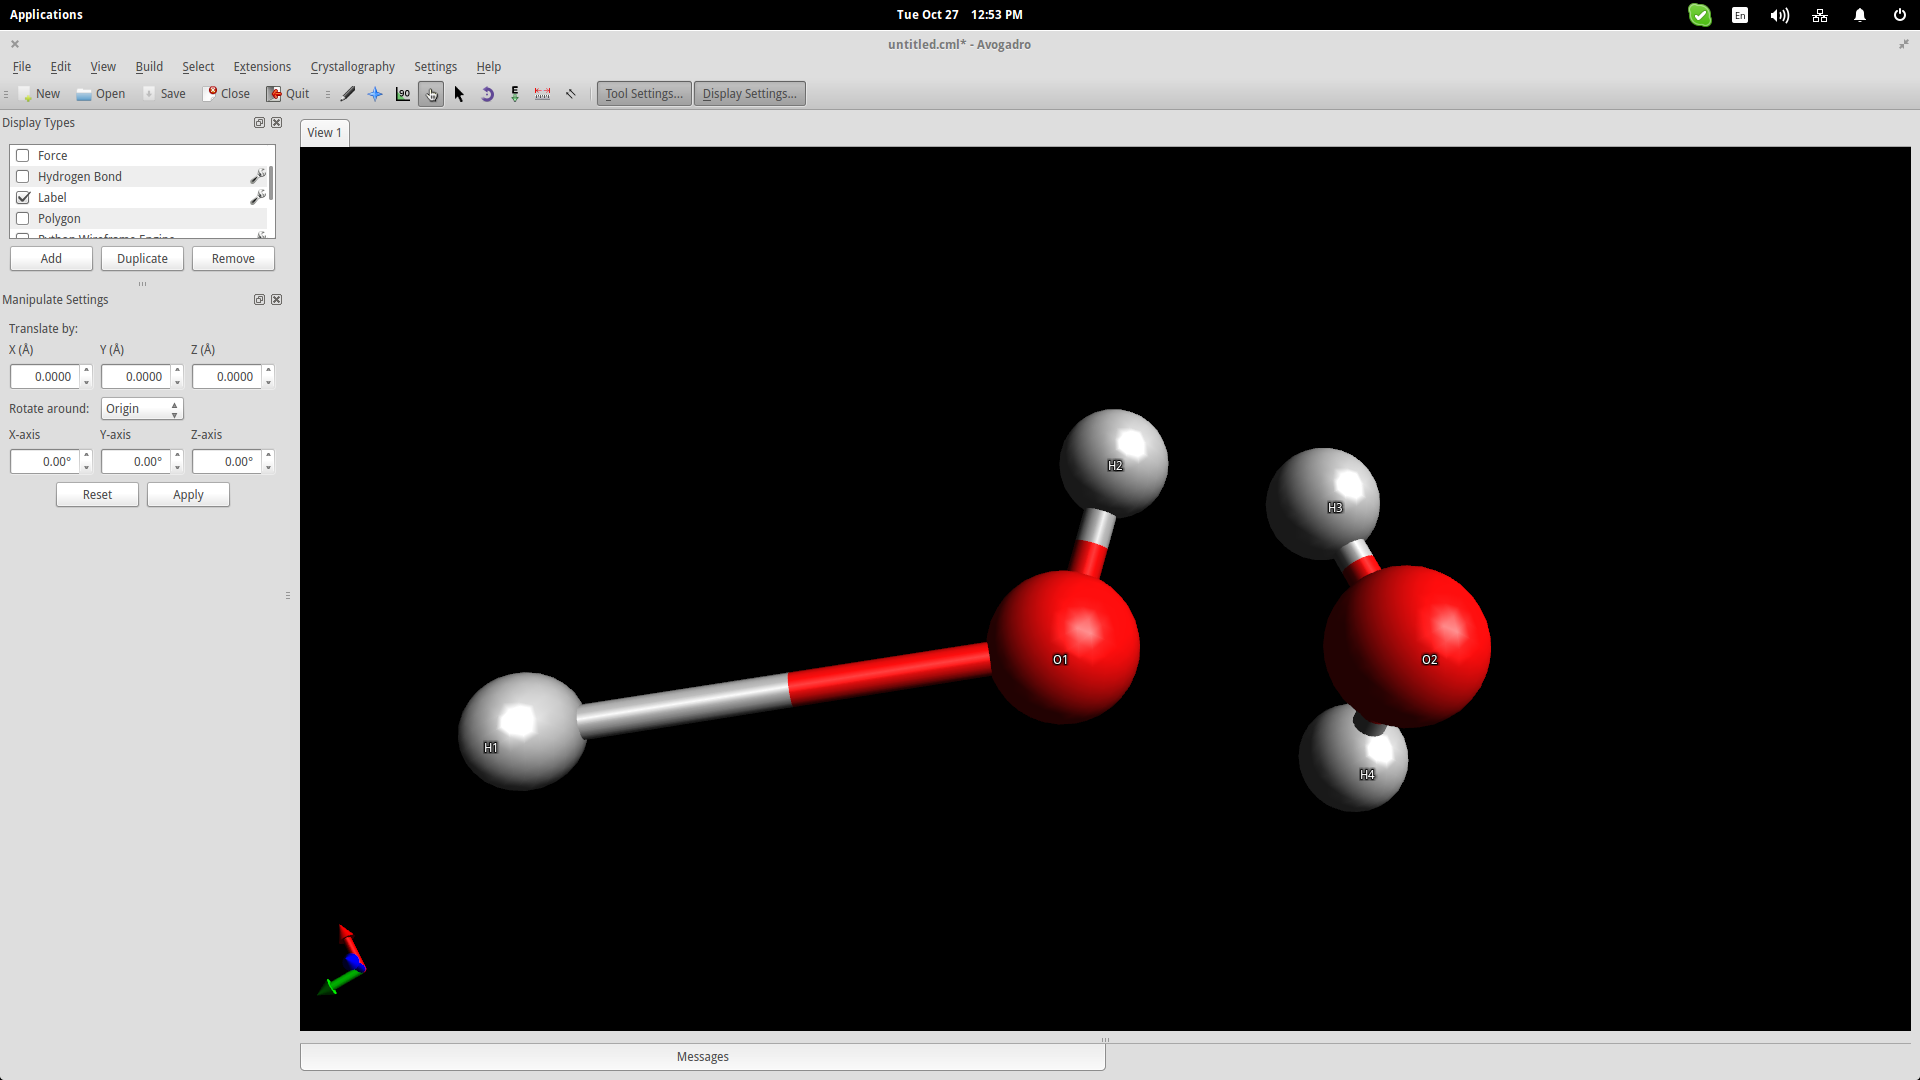
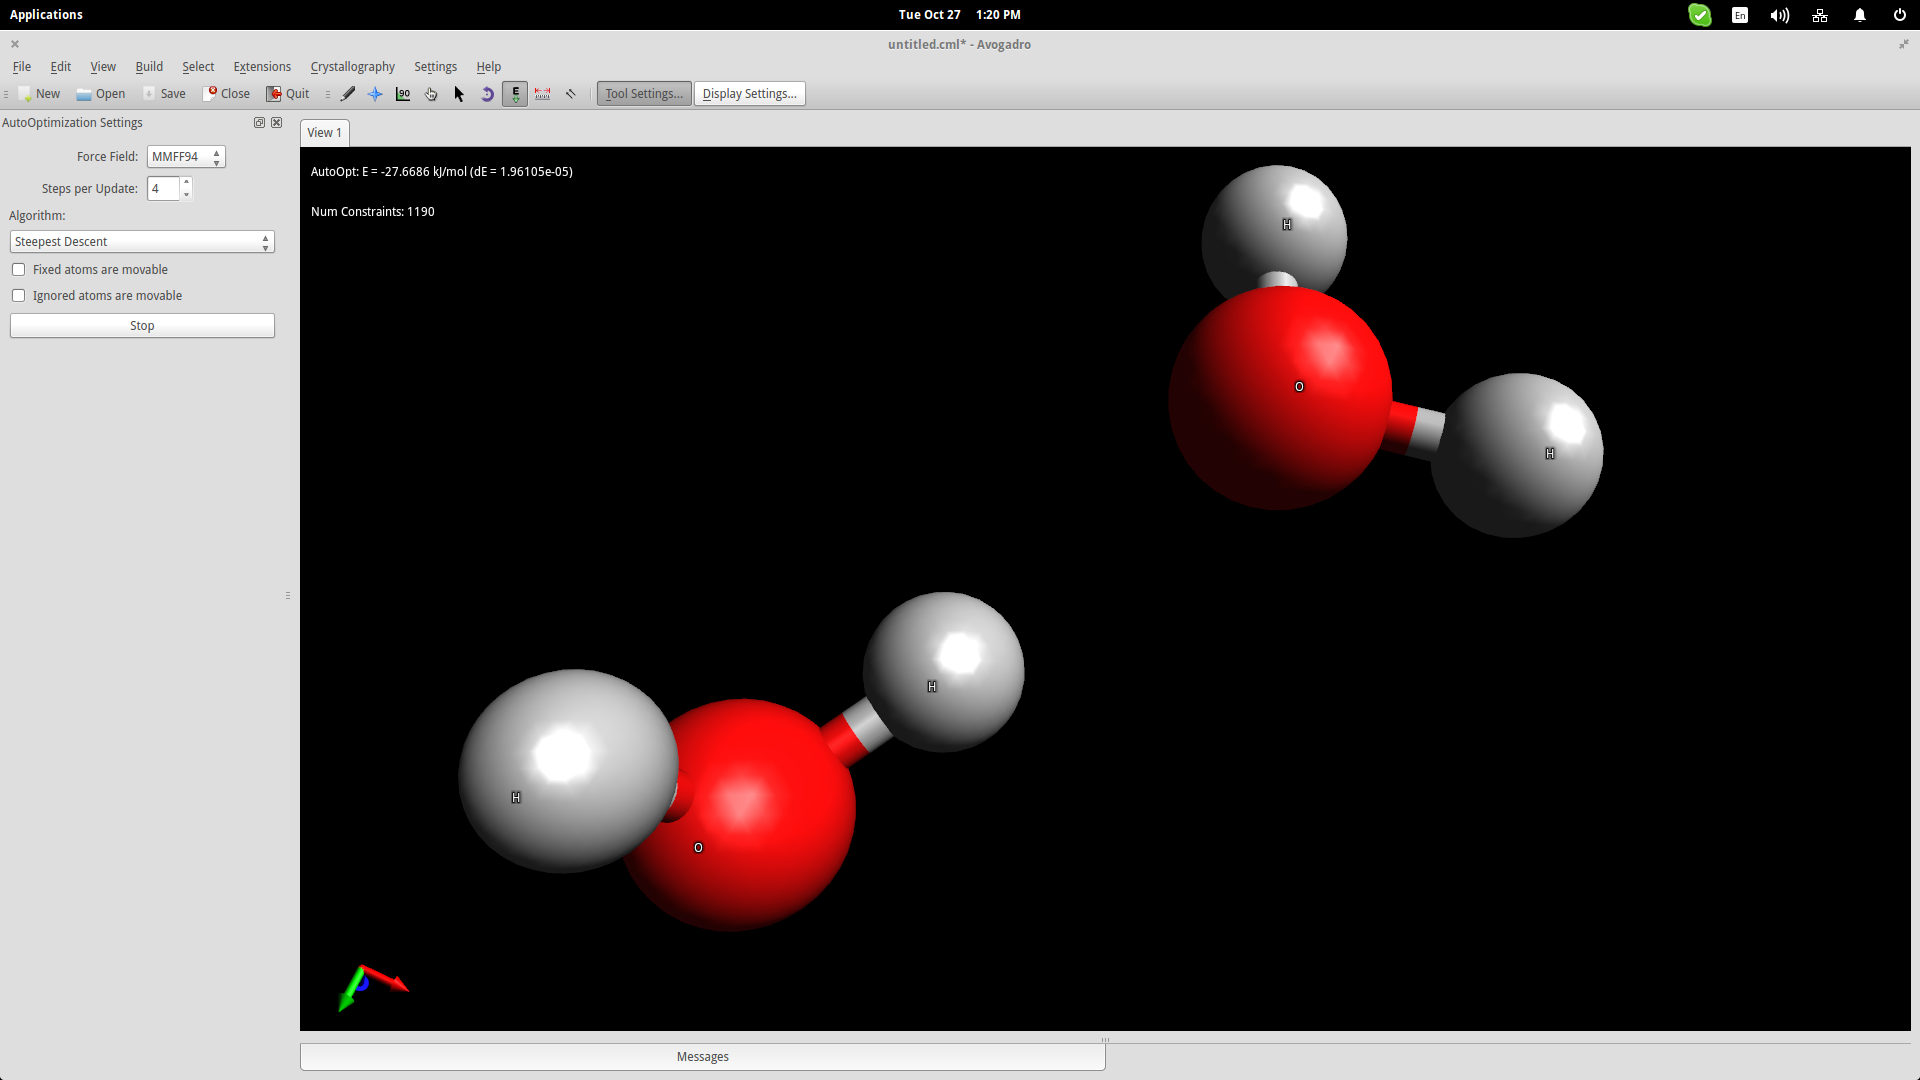
I have added two water molecules in order to simulate the bond that is naturally formed between them thanks to their bipolar nature. Press the “Auto-Optimization Tool” button right below the top menu and then click the “Start” button on the left side of the interface to start the simulation. I used the “steepest descent” algorithm, which aligned the two molecules as shown in the screenshot below:
To show this better, I will use an electrostatic potential depiction on the two molecules. Go to the top panel and navigate on Extensions->Create Surfaces. On the window that will open up, choose the Electrostatic Potential option on the “Color By” menu and click on the “Calculate” button.
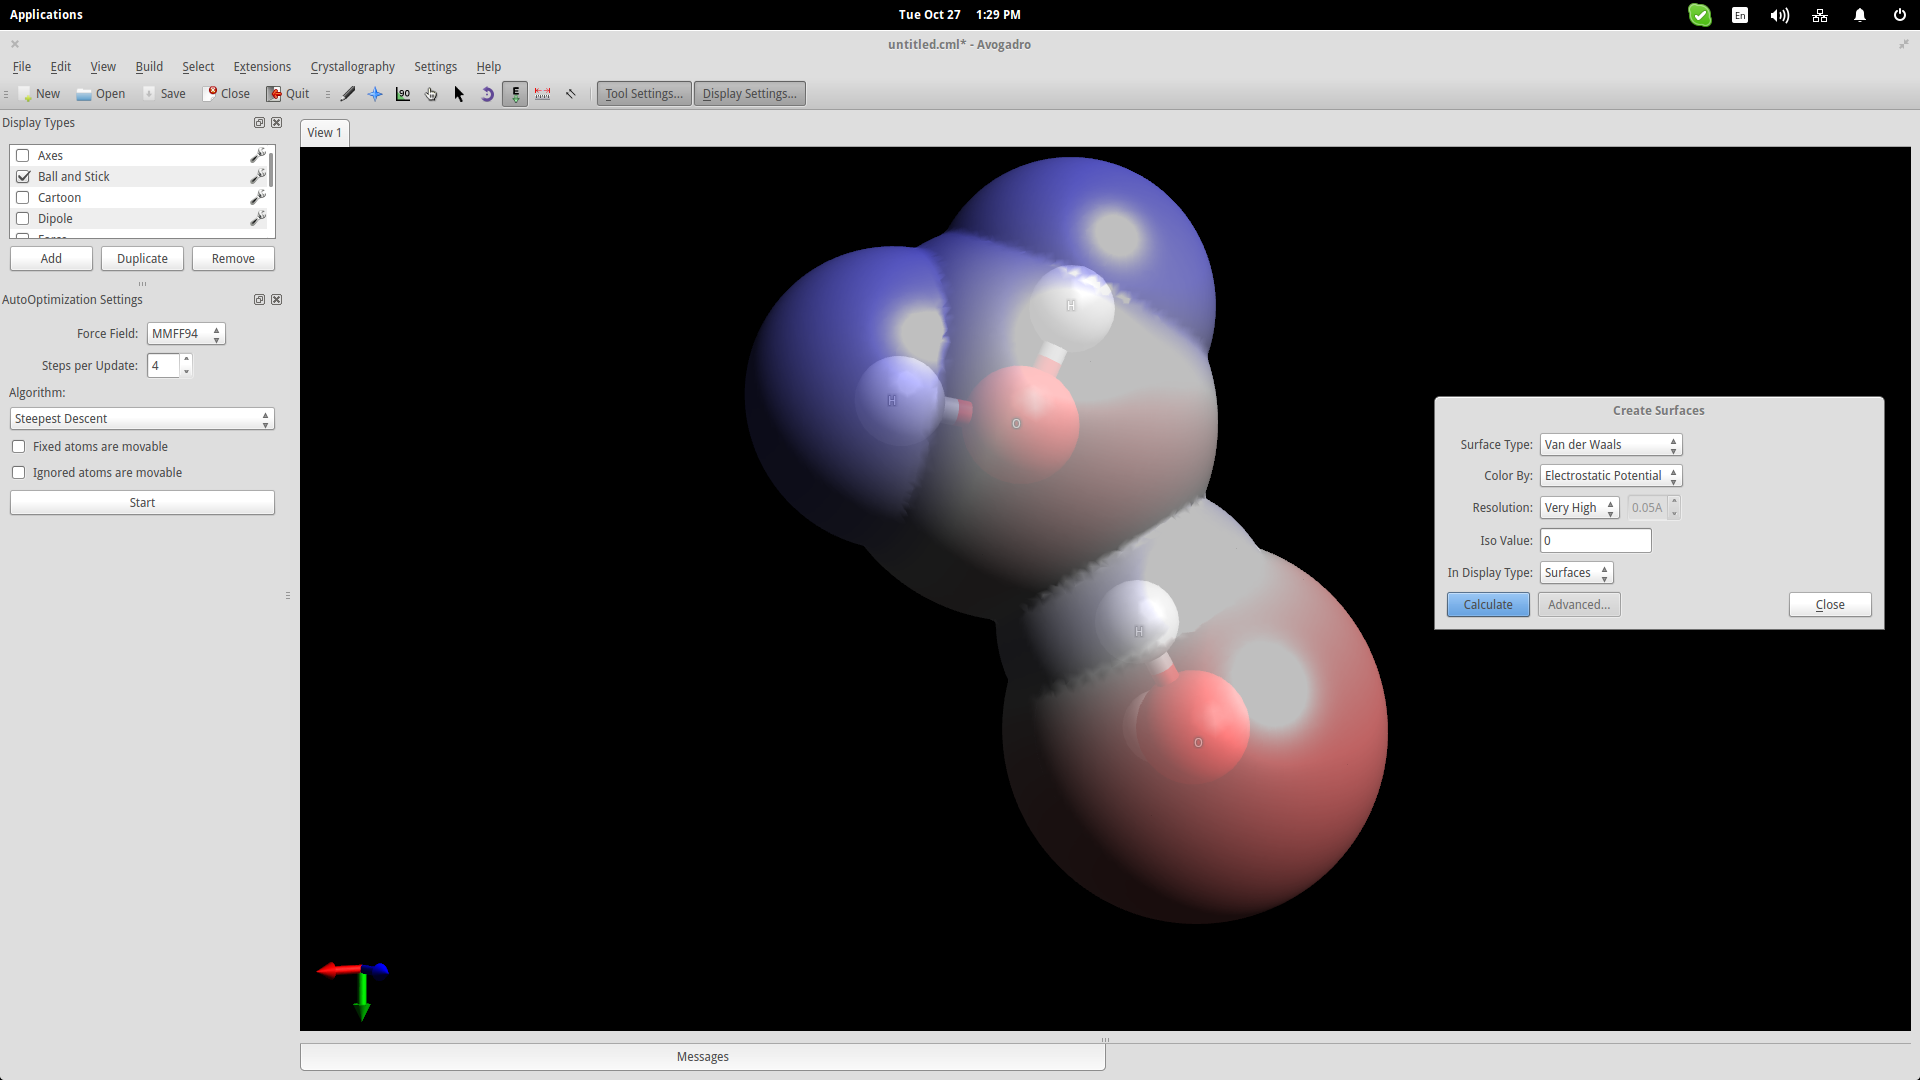
It is now clear that the hydrogen atom of one of the water molecules is bonding electro-statically with the oxygen atom of the second molecule. This helps students understand the nature of water molecules and why water is such a good dissolver.
DNA/RNA
Another useful educational feature of Avogadro (among the hundreds really) is the auto-generation of nucleic acids like DNA and RNA. Navigate to Build->Insert->DNA/RNA... on the top panel and add your own sequence and press the “Insert” button to insert the model in the drawing space.
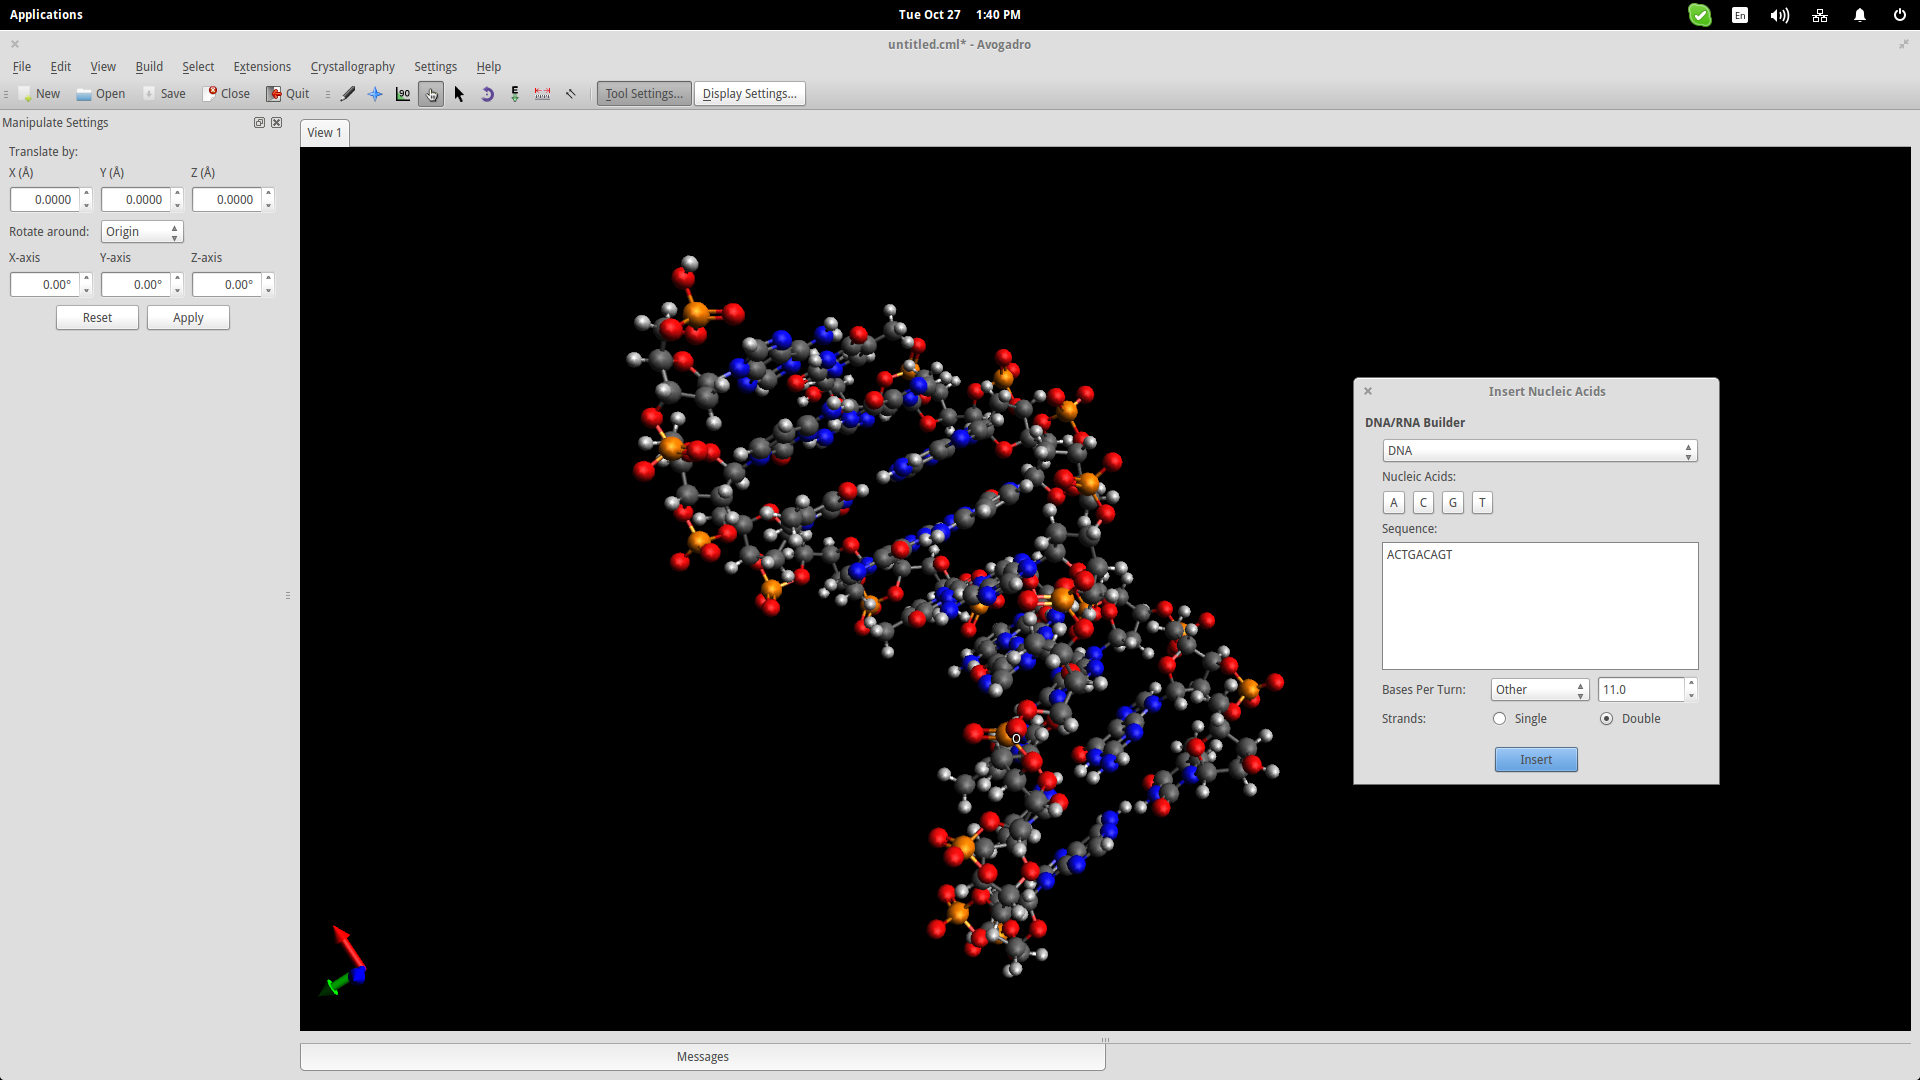
This could help students better understand the form of the genetic code of all living beings in the planet.
Crystal Generator/Viewer
One more thing that could be useful for educators is Avogadro's crystal generator/viewer. Go to the top panel menu and click on Crystallography->Add Unit Cell. This will add a cube in the drawing area. On the top right, you may change the cube size parameters according to what you want to create. Add the base molecules in the cell and then go to Crystallography->Spacegroup->Fill Unit Cell and select the specified type from the list.


