Performance monitoring with Monitorix 3.8.0 on Ubuntu 15.10
This tutorial exists for these OS versions
- Ubuntu 16.04 (Xenial Xerus)
- Ubuntu 15.10 (Wily Werewolf)
On this page
This tutorial will show the installation and configuration of Monitorix on Ubuntu 15.10 (Wiley Werewolf). Monitorix is a free, lightweight, open source monitoring tool designed to monitor as many services and system resources as possible on servers and desktops. It consists mainly of two programs: a collector, called monitorix, which is a Perl daemon that is started automatically as a system service, and a CGI script called monitorix.cgi. Since 3.0 version Monitorix includes its own HTTP server built in, so you aren't forced to install a third-party web server to use it.
You can download it on www.monitorix.com
Step 1: Add the Monitorix Repository
First, we must add the Monitorix Ubuntu repository.
First we make a backup of the original sources.list:
cp -pf /etc/apt/sources.list /etc/apt/sources.list_bak
Then open the sources.list file in an editor. I'll use nano here:
sudo nano /etc/apt/sources.list
Note: It´s strongly recommended to backup the original file prior to making any change.
This will open a window like this:
Place the cursor to the end of the file and add this line:
deb http://apt.izzysoft.de/ubuntu generic universe
This repository is only for debian and its derivatives like ubuntu.
Step 2: Add the PGP Key
Once the repository is added, we have to download (or add) the PGP key and "install" it into the system. You can download the key directly from http://apt.izzysoft.de/izzysoft.asc or copy & paste the next code to a txt file and save this like izzysoft.asc
-----BEGIN PGP PUBLIC KEY BLOCK-----
Version: GnuPG v1.4.2.2 (GNU/Linux)

mQGiBEaUwUkRBAC9C+9ojad9/DjLgZJr7g4j5EcxCPJJ7R1vZp3DgONrGmyoQ4vl
CRCT6qJoyD8jcguNqy4cyG4glDQuHJ86Q8MxdWrUDeHm5YRPlnDFrMaLGcKaUyox
GV8PseBIJLeB76cjMy5dWoIJklZcWS0lVTsVuYt8ZIhyjfIXBZjy2VtrAwCg8xDe
8WlF/p8aqorR2SUMzQxUSikEAIz6oZCc5Af2yktVZW0Lf6Gs9Xtumus4bQcehLH9
3gDXJwo4gED5PKZAHCeg/XnauoxWjwrChmJ9log4GGgscHpFQAX323lsqL98O4Pb
L9X/M2s7Cit/HGTseGVUh5MyL4dQCeIzIEUoMQzaJf1gmLPyrHkq6Ob4zZPe3ysI
QUuKBAC3cb7wcP4ZNeZL1b3EynZ2Ox8xajRd7A/oirD5BZuQwGV9zemldJgH7f+1
EvSy48daogAb1TT1HuUR8qe/hS0tpFxlz/0uRP7blMbVQyAnnupZ4eXW3CGQAaur
bmXsQZsHmquqEPz3eFt/7EC4WZnZbZRJ9mUwRP9pcRLrnCjc6rQoSXp6eVNvZnQg
RGV2ZWxvcG1lbnQgPGRldmVsQGl6enlzb2Z0LmRlPohgBBMRAgAgBQJGlMFJAhsD
BgsJCAcDAgQVAggDBBYCAwECHgECF4AACgkQ10Tpwsm5tizmnACeJbWrxEZQ7fsX
SUCxjr3OMWXASekAoNAawp8uAS1KOqK3Fo6rB4u9RsxjuQINBEaUwU0QCACVm6qe
DZ4s0LvNwlKIBGokV2du7dVQPKFGpagVRnejDbK5xKkl7cZ7DsslyYRZejnFkpYX
x4iCClDrg98L7xupO9S2LKsQZyQOg49Am8zJNBQ4HKO/TRNro+38GaC/PsNle2df
0tAPjWc9y6VS/Z8s2M+7ZFDtjjgWVa/wKE4+YwVL2lAd+xp38ckDFuQlTu/GANTc
cownWXfOSiEXjqDb60XyMIgFnWrEUKUcXpHdKFjj95zzgYZSx6SaIhJXJTJizbI/
mFyjLZrSqnyZbjDP5lUfcfqOz2qtva7l8JzrZA2u9M4eKtiWBSEAUotSmMnUjV/9
OlEN7lHuEinSt8z/AAMFB/oDqPOShdhMvl/UzO7Cz3b/ViHJGCCoMBA7P8LVj+MT
jh5BhmKxsK3OK122GTPpCgMzvov3JF25uvMDquUAePUFm+x3QFYyjHJcZiaLP3ne
d9i3cfC2nQiGOuB6MNar8U9IyYZydWhZrBiBUGjvurAAPv5IjDCRkgu6aTljEX8u
hQmFUYYkFkIF7srx48X8iG0IcvrzxEGzGiFnXuO3AWFa7GrxTqotRe4nsinWqSXt
RPHnNQxhklVfOjK6Q9mlN4pztIf2L3zmwlWsdOxIjObgKFcp1g12Ewik8wLn1ddH
EQ2If9KYhG1fXfBbRZOS0XtH/JvChkbLOrpbXgS932KAiEkEGBECAAkFAkaUwU0C
GwwACgkQ10Tpwsm5tiyE3wCffbhV2lKCBIuSSYKv1tEHRj3Sy+kAoIkzZpQeftdO
9UE5+v1VnrUfMibd
=nM4G
-----END PGP PUBLIC KEY BLOCK-----
Downloading and saving directly from izzysoft site: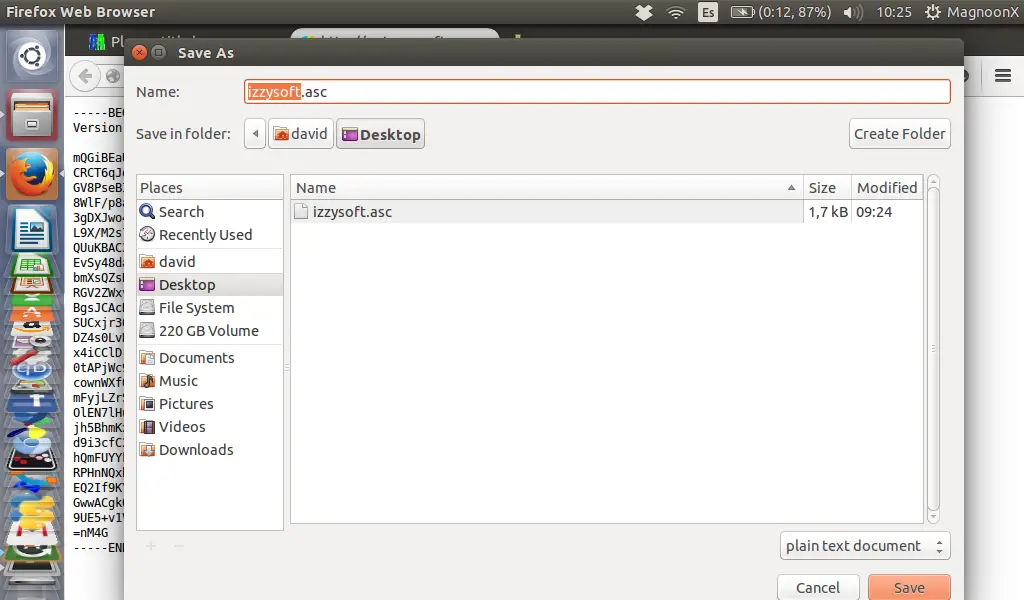
Now, we must go to the directory where we saved the .asc file and open a terminal window, to run the following command:
sudo apt-key add izzysoft.asc
and then update the repository with:
sudo apt-get update
Step 3: Installing Monitorix
Option 1: Via repository.
sudo apt-get install monitorix apache2-utils
Option 2: Manually.
sudo apt-get update
sudo apt-get install apache2 rrdtool perl libwww-perl libmailtools-perl libmime-lite-perl librrds-perl libdbi-perl libxml-simple-perl libhttp-server-simple-perl libconfig-general-perl libio-socket-ssl-perl apache2-utils
sudo dpkg -i monitorix*.deb
sudo apt-get -f install
Step 4: Configuring Monitorix
We have the option to configure the monitorix.conf located at:
sudo nano /etc/monitorix/monitorix.conf
A window like this will be open: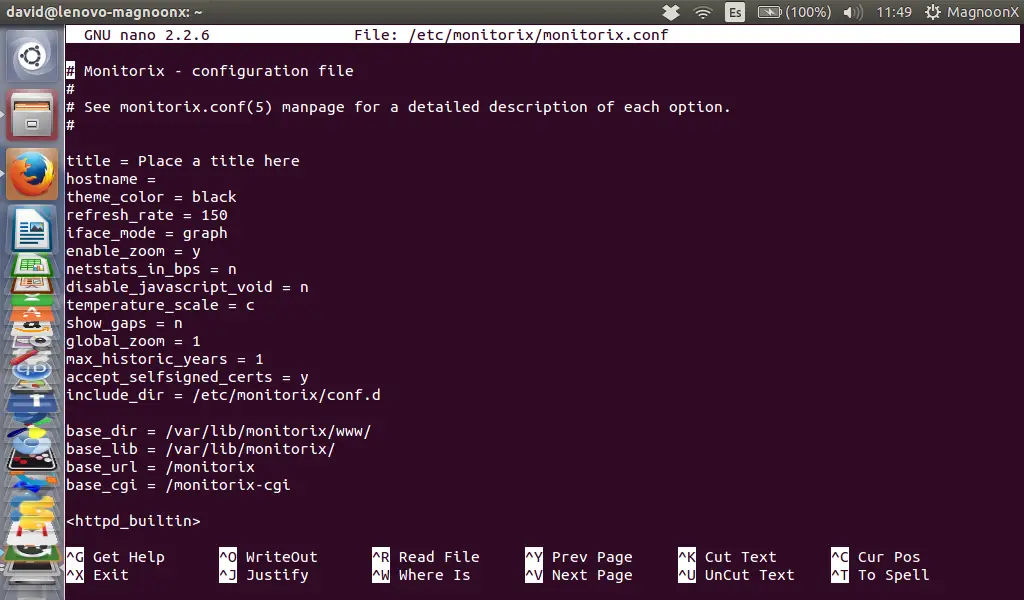
Note: we strongly recommend to backup this file prior any change.
Search for the lines:
<auth>
 enabled = n
 msg = Monitorix: Restricted access
 htpasswd = /var/lib/monitorix/htpasswd
 </auth>
and enable authentication by changing enabled to "y":
<auth>
 enabled = y
 msg = Monitorix: Restricted access
 htpasswd = /var/lib/monitorix/htpasswd
 </auth>
Once configured we have to restart the monitorix service:
sudo service monitorix restart
Add a username and password for the Monitorix login. I will use the username "admin" with password "howtoforge" in the example below. Please choose a more secure password on your system :)
sudo htpasswd -d -c /var/lib/monitorix/htpasswd admin
We use the -d parameter to encrypt the password with crypt() as required by Monitorix. The dialog of the htpasswd command will be like this.
david@desktop:/tmp# sudo htpasswd -d -c /var/lib/monitorix/htpasswd admin
New password:
Re-type new password:
Adding password for user admin
Step 5: Starting Monitorix
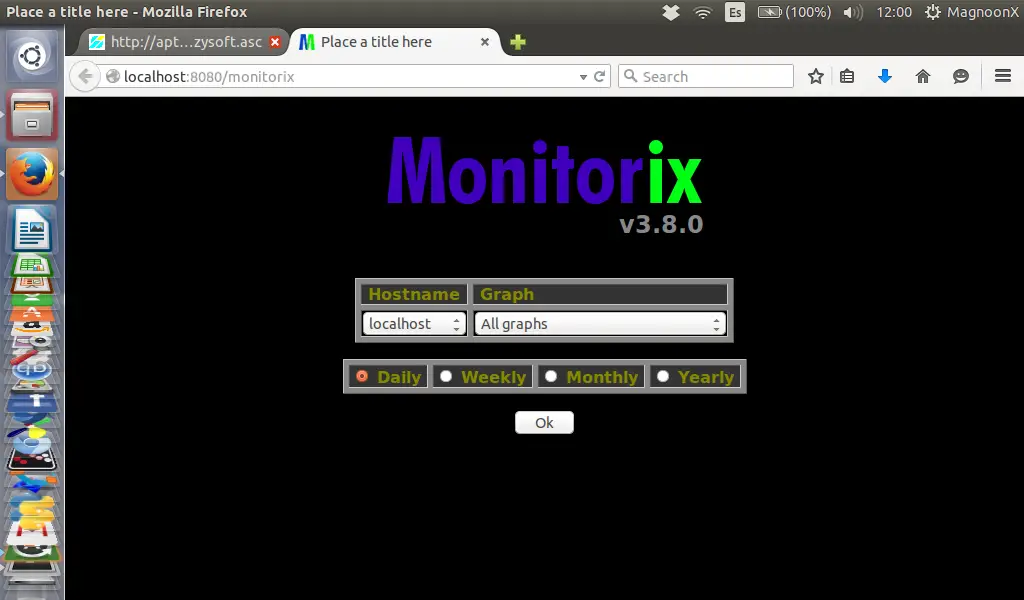
Point the browser to http://localhost:8080/monitorix/ (replace localhost with the IP of your server in case that you access Monitorix from an external Desktop) and you will see:
Interface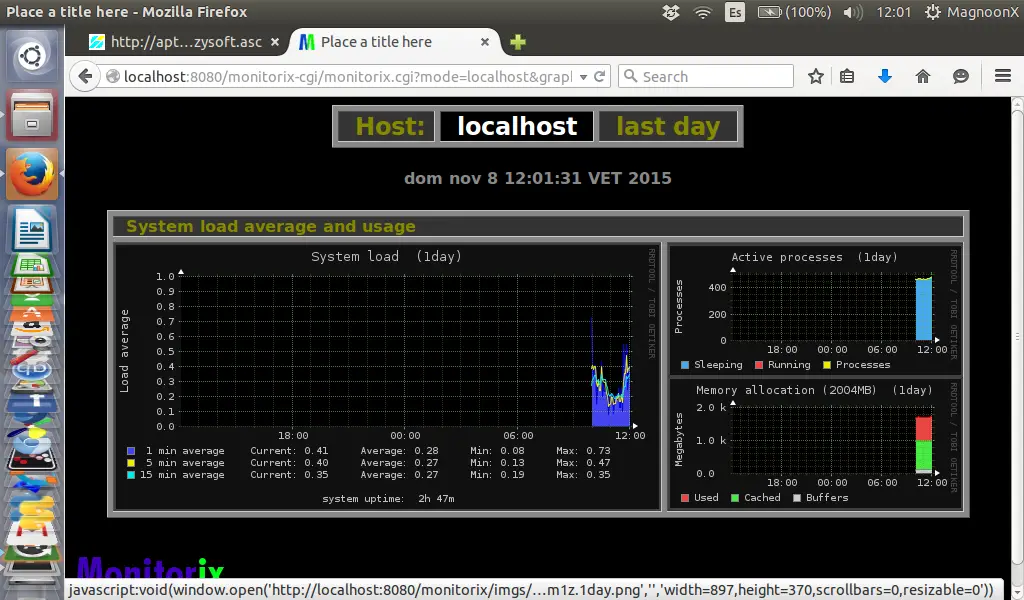
Enjoy this cool and useful software!.
References
1) Sanfeliu, J., http://www.monitorix.org/, Reached on 08/11/2015.

