The Linux tar Command Explained
The Linux tar command is the swiss army knife of the Linux admin when it comes to archiving or distributing files. Gnu Tar archives can contain multiple files and directories, file permissions can be preserved and it supports multiple compression formats. The name tar stands for "Tape Archiver", the format is an official POSIX standard.
Tar file formats
A short introduction to tar compression levels.
- No compression Uncompressed files have the file ending .tar.
- Gzip Compression The Gzip format is the most widely used compression format for tar, it is fast for creating and extracting files. Files with gz compression have normally the file ending .tar.gz or .tgz. Below you will find some examples on how to create and extract a tar.gz file.
- Bzip2 Compression The Bzip2 format offers better compression than the Gzip format. Creating files is slower, the file ending is usually .tar.bz2.
- Lzip (LZMA) Compression The Lzip compression combines the speed of Gzip with a compression level that is similar to Bzip2 (or even better). Independently from these good attributes, this format is not widely used.
- Lzop Compression This compress option is probably the fastest compression format for tar, it has a compression level similar to gzip and is not widely used.
The common formats are tar.gz and tar.bz2. If your goal is fast compression, then use gzip. When the archive file size is critical, then use tar.bz2.
What is the tar command used for?
Here a few common use cases of the tar command.
- Backup of Servers and Desktops.
- Document archiving.
- Software Distribution.
Installing tar
The command is installed on most Linux systems by default. Here are the instructions to install tar in case that the command is missing.
CentOS
Execute the following command as root user on the shell to install tar on CentOS.
yum install tar
Ubuntu
This command will install tar on Ubuntu. The "sudo" command ensures that the apt command is run with root privileges.
sudo apt-get install tar
Debian
The following apt command installs tar on Debian.
apt-get install tar
Windows
The tar command is available for Windows as well, you can download it from the Gunwin project. http://gnuwin32.sourceforge.net/packages/gtar.htm
Create tar.gz Files
Here is the tar command that has to be run on the shell. I will explain the command-line options below.
tar pczf myarchive.tar.gz /home/till/mydocuments
This command creates the archive myarchive.tar.gz which contains the files and folders from the path /home/till/mydocuments. The command-line options explained:
- [p] This option stands for "preserve", it instructs tar to store details on file owner and file permissions in the archive.
- [c] Stands for create. This option is mandatory when a file is created.
- [z] The z option enables gzip compression.
- [f] The file option tells tar to create an archive file. Tar will send the output to stdout if this option is omitted.
Tar command examples
Example 1: Backup the /etc Directory Create a backup of the /etc config directory. The backup is stored in the root folder.
tar pczvf /root/etc.tar.gz /etc
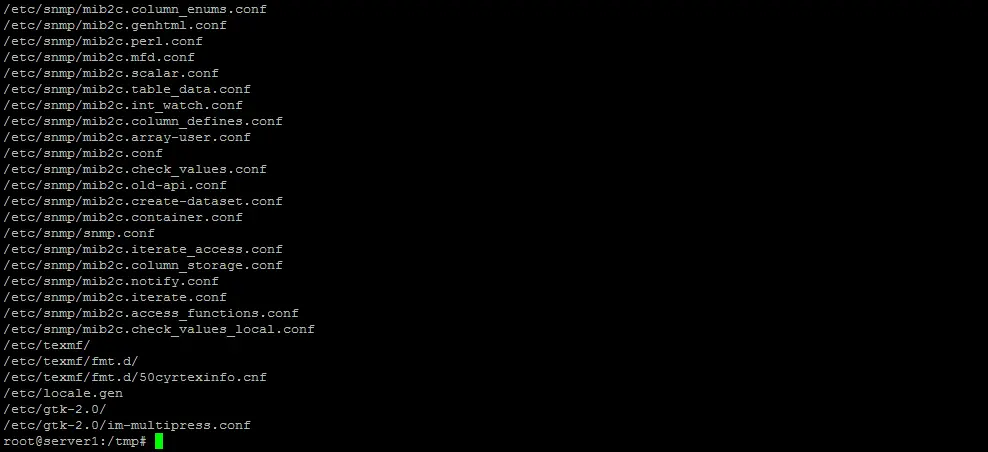
The command should be run as root to ensure that all files in /etc are included in the backup. This time, I've added the [v] option in the command. This option stands for verbose, it tells tar to show all file names that get added into the archive. Example 2: Backup your /home directory Create a backup of your home directory. The backup will be stored in a directory /backup.
tar czf /backup/myuser.tar.gz /home/myuser
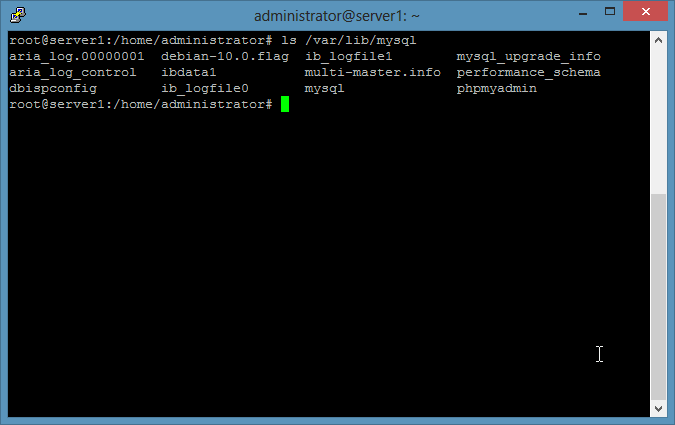
Replace myuser with your username. In this command, I've omitted the [p] switch, so the permissions get not preserved. Example 3: A file-based backup of MySQL databases The MySQL databases are stored in /var/lib/mysql on most Linux distributions. You can check that with the command:
ls /var/lib/mysql
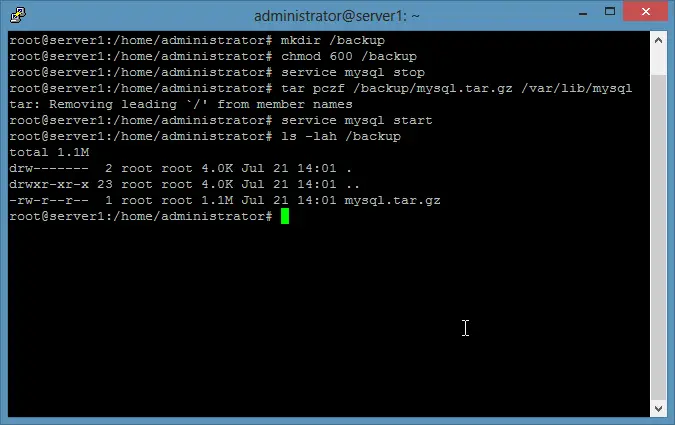
Stop the database server to get a consistent MySQL file backup with tar. The backup will be written to the /backup folder. 1) Create the backup folder
mkdir /backup
chmod 600 /backup
2) Stop MySQL, run the backup with tar and start the database server again.
service mysql stop
tar pczf /backup/mysql.tar.gz /var/lib/mysql
service mysql start
ls -lah /backup
Extract tar.gz Files
The command to extract tar.gz files is:
tar xzf myarchive.tar.gz
The tar command options explained
- [x] The x stand for extract, it is mandatory when a tar file shall be extracted.
- [z] The z option tells tar that the archive that shall be unpacked is in gzip format.
- [f] This option instructs tar to read the archive content from a file, in this case the file myarchive.tar.gz.
The above tar command will silently extract that tar.gz file, it will show only error messages. If you like to see which files get extracted, then add the "v" option.
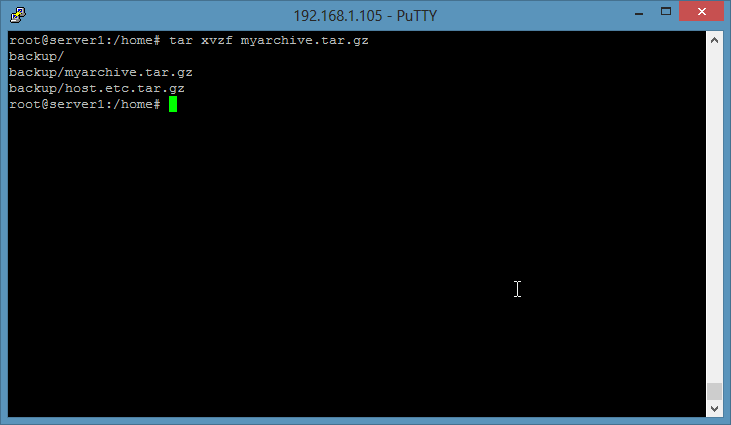
tar xzvf myarchive.tar.gz
The [v] option stands for verbose, it will show the file names while they get unpacked.