How to create a web-office using ONLYOFFICE Enterprise Edition on Ubuntu 14.04
On this page
ONLYOFFICE Enterprise Edition is a commercial version of an open source corporate office suite developed to organize the teamwork online. If you have a team up to 5 users, you can install and use it free of charge.
This guide will describe how to install ONLYOFFICE Enterprise Edition on Ubuntu 14.04 using the provided Docker script.
Prerequisites
Before we begin, we need the following:
- 6 GB of RAM
- 8 GB swap file
To ensure the proper work of our web-office, we need a 8 GB of swap. To set up the necessary amount under Ubuntu, we need to execute the following commands:
sudo fallocate -l 8G /swapfile \
sudo chmod 600 /swapfile \
sudo mkswap /swapfile \
sudo swapon /swapfile \
sudo echo "/swapfile none swap sw 0 0" >> /etc/fstab - Docker v.1.4 or later
To be able to run ONLYOFFICE Enterprise Edition installation script we need the latest Docker version installed. This tutorial will help with Docker installation. - Free activation key
To get an activation key, we need to send a request on the official website. - Registered domain name (if we would like to use the mail server as well)
Installing ONLYOFFICE Enterprise Edition
Step 1. Download Enterprise Edition scriptwget http://download.onlyoffice.com/install/enterprise-install.sh
cd /tmp
wget http://download.onlyoffice.com/install/enterprise-install.sh
Step 2. Install ONLYOFFICE Enterprise Editionbash enterprise-install.sh -
bash enterprise-install.sh -ims false -pms true
The script will install Community Server, Document Server and Control Panel (see below). As I have no a registered domain name for mail server, I decided to install it later using Control Panel (see below).
Running and performing the ONLYOFFICE Enterprise Edition initial configuration
Once the installation is finished, open a browser and enter the local network computer IP address to the browser address bar. ONLYOFFICE Enterprise Edition will be up and running.
The Welcome page will open allowing us to perform the ONLYOFFICE activation and initial configuration:
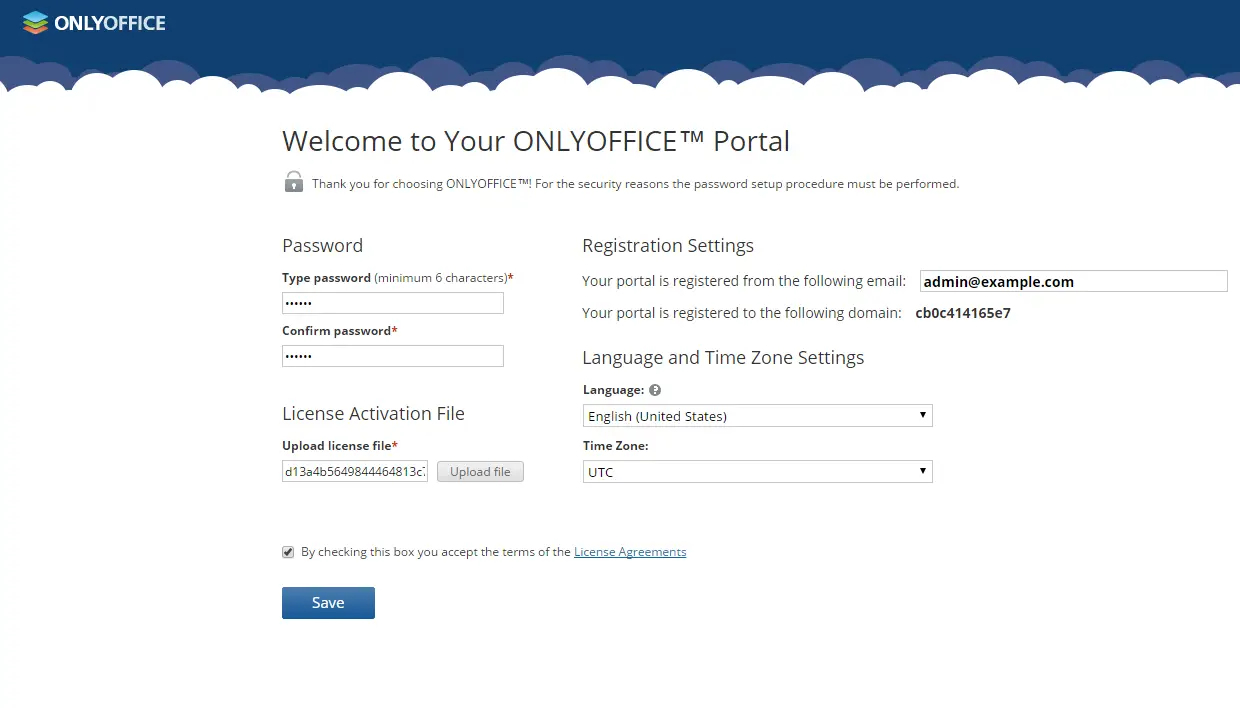
- Upload the provided free licence key (see Prerequisites) to activate ONLYOFFICE.
- Select and confirm the password and specify the email address to access your web-office the next time.
- Choose the language for the web-office interface. When working in ONLYOFFICE, you will be able to change the language for all the users or for your own account only.
- Set the correct time zone. It's particularly important for the notifications and the correct calendar work.
Finally, click the Save button to complete the ONLYOFFICE activation and configuration.
Configuring ONLYOFFICE Enterprise Edition using the Control Panel
The main difference between ONLYOFFICE community and enterprise edition is a Control Panel providing with tools to automate the web-office configuration. To use it, sign in to your web-office and click the Control Panel link on the Start Page. Then select the section you need:Enabling the HTTPS protocol to secure the access
Enabling the HTTPS protocol to secure the access
As I use ONLYOFFICE for my small team, I decided to generate the self-signed certificate. Click the GENERATE button on the HTTPS page. A popup message box will inform you that the certificate and private key are successfully generated. They will be automatically uploaded to the corresponding fields. Just click the Apply button to save the changes.
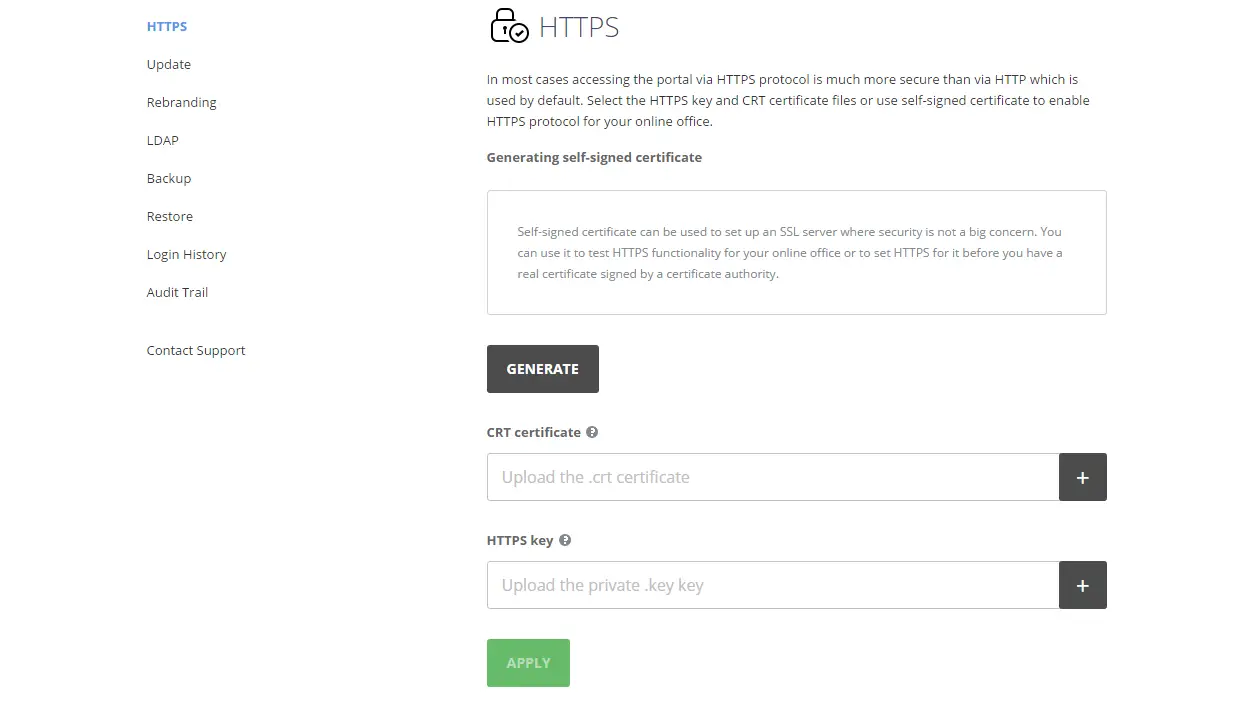
It's also possible to upload an existing certificate if you have one.
Installing the mail server, if needed
Open the Update page. Scroll the page down until the Mail Server section appears. Click the INSTALL button next to it. The Domain Name window will open. Specify your own domain name and click the OK button to start the installation process. Your web-office will be restarted and become unavailable during the installation. It can take some minutes.
Besides, using Control Panel you can:
- Replace the ONLYOFFICE logos with your own ones.
- Track user actions and login history.
- Automatically backup and restore data.
- Import users from Active Directory.
- Automatically update ONLYOFFICE once the new version is available.
Useful links
- ONLYOFFICE official website: www.onlyoffice.com
- Help Center: http://helpcenter.onlyoffice.com

