How to Install Magento eCommerce on Ubuntu 22.04 with Nginx and Elasticsearch
This tutorial exists for these OS versions
- Ubuntu 22.04 (Jammy Jellyfish)
- Ubuntu 20.04 (Focal Fossa)
- Ubuntu 18.04 (Bionic Beaver)
- Ubuntu 16.04 (Xenial Xerus)
- Ubuntu 15.10 (Wily Werewolf)
- Ubuntu 11.04 (Natty Narwhal)
On this page
- Prerequisites
- Step 1 - Configure Firewall
- Step 2 - Install PHP and its extensions
- Step 3 - Install Composer
- Step 4 - Install MySQL
- Step 5 - Configure MySQL
- Step 6 - Install Nginx
- Step 7 - Install SSL
- Step 8 - Install Elasticsearch
- Step 9 - Install Redis server
- Step 10 - Download Magento
- Step 11 - Install Magento
- Step 12 - Configure PHP-FPM
- Step 13 - Configure Nginx
- Step 14 - Disable Two factor Authentication
- Step 15 - Access the Administration Portal
- Step 16 - Enable and Configure Two-factor Authentication
- Conclusion
Magento is an open-source e-commerce platform written in PHP. It was acquired by Adobe in 2018 and was named Adobe eCommerce. It is also offered as a commercial and cloud-based product. You can use Magento to create high-capacity professional shopping websites. It offers both - a single-store and a multiple-store mode. It comes with lots of modules to extend its functionality.
In this tutorial, we will install the Magento open-source community edition. It offers all the functionality you need to set up a professional online store. We will also install Elasticsearch for searching through the product catalog, Redis for the session and file cache, and serve it using the Nginx server.
Prerequisites
-
A server running Ubuntu 22.04 with a minimum of 2GB RAM. You may need more RAM depending on your requirements.
-
A non-root user with sudo privileges.
-
A fully qualified domain name (FQDN) for the server,
magento.example.com -
Make sure everything is updated.
$ sudo apt update
$ sudo apt upgrade
-
Few packages that your system needs.
$ sudo apt install wget curl nano software-properties-common dirmngr apt-transport-https gnupg2 ca-certificates lsb-release ubuntu-keyring unzip -y
Some of these packages may already be installed on your system.
Step 1 - Configure Firewall
The first step is to configure the firewall. Ubuntu comes with ufw (Uncomplicated Firewall) by default.
Check if the firewall is running.
$ sudo ufw status
You should get the following output.
Status: inactive
Allow SSH port so the firewall doesn't break the current connection on enabling it.
$ sudo ufw allow OpenSSH
Allow HTTP and HTTPS ports as well.
$ sudo ufw allow http
$ sudo ufw allow https
Enable the Firewall
$ sudo ufw enable
Command may disrupt existing ssh connections. Proceed with operation (y|n)? y
Firewall is active and enabled on system startup
Check the status of the firewall again.
$ sudo ufw status
You should see a similar output.
Status: active

To                         Action      From
--                         ------      ----
OpenSSH                    ALLOW       Anywhere
80/tcp                     ALLOW       Anywhere
443                        ALLOW       Anywhere
OpenSSH (v6)               ALLOW       Anywhere (v6)
80/tcp (v6)                ALLOW       Anywhere (v6)
443 (v6)                   ALLOW       Anywhere (v6)
Step 2 - Install PHP and its extensions
Ubuntu 22.04 ships with PHP 8.1.2 version which is a bit outdated. We will install the latest PHP 8.2 version using Ondrej's PHP repository.
$ sudo add-apt-repository ppa:ondrej/php
Next, install PHP and its extensions required by Magento.
$ sudo apt install php8.2-fpm php8.2-mysql php8.2-bcmath php8.2-xml php8.2-zip php8.2-curl php8.2-mbstring php8.2-gd php8.2-tidy php8.2-intl php8.2-cli php8.2-soap php8.2-xsl libsodium-dev libsodium23 libssl-dev libcurl14-openssl-dev
Verify the installation.
$ php --version
PHP 8.2.5 (cli) (built: Apr 14 2023 04:27:02) (NTS)
Copyright (c) The PHP Group
Zend Engine v4.2.5, Copyright (c) Zend Technologies
    with Zend OPcache v8.2.5, Copyright (c), by Zend Technologies
Step 3 - Install Composer
Composer is a dependency management tool for PHP and is required for Magento installation.
Run the following commands to download the Composer binary. Magento requires Composer 2.2 LTS so we have modified the command accordingly.
$ php -r "copy('https://getcomposer.org/installer', 'composer-setup.php');"
$ php composer-setup.php --2.2
$ php -r "unlink('composer-setup.php');"
Install Composer by moving the binary to the /usr/local/bin directory.
$ sudo mv composer.phar /usr/local/bin/composer
Verify the installation by checking its version.
$ composer --version
Composer version 2.2.21 2023-02-15 13:07:40
Step 4 - Install MySQL
Ubuntu 22.04 ships with the latest version of MySQL. You can install it with a single command.
$ sudo apt install mysql-server
Check the version of MySQL.
$ mysql --version
mysql  Ver 8.0.33-0ubuntu0.22.04.1 for Linux on x86_64 ((Ubuntu))
This step is necessary for MySQL versions 8.0.28 and above. Enter the MySQL Shell.
$ sudo mysql
Run the following command to set the password for your root user. Make sure it has a mix of numbers, uppercase, lowercase, and special characters.
mysql> ALTER USER 'root'@'localhost' IDENTIFIED WITH mysql_native_password BY 'YourPassword12!';
Exit the shell.
mysql> exit
Run the MySQL secure install script.
$ sudo mysql_secure_installation
First, you will be asked for your root password. Enter it. Next, you will be asked to install the Validate Password Component. It checks the strength of passwords used in MySQL. Press Y to install it. Next, you will be asked to set the level of the password validation policy. Choose 2 as it is the strongest one.
Securing the MySQL server deployment.

Enter password for user root:

VALIDATE PASSWORD COMPONENT can be used to test passwords
and improve security. It checks the strength of password
and allows the users to set only those passwords which are
secure enough. Would you like to setup VALIDATE PASSWORD component?

Press y|Y for Yes, any other key for No: Y

There are three levels of password validation policy:

LOW    Length >= 8
MEDIUM Length >= 8, numeric, mixed case, and special characters
STRONG Length >= 8, numeric, mixed case, special characters and dictionary                  file

Please enter 0 = LOW, 1 = MEDIUM and 2 = STRONG: 2
Using existing password for root.

Estimated strength of the password: 100
Next, enter N to refuse to change your root password. Also, enter Y to remove anonymous users, disallow remote root logins, remove the test database, and reload the privilege tables.
Change the password for root ? ((Press y|Y for Yes, any other key for No) : N

 ... skipping.
By default, a MySQL installation has an anonymous user,
allowing anyone to log into MySQL without having to have
a user account created for them. This is intended only for
testing, and to make the installation go a bit smoother.
You should remove them before moving into a production
environment.

Remove anonymous users? (Press y|Y for Yes, any other key for No) : Y
Success.


Normally, root should only be allowed to connect from
'localhost'. This ensures that someone cannot guess at
the root password from the network.

Disallow root login remotely? (Press y|Y for Yes, any other key for No) : Y
Success.

By default, MySQL comes with a database named 'test' that
anyone can access. This is also intended only for testing,
and should be removed before moving into a production
environment.


Remove test database and access to it? (Press y|Y for Yes, any other key for No) : Y
 - Dropping test database...
Success.

 - Removing privileges on test database...
Success.

Reloading the privilege tables will ensure that all changes
made so far will take effect immediately.

Reload privilege tables now? (Press y|Y for Yes, any other key for No) : Y
Success.

All done!
Step 5 - Configure MySQL
Log in to the MySQL shell. Enter your root password when prompted.
$ sudo mysql -u root -p
Create a database for Magento.
mysql> CREATE DATABASE magento;
Create an SQL user account.
mysql> CREATE USER 'magentouser'@'localhost' IDENTIFIED BY 'Your_password2';
Grant all privileges on the database to the user.
mysql> GRANT ALL PRIVILEGES ON magento.* TO 'magentouser'@'localhost';
Flush user privileges.
mysql> FLUSH PRIVILEGES;
Exit the shell.
mysql> exit
Step 6 - Install Nginx
Ubuntu 22.04 ships with an older version of Nginx. To install the latest version, you need to download the official Nginx repository.
Import Nginx's signing key.
$ curl https://nginx.org/keys/nginx_signing.key | gpg --dearmor \
| sudo tee /usr/share/keyrings/nginx-archive-keyring.gpg >/dev/null
Add the repository for Nginx's stable version.
$ echo "deb [signed-by=/usr/share/keyrings/nginx-archive-keyring.gpg arch=amd64] \
http://nginx.org/packages/ubuntu `lsb_release -cs` nginx" \
| sudo tee /etc/apt/sources.list.d/nginx.list
Update the system repositories.
$ sudo apt update
Install Nginx.
$ sudo apt install nginx
Verify the installation.
$ nginx -v
nginx version: nginx/1.24.0
Start the Nginx server.
$ sudo systemctl start nginx
Step 7 - Install SSL
We need to install Certbot to generate the SSL certificate. You can either install Certbot using Ubuntu's repository or grab the latest version using the Snapd tool. We will be using the Snapd version.
Ubuntu 22.04 comes with Snapd installed by default. Run the following commands to ensure that your version of Snapd is up to date.
$ sudo snap install core && sudo snap refresh core
Install Certbot.
$ sudo snap install --classic certbot
Use the following command to ensure that the Certbot command can be run by creating a symbolic link to the /usr/bin directory.
$ sudo ln -s /snap/bin/certbot /usr/bin/certbot
Run the following command to generate an SSL Certificate.
$ sudo certbot certonly --nginx --agree-tos --no-eff-email --staple-ocsp --preferred-challenges http -m [email protected] -d magento.example.com
The above command will download a certificate to the /etc/letsencrypt/live/magento.example.com directory on your server.
Generate a Diffie-Hellman group certificate.
$ sudo openssl dhparam -dsaparam -out /etc/ssl/certs/dhparam.pem 4096
Check the Certbot renewal scheduler service.
$ sudo systemctl list-timers
You will find snap.certbot.renew.service as one of the services scheduled to run.
NEXT                        LEFT          LAST                        PASSED        UNIT                      ACTIVATES
.....
Sun 2023-02-26 06:32:00 UTC 9h left       Sat 2023-02-25 18:04:05 UTC 2h 59min ago  snap.certbot.renew.timer  snap.certbot.renew.service
Sun 2023-02-26 06:43:20 UTC 9h left       Sat 2023-02-25 10:49:23 UTC 10h ago       apt-daily-upgrade.timer   apt-daily-upgrade.service
Sun 2023-02-26 09:00:06 UTC 11h left      Sat 2023-02-25 20:58:06 UTC 5min ago      apt-daily.timer           apt-daily.service
Do a dry run of the process to check whether the SSL renewal is working fine.
$ sudo certbot renew --dry-run
If you see no errors, you are all set. Your certificate will renew automatically.
Step 8 - Install Elasticsearch
Elasticsearch is used by Magento for product searches. We will install Elasticsearch 7.x using its official repository since it is the version that is compatible with Magento.
Import Elasticsearch's GPG key.
$ wget -qO - https://artifacts.elastic.co/GPG-KEY-elasticsearch | sudo gpg --dearmor -o /usr/share/keyrings/elasticsearch-keyring.gpg
Add the Elasticsearch repository.
$ echo "deb [signed-by=/usr/share/keyrings/elasticsearch-keyring.gpg] https://artifacts.elastic.co/packages/7.x/apt stable main" | sudo tee /etc/apt/sources.list.d/elastic-7.x.list
Update the system's repository list.
$ sudo apt update
Install Elasticsearch.
$ sudo apt install elasticsearch
Elasticsearch uses a lot of memory. You need to limit its usage depending on your server size. Create the file /etc/elasticsearch/jvm.options.d/memory.options file and open it for editing.
$ sudo nano /etc/elasticsearch/jvm.options.d/memory.options
Paste the following code in it.
-Xms1g
-Xmx1g
Save the file by pressing Ctrl + X and entering Y when prompted. This configures Elasticsearch to use 1GB of RAM. You can use any value as necessary.
Start and enable the service.
$ sudo systemctl enable elasticsearch --now
Check if Elasticsearch is working.
$ curl http://localhost:9200
You should see the following output.
{
  "name" : "magento",
  "cluster_name" : "elasticsearch",
  "cluster_uuid" : "6yks8tZ6T4GskIwWoXuSLA",
  "version" : {
    "number" : "7.17.10",
    "build_flavor" : "default",
    "build_type" : "deb",
    "build_hash" : "fecd68e3150eda0c307ab9a9d7557f5d5fd71349",
    "build_date" : "2023-04-23T05:33:18.138275597Z",
    "build_snapshot" : false,
    "lucene_version" : "8.11.1",
    "minimum_wire_compatibility_version" : "6.8.0",
    "minimum_index_compatibility_version" : "6.0.0-beta1"
  },
  "tagline" : "You Know, for Search"
}
Step 9 - Install Redis server
Magento uses Redis for session and cache storage. It is entirely optional and you can use the database for session storage. But Redis does a better job. The latest version of Magento works with Redis 7.0. Ubuntu ships with Redis 6.0 so we will use the Redis repository for installation.
Import the official Redis GPG key.
$ curl -fsSL https://packages.redis.io/gpg | sudo gpg --dearmor -o /usr/share/keyrings/redis-archive-keyring.gpg
Add the APT repository to your sources list.
$ echo "deb [signed-by=/usr/share/keyrings/redis-archive-keyring.gpg] https://packages.redis.io/deb $(lsb_release -cs) main" | sudo tee /etc/apt/sources.list.d/redis.list
Update the system repository list.
$ sudo apt update
Issue the following command to install the Redis server.
$ sudo apt install redis
Confirm the Redis version.
$ redis-server -v
Redis server v=7.0.11 sha=00000000:0 malloc=jemalloc-5.2.1 bits=64 build=3af367a78d5e21e9
Let us verify the service connection by using the following command.
$ redis-cli
You will be switched to the Redis shell.
The first step is to set the password for the Redis default user. Replace Your_Redis_Password with a strong password of your choice. Make sure you prefix the password with the > character.
127.0.0.1:6379> acl setuser default >Your_Redis_Password
Test the Redis Authentication.
127.0.0.1:6379> AUTH Your_Redis_Password
OK
Ping the service.
127.0.0.1:6379> ping
PONG
Exit the service by typing exit.
Step 10 - Download Magento
Create a web root directory for Magento.
$ sudo mkdir /var/www/magento -p
Give the rights to the Magento directory to the current user.
$ sudo chown $USER:$USER /var/www/magento/ -R
Switch to the /var/www directory.
$ cd /var/www
Before we move further, you need to authentication keys required by the Magento repository. Visit the website https://account.magento.com/ and you will get the following page asking you to log in using your Adobe ID.
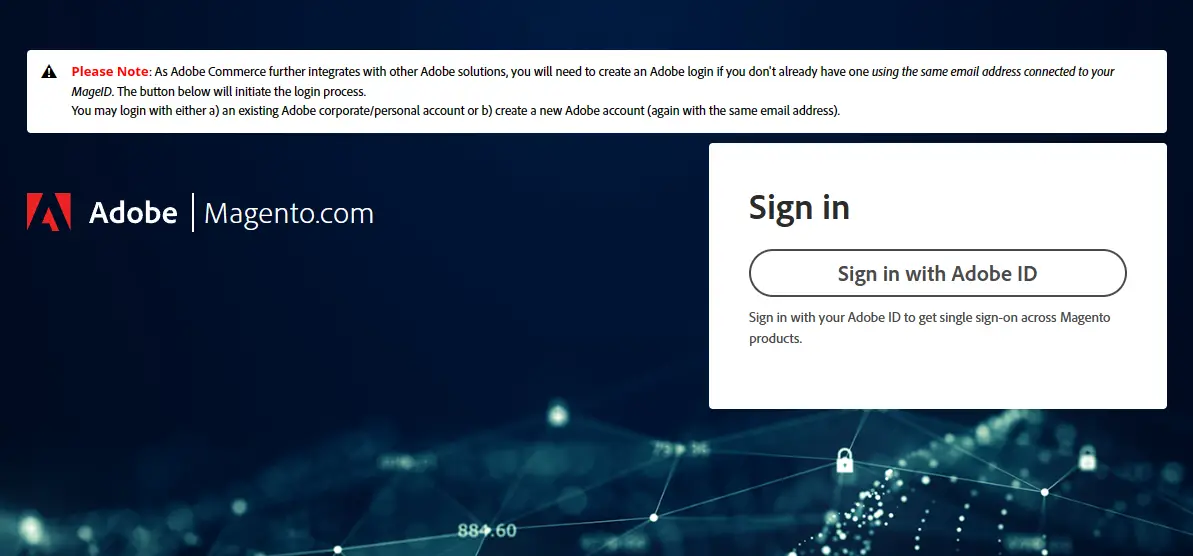
Click the Sign in with Adobe ID button to get to the following page.
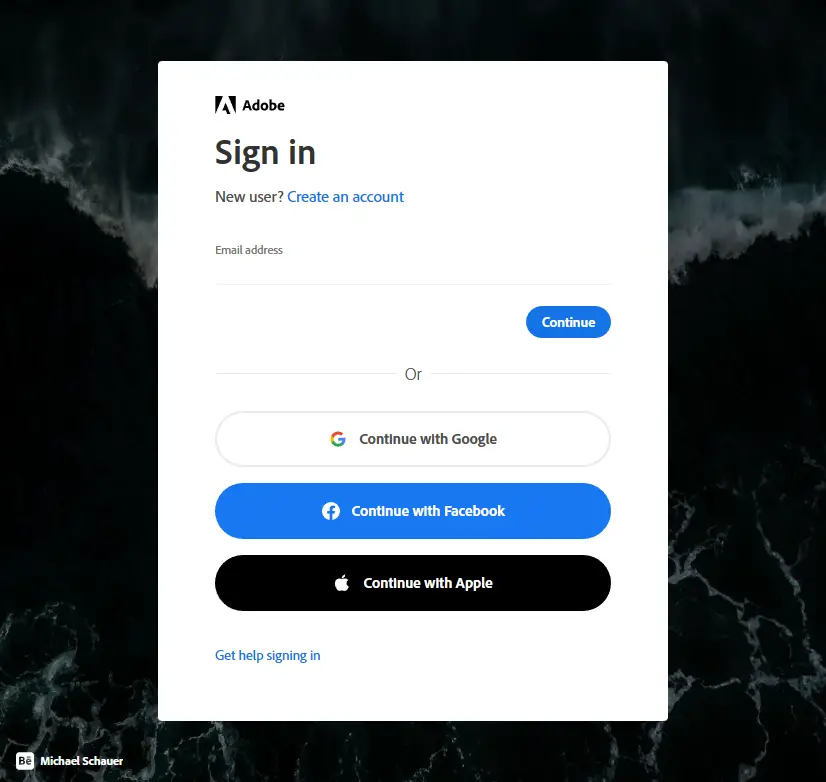
If you have an Adobe ID, enter your credentials to continue or you can create an account here. Once you have created your account and logged in, open the URL https://marketplace.magento.com/customer/accessKeys/. You can also access this page by visiting your profile and clicking the Access Keys link.

Click the Create A New Access Key button to create your authentication key. Give a name to your key for identification.
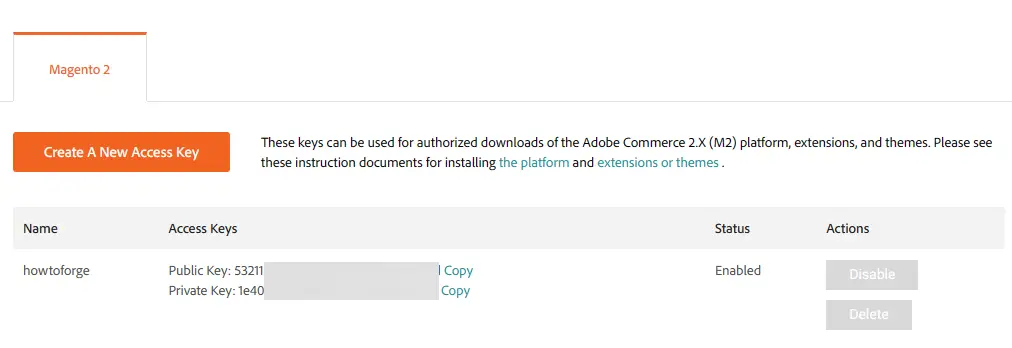
Note down both the public and private keys for the next step.
Create the Magento project.
$ composer create-project --repository-url=https://repo.magento.com/ magento/project-community-edition magento
You will be asked for the username and password for the repository. Use the public key as your username and the private key as your password. You will be asked if you want to store the credentials in the Composer configuration directory. Enter y to do so.
Creating a "magento/project-community-edition" project at "./magento"
    Authentication required (repo.magento.com):
      Username: 53211xxxxxxxxxxxxxxxxxxxxxxxxxxx
      Password:
Do you want to store credentials for repo.magento.com in /home/navjot/.config/composer/auth.json ? [Yn] y
Installing magento/project-community-edition (2.4.6)
  - Downloading magento/project-community-edition (2.4.6)
  - Installing magento/project-community-edition (2.4.6): Extracting archive
Created project in /var/www/magento
Loading composer repositories with package information
Info from https://repo.packagist.org: #StandWithUkraine
Updating dependencies
Lock file operations: 564 installs, 0 updates, 0 removals
  - Locking 2tvenom/cborencode (1.0.2)
  - Locking adobe-commerce/adobe-ims-metapackage (2.2.0)
...............................................
Run the following commands to set the file permissions and make Magento binary executable. Also, set the owner of the Magento directory to the Nginx user so that it can access the website.
$ cd /var/www/magento/
$ sudo find var generated vendor pub/static pub/media app/etc -type f -exec chmod g+w {} +
$ sudo find var generated vendor pub/static pub/media app/etc -type d -exec chmod g+ws {} +
$ sudo chown -R :nginx .
$ sudo chmod u+x bin/magento
Step 11 - Install Magento
Make sure you are in the Magento directory.
$ cd /var/www/magento
Run the following command to install Magento.
$ bin/magento setup:install \
--base-url=http://magento.example.com \
--use-secure=1 \
--base-url-secure=https://magento.example.com \
--use-secure-admin=1 \
--db-host=localhost \
--db-name=magento \
--db-user=magentouser \
--db-password=Your_password2 \
--admin-firstname=Navjot \
--admin-lastname=Singh \
[email protected] \
--admin-user=navjot \
--admin-password=admin_password \
--language=en_US \
--currency=USD \
--timezone=America/Chicago \
--use-rewrites=1 \
--elasticsearch-host=http://127.0.0.1 \
--elasticsearch-port=9200 \
--session-save=redis \
--session-save-redis-db=0 \
--session-save-redis-password=redis_password \
--cache-backend=redis \
--cache-backend-redis-db=2 \
--cache-backend-redis-password=redis_password \
--page-cache=redis \
--page-cache-redis-db=4 \
--page-cache-redis-password=redis_password
Once the process is complete, you will get a similar output.
.......
[SUCCESS]: Magento installation complete.
[SUCCESS]: Magento Admin URI: /admin_19uadb
Nothing to import.
Note down the Admin URI which you will need later to access the administration panel.
Create Magento cron jobs.
$ php bin/magento cron:install
Verify the cron job.
$ crontab -l
You should see the following output.
#~ MAGENTO START d1957f62aa710cc367525c9ec68dd7456d4311756b5aa37d2143c4a98b25318c
* * * * * /usr/bin/php8.2 /var/www/magento/bin/magento cron:run 2>&1 | grep -v "Ran jobs by schedule" >> /var/www/magento/var/log/magento.cron.log
#~ MAGENTO END d1957f62aa710cc367525c9ec68dd7456d4311756b5aa37d2143c4a98b25318c
Step 12 - Configure PHP-FPM
Open the file /etc/php/8.2/fpm/pool.d/www.conf.
$ sudo nano /etc/php/8.2/fpm/pool.d/www.conf
We need to set the Unix user/group of PHP processes to nginx. Find the user=www-data and group=www-data lines in the file and change them to nginx.
...
; Unix user/group of processes
; Note: The user is mandatory. If the group is not set, the default user's group
;       will be used.
; RPM: apache user chosen to provide access to the same directories as httpd
user = nginx
; RPM: Keep a group allowed to write in log dir.
group = nginx
...
Find the listen.owner = www-data and listen.group = www-data lines in the file and change them to nginx.
; Set permissions for unix socket, if one is used. In Linux, read/write
; permissions must be set in order to allow connections from a web server. Many
; BSD-derived systems allow connections regardless of permissions. The owner
; and group can be specified either by name or by their numeric IDs.
; Default Values: user and group are set as the running user
;                 mode is set to 0660
listen.owner = nginx
listen.group = nginx
Save the file by pressing Ctrl + X and entering Y when prompted.
Increase the execution time for PHP-FPM and PHP-CLI to 180 seconds.
$ sudo sed -i 's/max_execution_time = 30/max_execution_time = 180/' /etc/php/8.2/fpm/php.ini
$ sudo sed -i 's/max_execution_time = 30/max_execution_time = 180/' /etc/php/8.2/cli/php.ini
Increase the memory limit for PHP-FPM from 128MB to 256MB. You can raise the limit depending on your server size and requirements.
$ sudo sed -i 's/memory_limit = 128M/memory_limit = 256M/' /etc/php/8.2/fpm/php.ini
Magento by default sets the file size limit for the media library as 2MB. Run the following commands to increase the file size limit to 25MB.
$ sudo sed -i 's/upload_max_filesize = 2M/upload_max_filesize = 25M/g' /etc/php/8.2/fpm/php.ini
$ sudo sed -i 's/post_max_size = 8M/post_max_size = 25M/g' /etc/php/8.2/fpm/php.ini
Turn on the Zlib Compression.
$ sudo sed -i 's/zlib.output_compression = Off/zlib.output_compression = On/g' /etc/php/8.2/fpm/php.ini
Restart the PHP-FPM service.
$ sudo systemctl restart php8.2-fpm
Change the group of the PHP sessions directory to Nginx.
$ sudo chgrp -R nginx /var/lib/php/sessions
Step 13 - Configure Nginx
Open the file /etc/nginx/nginx.conf for editing.
$ sudo nano /etc/nginx/nginx.conf
Add the following line before the line include /etc/nginx/conf.d/*.conf;.
server_names_hash_bucket_size 64;
Save the file by pressing Ctrl + X and entering Y when prompted.
Create and open the file /etc/nginx/conf.d/magento.conf for editing.
$ sudo nano /etc/nginx/conf.d/magento.conf
Paste the following code in it.
upstream fastcgi_backend {
  server  unix:/run/php/php8.2-fpm.sock;
}

server {
  # Redirect any http requests to https
  listen 80;
  listen [::]:80;
  server_name magento.example.com;
  return 301 https://$host$request_uri;
}

server {
  listen 443 ssl http2;
  listen [::]:443 ssl http2;
  server_name magento.example.com;

  set $MAGE_ROOT /var/www/magento;
  include /var/www/magento/nginx.conf.sample;
  client_max_body_size 25m;

  access_log /var/log/nginx/magento.access.log;
  error_log  /var/log/nginx/magento.error.log;

  # TLS configuration
  ssl_certificate /etc/letsencrypt/live/magento.example.com/fullchain.pem;
  ssl_certificate_key /etc/letsencrypt/live/magento.example.com/privkey.pem;
  ssl_trusted_certificate /etc/letsencrypt/live/magento.example.com/chain.pem;
  ssl_protocols TLSv1.2 TLSv1.3;

  ssl_ciphers 'ECDHE-ECDSA-AES256-GCM-SHA384:ECDHE-RSA-AES256-GCM-SHA384:ECDHE-ECDSA-CHACHA20-POLY1305:ECDHE-RSA-CHACHA20-POLY1305:ECDHE-ECDSA-AES256-SHA384:ECDHE-RSA-AES256-SHA384';
  ssl_prefer_server_ciphers on;
  ssl_session_cache shared:SSL:50m;
  ssl_session_timeout 1d;

  # OCSP Stapling ---
  # fetch OCSP records from URL in ssl_certificate and cache them
  ssl_stapling on;
  ssl_stapling_verify on;
  ssl_dhparam /etc/ssl/certs/dhparam.pem;
}
Save the file by pressing Ctrl + X and entering Y when prompted once finished.
Magento comes with a Nginx configuration template at /var/www/magento/nginx.conf.sample which we have included in our configuration. The $MAGE_ROOT variable points to the Magento web root directory which we have set in our file and is used in the sample configuration file.
Verify the Nginx configuration file syntax.
$ sudo nginx -t
nginx: the configuration file /etc/nginx/nginx.conf syntax is ok
nginx: configuration file /etc/nginx/nginx.conf test is successful
Restart the Nginx service.
$ sudo systemctl restart nginx
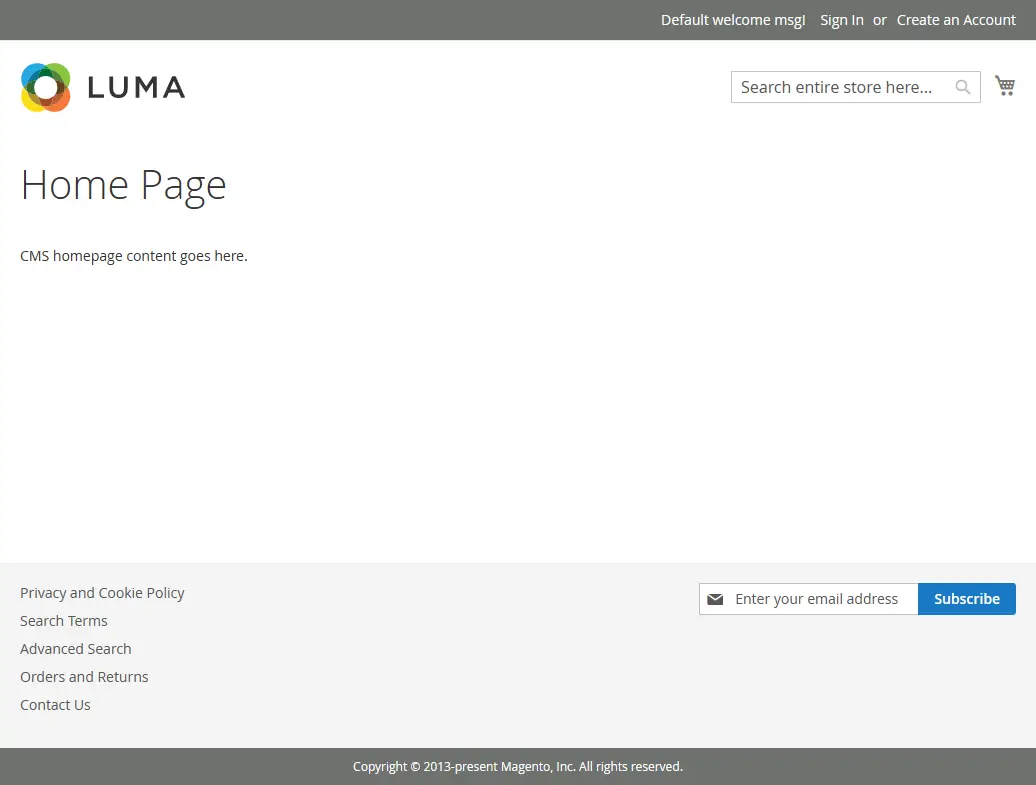
Open the Magento website via the URL https://magento.example.com. You should see the following page.
If the CSS and JS don't load for you, then run the following commands.
$ cd /var/www/magento
$ php bin/magento setup:static-content:deploy -f
$ php bin/magento indexer:reindex
Step 14 - Disable Two factor Authentication
Before accessing the administration panel, we need to disable the two-factor authentication which is enabled by default. Magento tries to send mail via sendmail for enabling two-factor authentication during installation but since we didn't configure that, the only way to access the dashboard is to disable the feature first.
If you have sendmail configured on your server to send emails, then you can skip this step. To disable two-factor authentication, we need to disable two of Magento's modules using the following commands.
$ php /var/www/magento/bin/magento module:disable Magento_AdminAdobeImsTwoFactorAuth
$ php /var/www/magento/bin/magento module:disable Magento_TwoFactorAuth
Run the following command to create the classes.
$ php /var/www/magento/bin/magento setup:di:compile
Clean the cache as well.
$ php /var/www/magento/bin/magento c:c
Step 15 - Access the Administration Portal
You will need to open the administration portal using the URI the Magento install script gave you. If you somehow forgot to note it down or lost it, you can retrieve the URI again using the following command.
$ php /var/www/magento/bin/magento info:adminuri
Admin URI: /admin_19uadb
Open the URL https://magento.example.com/admin_19uadb in your browser and you will get the following screen.
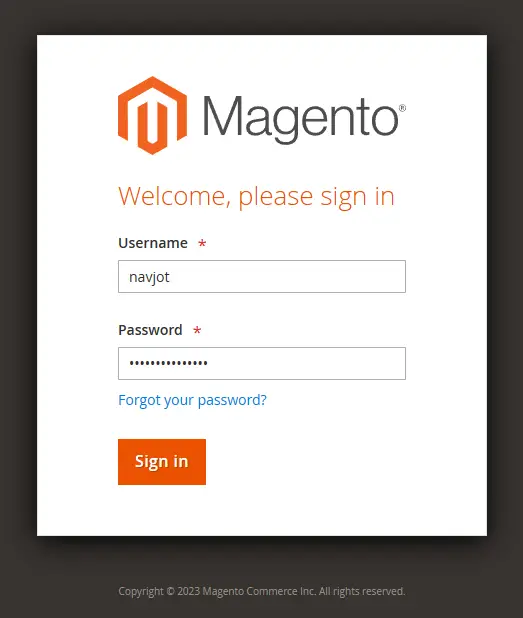
Enter your administrator credentials supplied during the installation and click the Sign in button to proceed. You will be greeted with the following screen.

You will get a popup asking permission for Adobe to collect usage data. Click the Don't Allow button to proceed.
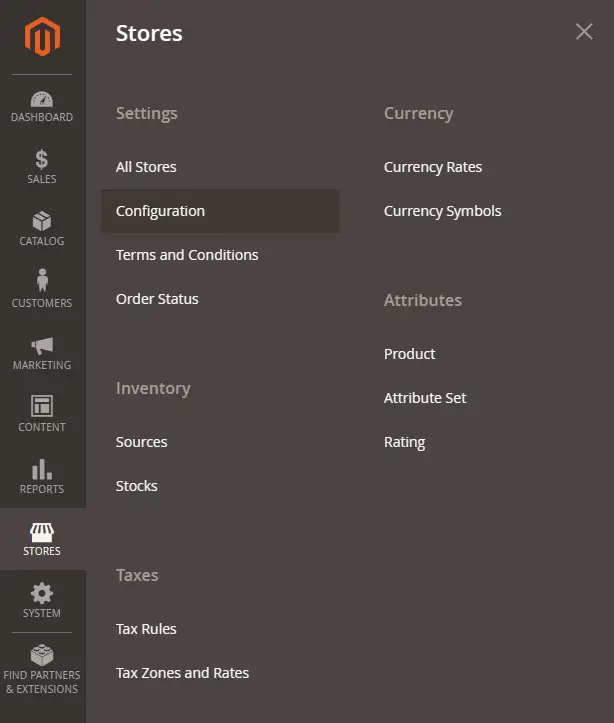
The next step is to configure SMTP for emails so that we can re-enable two-factor authentication. Visit the Stores >> Configuration menu.
Expand the Advanced Menu from the left side and click the Systems option to open the Email settings page.
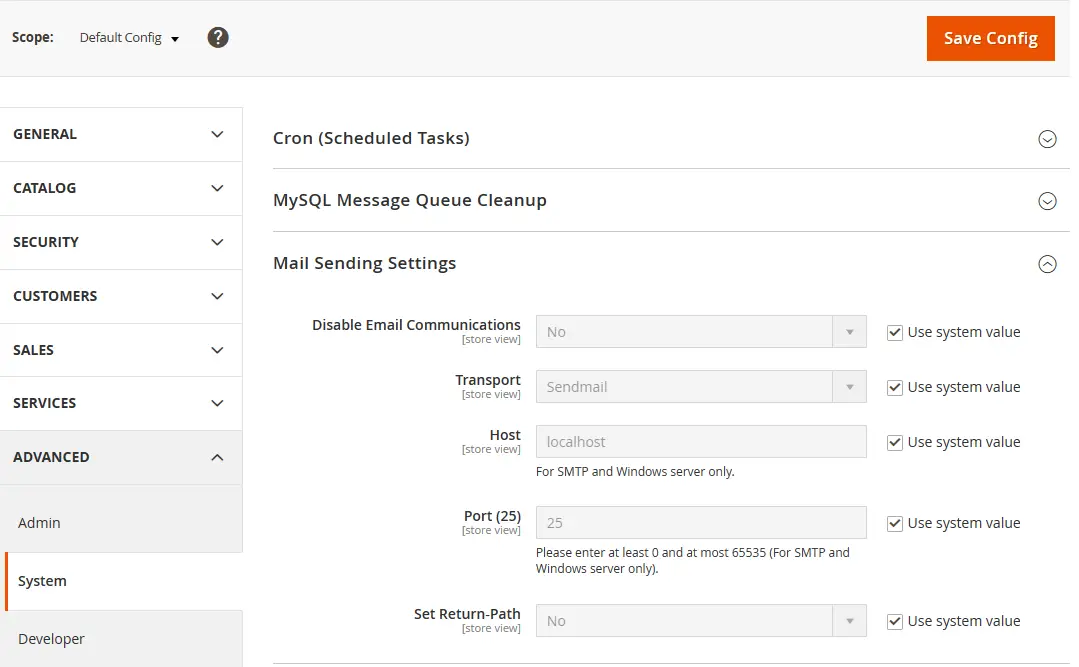
Uncheck the Use system value in front of the Transport, Host, and, Port options. Click the dropdown menu for Transport and select SMTP from it. For our tutorial, we are using Amazon SES as the mailer.
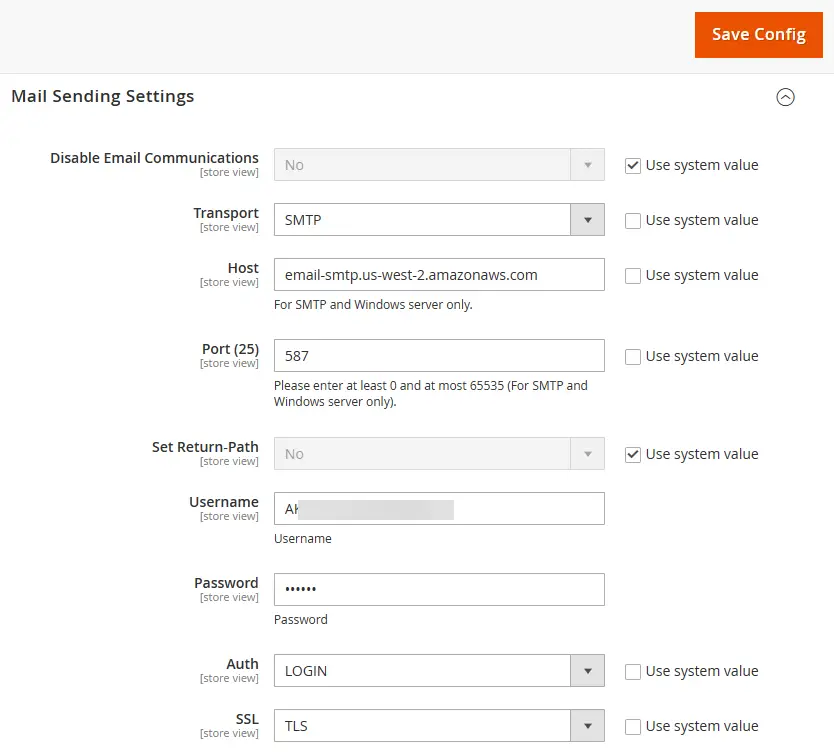
Enter your SMTP host, 587 as the port, username, and password, set Auth to LOGIN and set SSL to TLS in the given fields. Click the Save Config button when you are done. Now that we have configured the email settings, the next step is to configure the store email IDs so that we can test them.
Scroll up and expand the General menu on the same page and select the Store Email Addresses option.
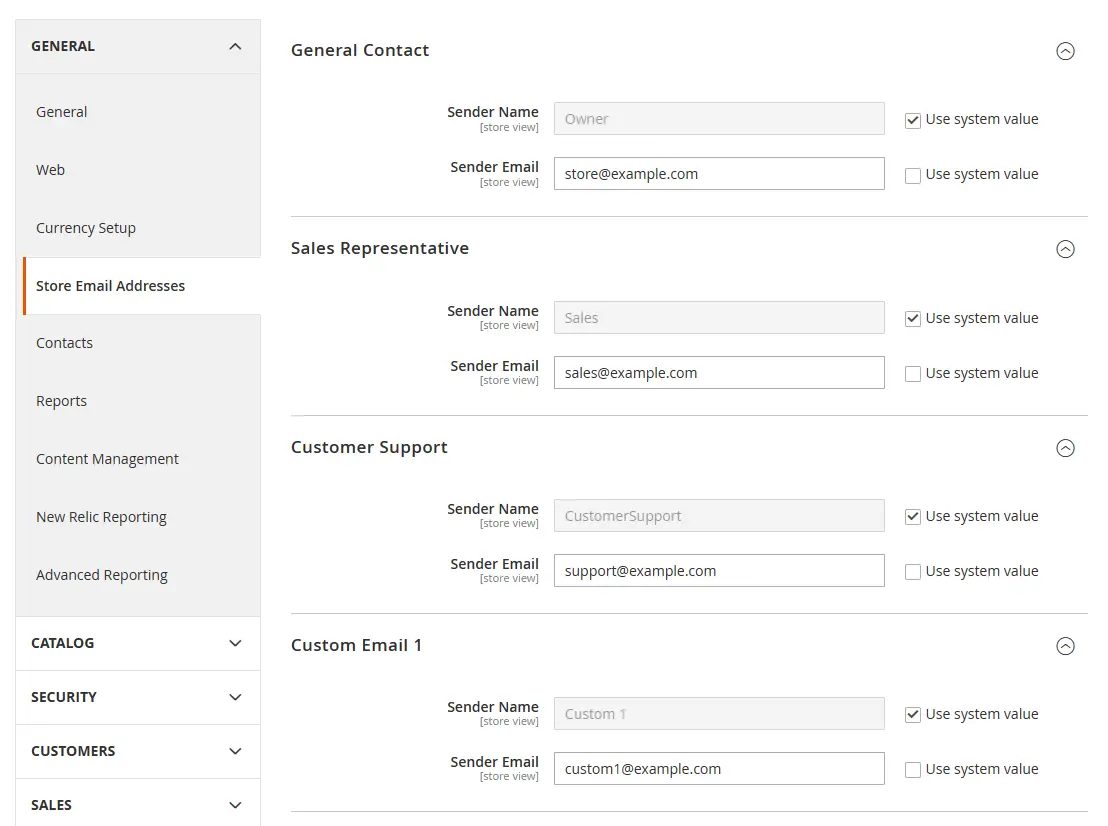
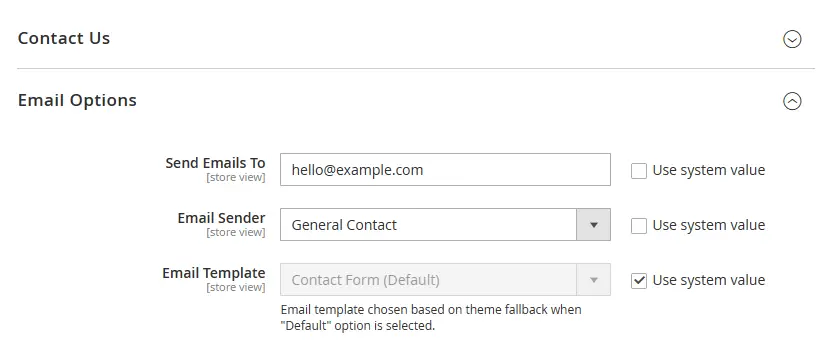
Uncheck the default Sender Email fields and enter your store's email ids. Click the Save Config button when you are done. Similarly, open the Contacts screen and make the same changes and click the Save Config button to finish it.
Changing administrator options can affect the cache and you will get a warning. Run the following command to clear the cache manually.
$ php /var/www/magento/bin/magento c:c
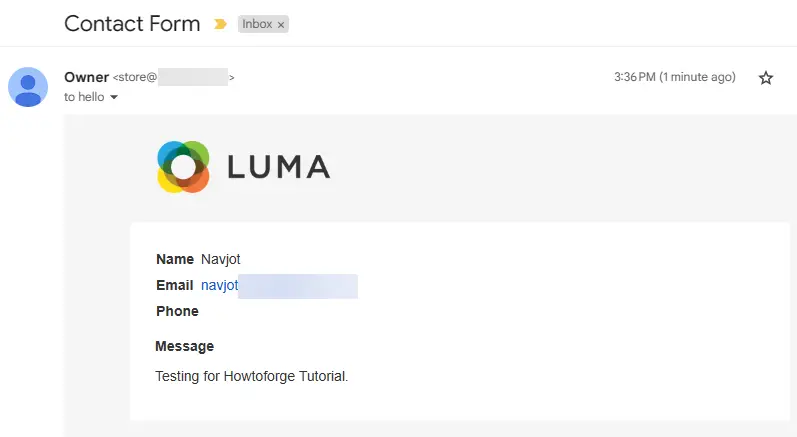
To test the emails, visit the storefront page and open the Contact Us page. You can use the URL https://magento.example.com/contact/ directly to access it. Send a test message and click the Submit button. You should receive a similar mail.
Step 16 - Enable and Configure Two-factor Authentication
Now that we have enabled the SMTP mailer, it is time to re-enable two-factor authentication. Run the following commands to enable two-factor authentication.
$ php /var/www/magento/bin/magento module:enable Magento_AdminAdobeImsTwoFactorAuth
$ php /var/www/magento/bin/magento module:enable Magento_TwoFactorAuth
Upgrade the setup for the modules.
$ php /var/www/magento/bin/magento setup:upgrade
Run the following command to create the classes.
$ php /var/www/magento/bin/magento setup:di:compile
Clean the cache as well.
$ php /var/www/magento/bin/magento c:c
If you are not able to access the admin area, run the following commands as well.
Force deploy the static content.
$ php /var/www/magento/bin/magento setup:static-content:Deploy -f
Set the file permissions.
$ cd /var/www/magento
$ sudo find var generated vendor pub/static pub/media app/etc -type f -exec chmod g+w {} +
$ sudo find var generated vendor pub/static pub/media app/etc -type d -exec chmod g+ws {} +
$ sudo chown -R :nginx .
Visit the Admin portal and you will get the following screen.

We will be using the Google Authenticator Method. You can use a hardware key if you have that. Google Authenticator method works with any TOTP app including Authy, 1Password, Bitwarden, Microsoft Authenticator, etc. Click the Apply button to proceed.
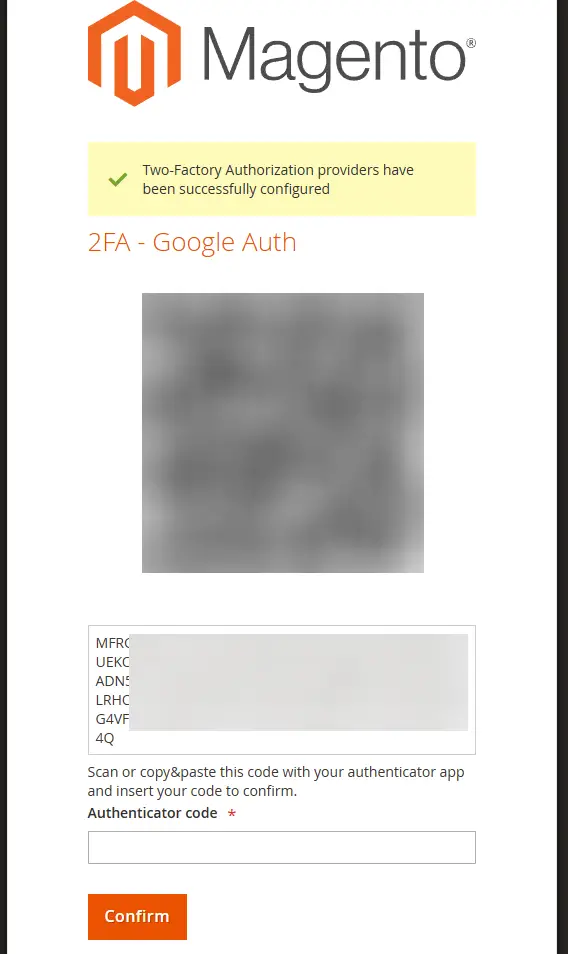
On the next page, you will get the QR code to scan with your 2FA app. Enter the details into your app and copy the generated code into the Authenticator code field. Click the Confirm button to proceed to the admin dashboard.
Conclusion
This concludes our tutorial on installing Magento eCommerce Site on a Ubuntu 22.04 server with Nginx server and Elasticsearch. If you have any questions, post them in the comments below.

