How to Install OpenCart 2 with Nginx and SSL on Ubuntu 15.10
OpenCart is free open source e-commerce software based on PHP and MySQL. OpenCart allows you to setup and run your own online store at a minimal cost. The software is suitable for a small and medium online businesses, it is easy to install and there are many add-ons and extensions available. OpenCart comes with translations for numerous languages and supports multiple currencies.
This tutorial covers the OpenCart installation with Nginx, PHP-fpm and MariaDB on Ubuntu 15.10.
Prerequisite
- Ubuntu 15.10 - 64bit
- Root Privileges
Step 1 - Install Nginx
We will use nginx as the webserver, it is a lightweight web server that is fast and has a small of memory footprint. Install nginx with the apt command from the Ubuntu repositories:
sudo apt-get install nginx
Now check Nginx with curl or by visiting your server IP with the browser like firefox etc.
curl -I 192.168.1.101
You should see the Ubuntu Default page.
Step 2 - Install and Configure PHP-FPM
In this step, I will install as php-fpm version, php-fpm (FastCGI Process Manager) is a modern alternative for the classic PHP FastCGI mode. We will install php-fpm with some php modules that are required by OpenCart.
- php-mysql
- php-gd
- php-curl
- php-mcrypt
Install PHP-FPM and the PHP extension with the single apt command below:
sudo apt-get install php5 php5-fpm php5-mysql php5-curl php5-gd php5-mcrypt
When the packages are installed, go to the php-fpm configuration directory and edit the 'php.ini' file with vim.
cd /etc/php5/fpm
vim php.ini
Uncomment line 773 and change the value to '0' :
cgi.fix_pathinfo=0
Save the file and Exit.
Now we must enable the mcrypt module, which is required by OpenCart. Go to the php-fpm conf.d directory and make a symlink for the .ini file.
cd /etc/php5/fpm/conf.d/
ln -s ../../mods-available/mcrypt.ini mcrypt.ini
The mcrypt module is enabled, now restart the php-fpm and nginx to apply the changes:
systemctl restart nginx
systemctl restart php5-fpm
Now we should verify that php-fpm and Nginx are working correctly. Edit the default of nginx virtualhost configuration to enable the php location and make a phpinfo file in the web root directory.
cd /etc/nginx/sites-available/
vim default
Uncomment the php-fpm directive:
        location ~ \.php$ {
                include snippets/fastcgi-php.conf;
        #
        #       # With php5-cgi alone:
        #       fastcgi_pass 127.0.0.1:9000;
        #       # With php5-fpm:
                fastcgi_pass unix:/var/run/php5-fpm.sock;
        }
Save the file and exit.
Go to the '/var/www/html/' directory and add a phpinfo file.
cd /var/www/html/
echo "<?php phpinfo(); ?>" > info.php
Visit the server IP (in my case IP 192.168.1.103): http://
http:// 192.168.1.103/info.php.

Nginx and PHP-FPM are properly configured.
Step 3 - Install and Configure MariaDB
MariaDB is a fork of the MySQL database server. I prefer MariaDB over MySQL, but it is up to you which database server you use in this step. Install MariaDB with the apt command:
sudo apt-get install mariadb-server mariadb-client
Then configure the MariaDB / MySQL root password with the 'mysql_secure_installation' command:
mysql_secure_installation
Set root password? [Y/n] Y
Remove anonymous users? [Y/n] Y
Disallow root login remotely? [Y/n] Y
Remove test database and access to it? [Y/n] Y
Reload privilege tables now? [Y/n] Y
The MariaDB root user and password have been setup. Now we have to create a new database and user for our OpenCart installation. Log in to the mysql/mariadb shell to create all of it.
Log in to the MySQL/MariaDB shell to create the database and user.
mysql -u root -p
TYPE YOUR PASSWORD

create database opencartdb;
create user opencartuser@localhost identified by 'opencartuser@';
grant all privileges on opencartdb.* to opencartuser@localhost identified by 'opencartuser@';
flush privileges;
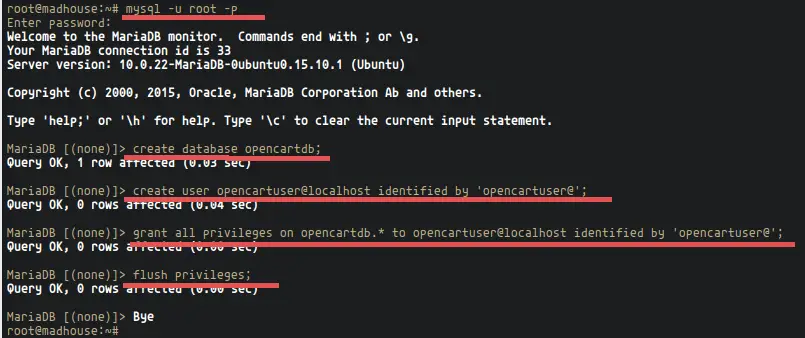
The MySQL database is created, we have a new database named 'opencartdb' and a user with the name 'opencartuser' and password 'opencartuser@'. We need to know these details for the OpenCart installation later. Please use a more secure password for your installation.
Step 4 - Install SSL
Make sure that OpenSSL is installed on your server.
sudo apt-get install openssl
Create a new directory for the SSL certificate and generate the certificate with OpenSSL.
mkdir -p /etc/nginx/ssl
cd /etc/nginx/ssl
Generate the certificate and key file:
openssl req -x509 -nodes -days 365 -newkey rsa:2048 -keyout /etc/nginx/ssl/opencart.key -out /etc/nginx/ssl/opencart.crt
Change the permission of the private key to 600:
chmod 600 opencart.key
The SSL certificate installation is done.
Step 5 - Configure the VirtualHost for OpenCart
Create a new virtual host configuration file for OpenCart in the Nginx 'sites-available' directory. Go to the Nginx virtualhost directory and create new configuration with vim:
cd /etc/nginx/sites-available/
vim opencart
Paste the configuration below:
server {
    server_name www.myopencart.co; ## Your Domain
    root /var/www/opencart/upload; ## Web Root Directory
    index index.php index.html;

    listen 80;
    listen [::]:80;
    listen 443 default ssl;

    ssl_certificate      /etc/nginx/ssl/opencart.crt;
    ssl_certificate_key  /etc/nginx/ssl/opencart.key;

    # Redirect HTTP to HTTPS
    if ($scheme = http) {
        return 301 https://$server_name$request_uri;
    }

    access_log /var/log/nginx/myopencart_access.log;

    location /image/data {
        autoindex on;
    }
    location /admin {
        index index.php;
    }
    location / {
        try_files $uri @opencart;
    }
    location @opencart {
        rewrite ^/(.+)$ /index.php?_route_=$1 last;
    }

    # Make sure files with the following extensions do not get loaded by nginx because nginx would display the source code, and these files can contain PASSWORDS!
    location ~* \.(engine|inc|info|install|make|module|profile|test|po|sh|.*sql|theme|tpl(\.php)?|xtmpl)$|^(\..*|Entries.*|Repository|Root|Tag|Template)$|\.php_ {
        deny all;
    }
    # Deny all attempts to access hidden files such as .htaccess, .htpasswd, .DS_Store (Mac).
    location ~ /\. {
        deny all;
        access_log off;
        log_not_found off;
    }
    location ~*  \.(jpg|jpeg|png|gif|css|js|ico)$ {
        expires max;
        log_not_found off;
    }
    location ~ \.php$ {
        try_files $uri =404;
        fastcgi_pass unix:/var/run/php5-fpm.sock;
        fastcgi_index index.php;
        fastcgi_param SCRIPT_FILENAME $document_root$fastcgi_script_name;
        include fastcgi_params;
    }
}
Replace the Domain name in the server_name line with your own domain name.
Save the file and exit.
Activate the new virtual host with a symlink to the 'opencart' file in the 'sites-enabled' directory and check the Nginx configuration syntax with the "nginx -t" command.
ln -s /etc/nginx/sites-available/opencart /etc/nginx/sites-enabled/
nginx -t
Step 6 - Install and Configure OpenCart
We use the '/var/www/' directory for the OpenCart installation. Go to the '/var/www/' directory, download OpenCart and extract the downloaded .zip archive.
You can download opencart from here: http://www.opencart.com/?route=download/download.
cd /var/www/
unzip opencart-2.1.0.1.zip
Rename the directory to opencart, then go to the upload directory.
mv opencart-opencart-2.1.0.1/ opencart/
cd opencart/upload/
Copy the config-dist files in the upload and admin directory:
cp config-dist.php config.php
cp admin/config-dist.php admin/config.php
And back to the '/var/www/' directory, change the owner of the OpenCart files and directories to the user 'www-data'.
cd /var/www/
chown -R www-data:www-data opencart/
Note : We run nginx as www-data user and group. If you run nginx as your own user or user Nginx, then change the owner to your own name and group.
Restart nginx and php-fpm to ensure that we have no error on the configuration we've been setup:
systemctl restart nginx
systemctl restart php5-fpm
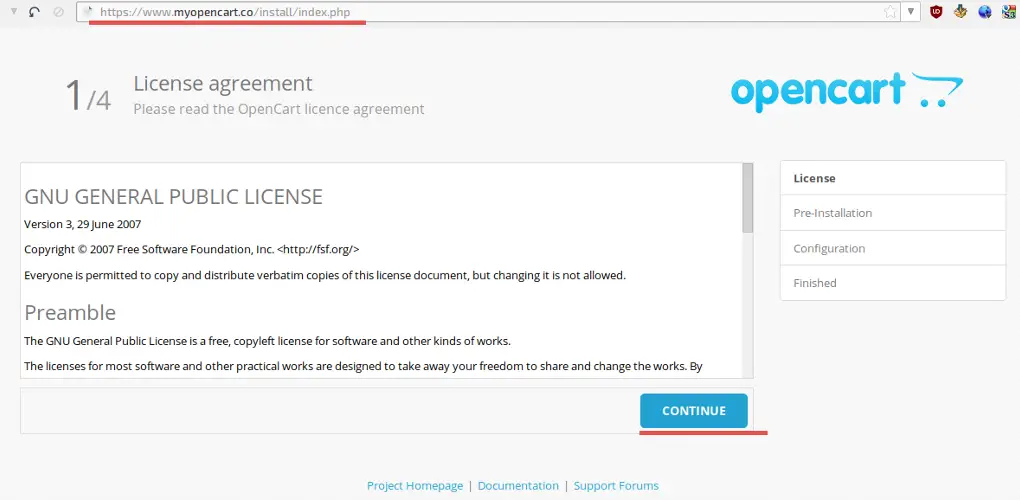
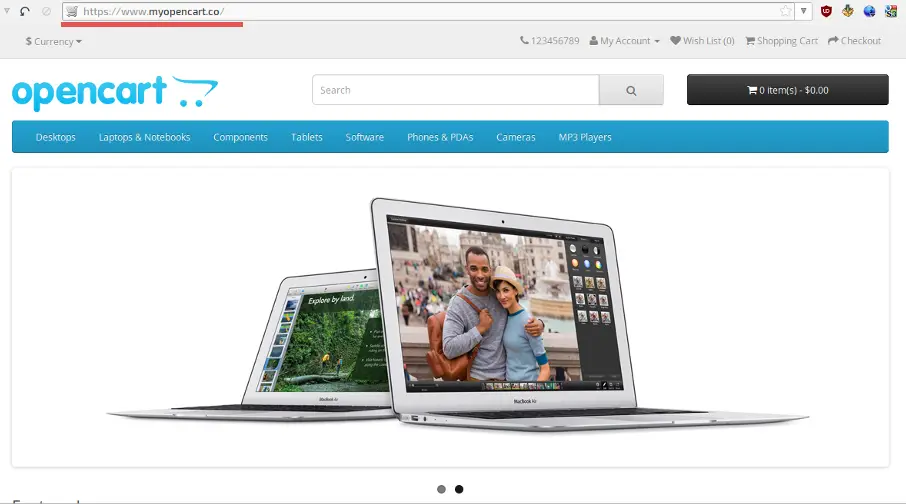
Now open your web-browser, and enter your opencart domain in the address bar, my domain name in this example is: www.myopencart.co.
The installer will show you the "License agreement" read it and click "Continue".
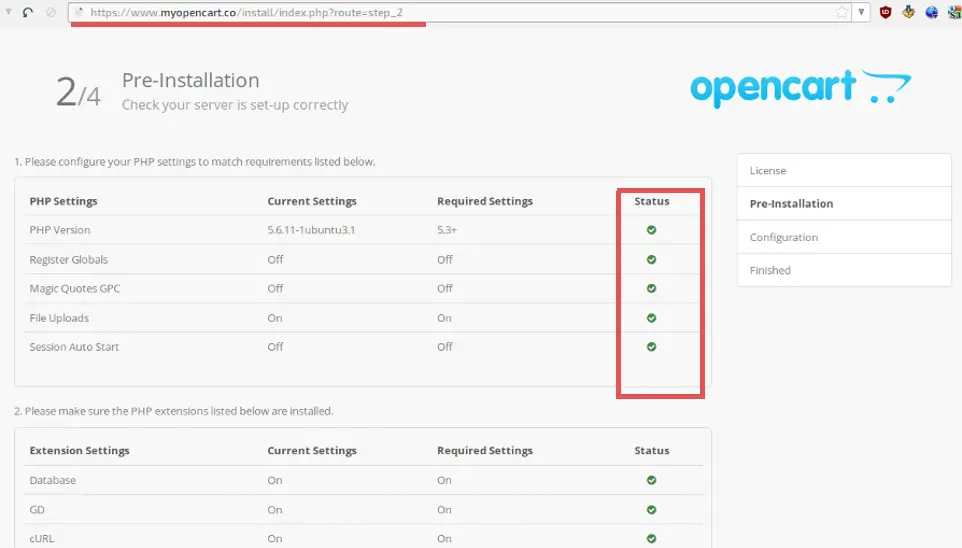
The installer now checks your server setup, make sure all status fields are "Green" and then click "Continue".
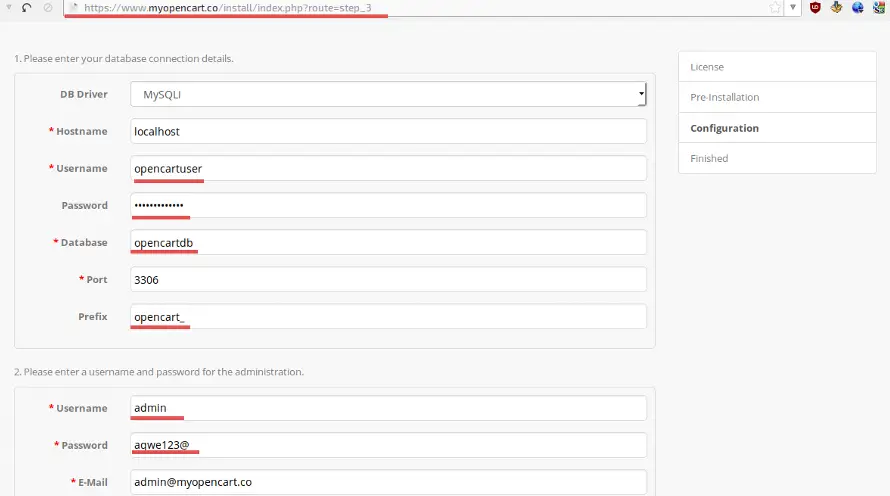
The installer will show the database and admin account configuration. Fill in the database details of the database that we created earlier and choose a admin username and password, then click "Continue".
The OpenCart installation is is finished, You can visit your web shop domain (in my case www.myopencart.co) and login to the OpenCart backend.
Don't forget to delete the instalation directory on the server.
cd /var/www/opencart/upload/
rm -rf install/
Opencart with Nginx and php-fpm is installed and working
Conclusion
Opencart is a web based application written in PHP to build online stores. It is suitable for low and medium sized online store. Opencart can be installed with Apache or Nginx (with php-fpm) web servers, this tutorial covered the OpenCart installation with nginx, php-fpm and MariaDB (a fork of MySQL) database. The installation process is easy, you just have to make sure that your server is ready for OpenCart like we did it in the first chapter of this tutorial.

