Microsoft Azure Series - Creating a Linux virtual machine from custom image
In the first tutorial, we have learned how to deploy a new virtual machine from default Azure images. In this tutorial, we are going to find out how we can use our existing virtual machine to duplicate it or save as image for further usage.
For this scenario, I have prepared a virtual machine and installed everything needed from The Perfect Server - Ubuntu 15.10 (Wily Werewolf) with Apache, PHP, MySQL, PureFTPD, BIND, Postfix, Dovecot and ISPConfig 3 tutorial. We are going to use this virtual machine (named ISP1) for cloning now.
Prepare the source machine
After installing everything needed, we can prepare our source machine for cloning. It's very simple. Just finish your work, keep everything clean (if you follow the "The Perfect Server - Ubuntu 15.10 (Wily Werewolf) with Apache, PHP, MySQL, PureFTPD, BIND, Postfix, Dovecot and ISPConfig 3" tutorial, you are on the best way) and shut down the system from Azure portal.
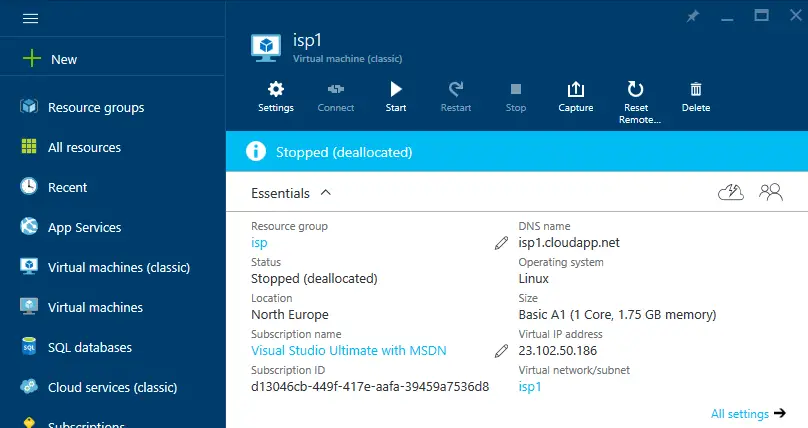
When your machine has been powered off, it's safe to start with cloning. In the menu above you can find “capture” button. Follow the basic guide and fill in the name of your image.
Find the Azure image
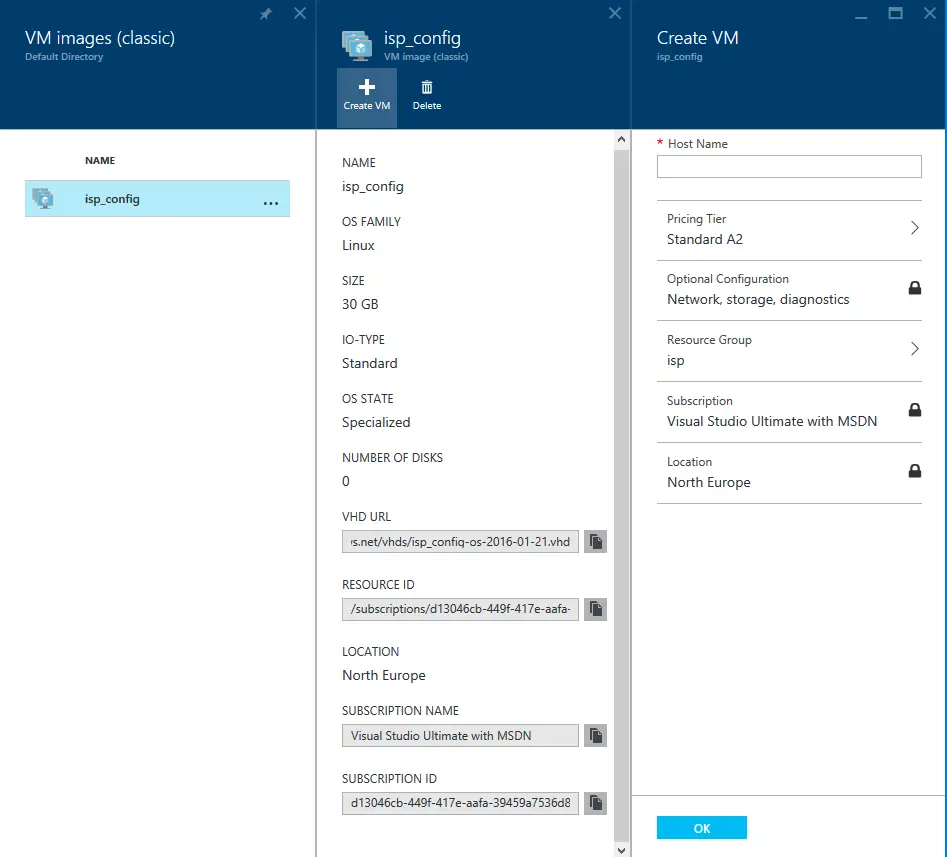
Now it's a little tricky to find the image we have created. As the menu in Azure portal got pretty long, scroll down the main menu on the left until you see VM images (classic). There you can find your image being stored.

Creating new Azure virtual machine
Now you can simply re-deploy your virtual machine. Choose the machine image in your list and create new machine from this image. You are going to be asked just a simple question and that's a name of the new virtual machine. I have chosen ISP2.
Summary
This simple guide helped you to simply create the 2nd virtual machine. Both instances will be used in next tutorials for setting up high-availability, load balancing and other options you can do with ISPConfig 3.

