How to install and configure Solr 5.5 on Ubuntu 14.04
This tutorial exists for these OS versions
- Ubuntu 22.04 (Jammy Jellyfish)
- Ubuntu 20.04 (Focal Fossa)
- Ubuntu 16.04 (Xenial Xerus)
- Ubuntu 14.04 LTS (Trusty Tahr)
On this page
What is Apache Solr? Apache Solr is an open source enterprise-class search platform written in Java which enables you to create custom search engines that index databases, files, and websites. It has back end support for Apache Lucene. It can e.g. be used to search in multiple websites and can show recommendations for the searched content. Solr uses an XML (Extensible Markup Language) based query and result language. There are APIs (Applications program interfaces) available for Python, Ruby and JSON (Javascript Object Notation).
Some other features that Solr provides are:
- Full-Text Search.
- Snippet generation and highlighting.
- Custom Document ordering/ranking.
- Spell Suggestions.
This tutorial will show you how to install the latest Solr version on Ubuntu 14.04 LTS. The steps will most likely work with later Ubuntu versions as well.
Update your System
Use a non-root sudo user to login into your Ubuntu server. Through this user, you will have to perform all the steps and use the Solr later.
To update your system, execute the following command to update your system with latest patches and updates.
sudo apt-get update && apt-get upgrade -y
Setting up the Java Runtime Environment
Solr is a Java application, so the Java runtime environment needs to be installed first in order to set up Solr.
We have to install Python Software properties in order to install the latest Java 8. Run the following command to install the software.
sudo apt-get install python-software-properties
Reading package lists... Done
Building dependency tree
Reading state information... Done
The following extra packages will be installed:
 python-pycurl
Suggested packages:
 libcurl4-gnutls-dev python-pycurl-dbg
The following NEW packages will be installed:
 python-pycurl python-software-properties
0 upgraded, 2 newly installed, 0 to remove and 7 not upgraded.
Need to get 67.5 kB of archives.
After this operation, 358 kB of additional disk space will be used.
Do you want to continue? [Y/n]
Press Y to continue.

After executing the command, add the webupd8team Java PPA repository in your system by running:
sudo add-apt-repository ppa:webupd8team/java
Press [ENTER] when requested. Now, you can easily install the latest version of Java 8 with apt.
First update the package lists to fetch the available packages from the new PPA:
sudo apt-get update
Then install the latest version of Oracle Java 8 with this command:
sudo apt-get install oracle-java8-installer
Reading package lists... Done
Building dependency tree
...........................................
After this operation, 19.1 MB of additional disk space will be used.
Do you want to continue? [Y/n]
Press Y to continue.
You MUST agree to the license available in http://java.com/license if you want to use Oracle JDK, clicking on the OK button.

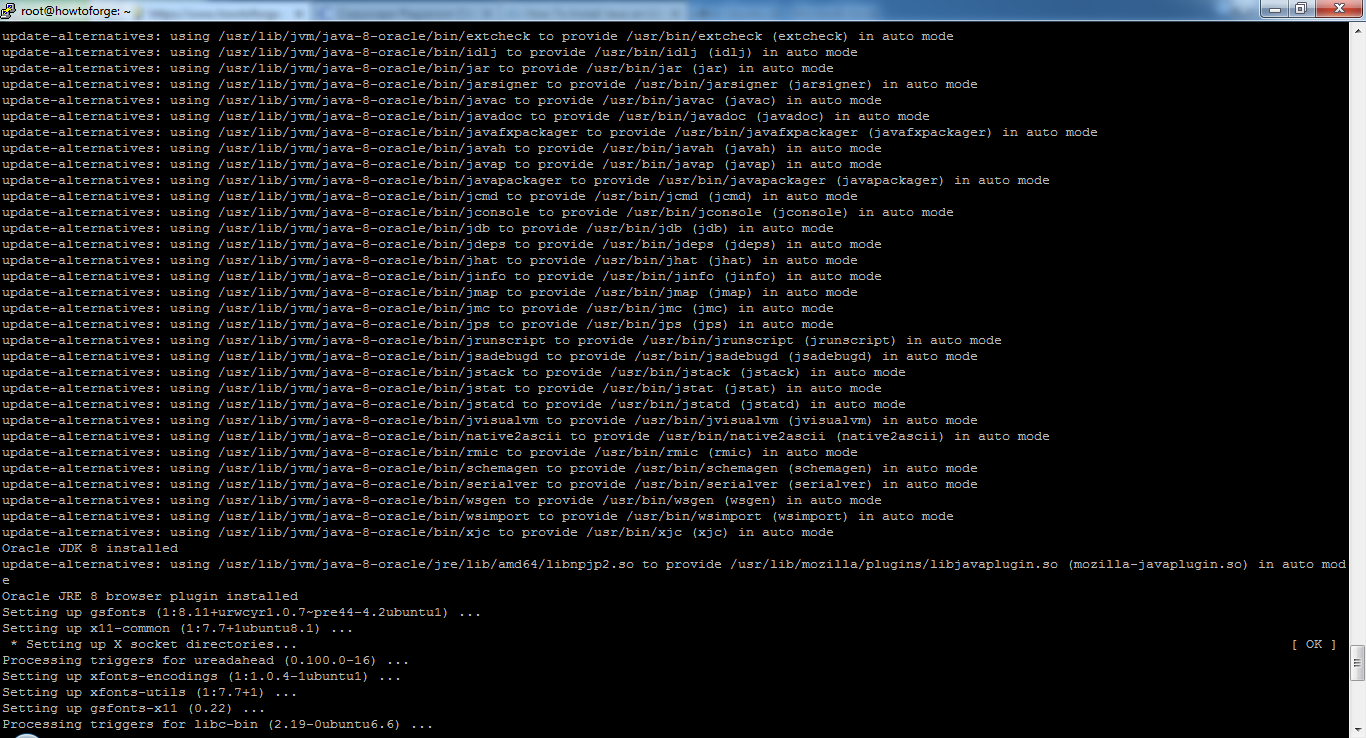
The package installs a kind of meta-installer which then downloads the binaries directly from Oracle. After installation process, check the version of Java installed by running the following command
java -version
java version "1.8.0_72"
Java(TM) SE Runtime Environment (build 1.8.0_72-b15)
Java HotSpot(TM) 64-Bit Server VM (build 25.72-b15, mixed mode)
Now you have installed Java 8 and we will move to the next step.
Installing the Solr application
Solr can be installed on Ubuntu in different ways, in this article, I will show you how to install the latest package from the source.
We will begin by downloading the Solr distribution. First finding the latest version of the available package from their web page, copy the link and download it using the wget command
For example we will use http://www.us.apache.org/dist/lucene/solr/5.5.0
cd /tmp
wget http://www.us.apache.org/dist/lucene/solr/5.5.0/solr-5.5.0.tgz
wget http://www.us.apache.org/dist/lucene/solr/5.5.0/solr-5.5.0.tgz
--2016-02-26 22:21:37-- http://www.us.apache.org/dist/lucene/solr/5.5.0/solr-5.5.0.tgz
Resolving www.us.apache.org (www.us.apache.org)... 140.211.11.105
Connecting to www.us.apache.org (www.us.apache.org)|140.211.11.105|:80... connected.
HTTP request sent, awaiting response... 200 OK
Length: 136758069 (130M) [application/x-gzip]
Saving to: ‘solr-5.5.0.tgz’
Now, run the given below command to extract the service installation file:
tar xzf solr-5.5.0.tgz solr-5.5.0/bin/install_solr_service.sh --strip-components=2
And install Solr as a service using the script:
sudo ./install_solr_service.sh solr-5.5.0.tgz
The output will be similar to this:
 sudo ./install_solr_service.sh solr-5.5.0.tgz
id: solr: no such user
Creating new user: solr
Adding system user `solr' (UID 114) ...
Adding new group `solr' (GID 123) ...
Adding new user `solr' (UID 114) with group `solr' ...
Creating home directory `/var/solr' ...

Extracting solr-5.5.0.tgz to /opt


Installing symlink /opt/solr -> /opt/solr-5.5.0 ...


Installing /etc/init.d/solr script ...


Installing /etc/default/solr.in.sh ...

 Adding system startup for /etc/init.d/solr ...
 /etc/rc0.d/K20solr -> ../init.d/solr
 /etc/rc1.d/K20solr -> ../init.d/solr
 /etc/rc6.d/K20solr -> ../init.d/solr
 /etc/rc2.d/S20solr -> ../init.d/solr
 /etc/rc3.d/S20solr -> ../init.d/solr
 /etc/rc4.d/S20solr -> ../init.d/solr
 /etc/rc5.d/S20solr -> ../init.d/solr
Waiting up to 30 seconds to see Solr running on port 8983 [-]
Started Solr server on port 8983 (pid=3288). Happy searching!

Found 1 Solr nodes:

Solr process 3288 running on port 8983
{
 "solr_home":"/var/solr/data",
 "version":"5.5.0 2a228b3920a07f930f7afb6a42d0d20e184a943c - mike - 2016-02-16 15:22:52",
 "startTime":"2016-02-26T17:02:13.127Z",
 "uptime":"0 days, 0 hours, 0 minutes, 17 seconds",
 "memory":"58.6 MB (%11.9) of 490.7 MB"}

Service solr installed.
Use this command to check the status of the service
service solr status
You should see an output that begins with this:
Found 1 Solr nodes:

Solr process 3288 running on port 8983
{
 "solr_home":"/var/solr/data",
 "version":"5.5.0 2a228b3920a07f930f7afb6a42d0d20e184a943c - mike - 2016-02-16 15:22:52",
 "startTime":"2016-02-26T17:02:13.127Z",
 "uptime":"0 days, 0 hours, 1 minutes, 32 seconds",
 "memory":"61.4 MB (%12.5) of 490.7 MB"}
Creating a Solr search collection:
Using Solr, we can create multiple collections. Run the given command, mention the name of the collection (here gettingstarted) and specify its configurations.
sudo su - solr -c "/opt/solr/bin/solr create -c gettingstarted -n data_driven_schema_configs"
Copying configuration to new core instance directory:
/var/solr/data/gettingstarted

Creating new core 'gettingstarted' using command:
http://localhost:8983/solr/admin/cores?action=CREATE&name=gettingstarted&instanceDir=gettingstarted

{
 "responseHeader":{
 "status":0,
 "QTime":5268},
 "core":"gettingstarted"}
The new core directory for our first collection has been created. To view the default schema file, got to:
'/opt/solr/server/solr/configsets/data_driven_schema_configs/conf' .
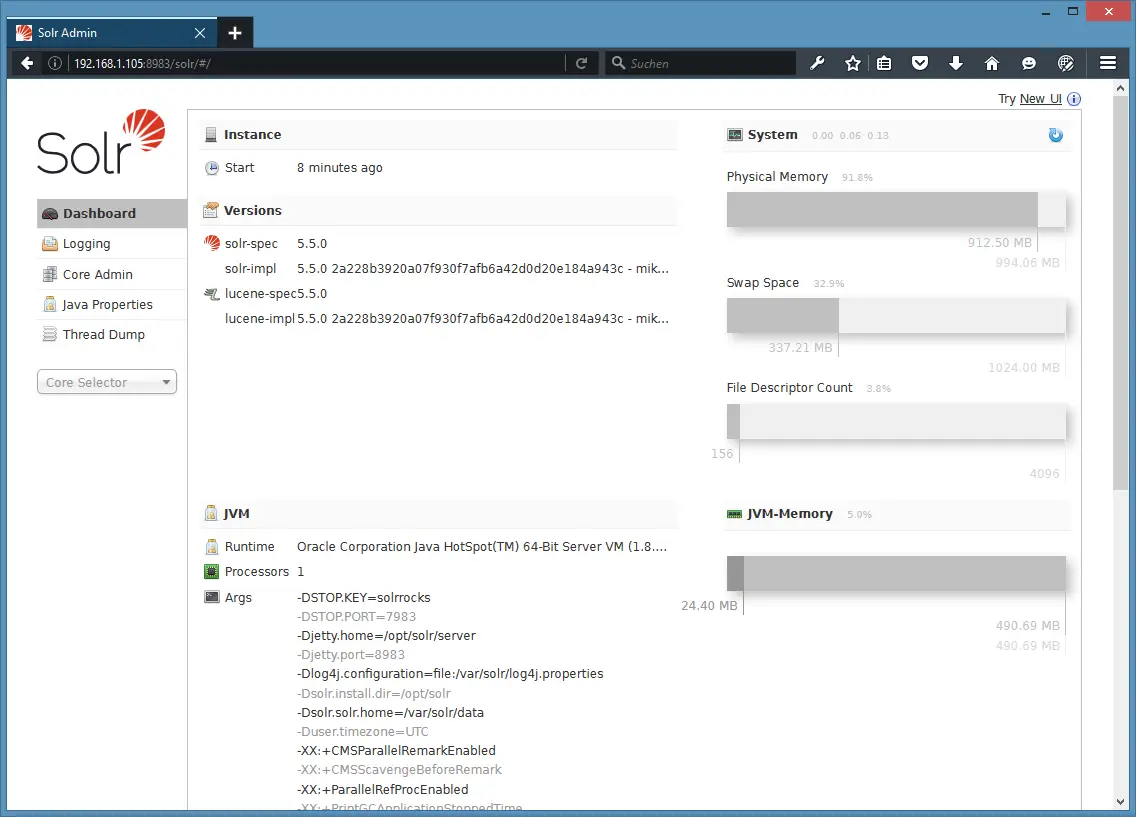
Use the Solr Web Interface
The Apache Solr is now accessible on the default port, which is 8983. The admin UI should be accessible at http://your_server_ip:8983/solr. The port should be allowed by your firewall to run the links.
For example:
http://192.168.1.105:8983/solr/
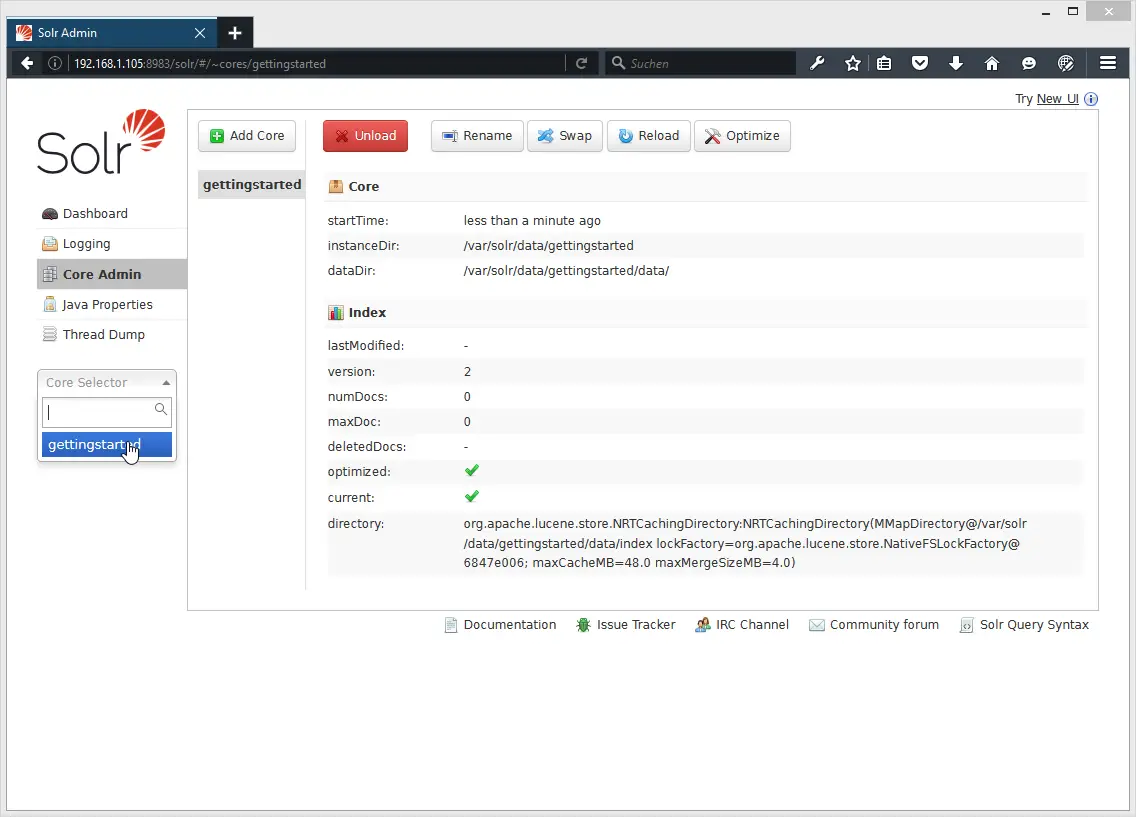
To see the details of the first collection that we created earlier, select the "gettingstarted" collection in the left menu.
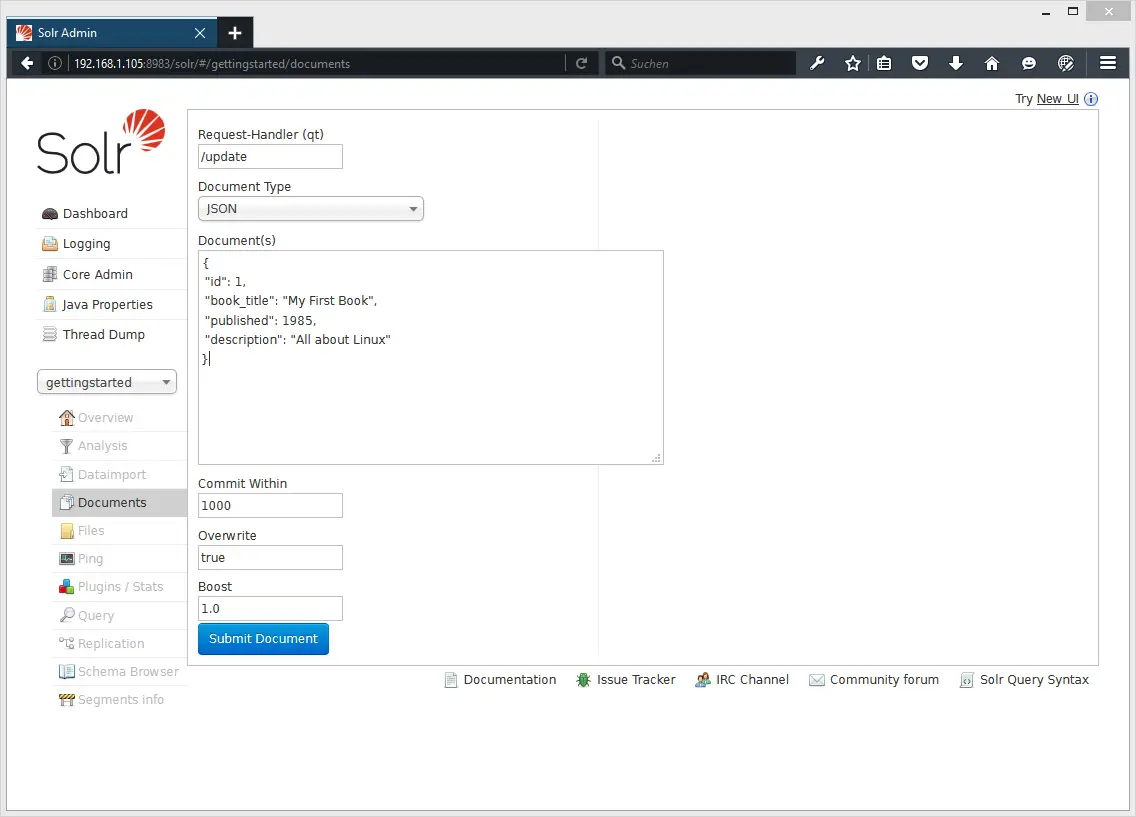
After you selected the "gettingstarted" collection, select Documents in the left menu. There you can enter real data in JSON format that will be searchable by Solr. To add more data, copy and paste the following example JSON onto Document field:
{
 "id": 1,
 "book_title": "My First Book",
 "published": 1985,
 "description": "All about Linux"
}
Click on the submit document button after adding the data.
Status: success
Response:

{
 "responseHeader": {
 "status": 0,
 "QTime": 606
 }
}
Now we can click on Query on the left side then click in Execute Query,
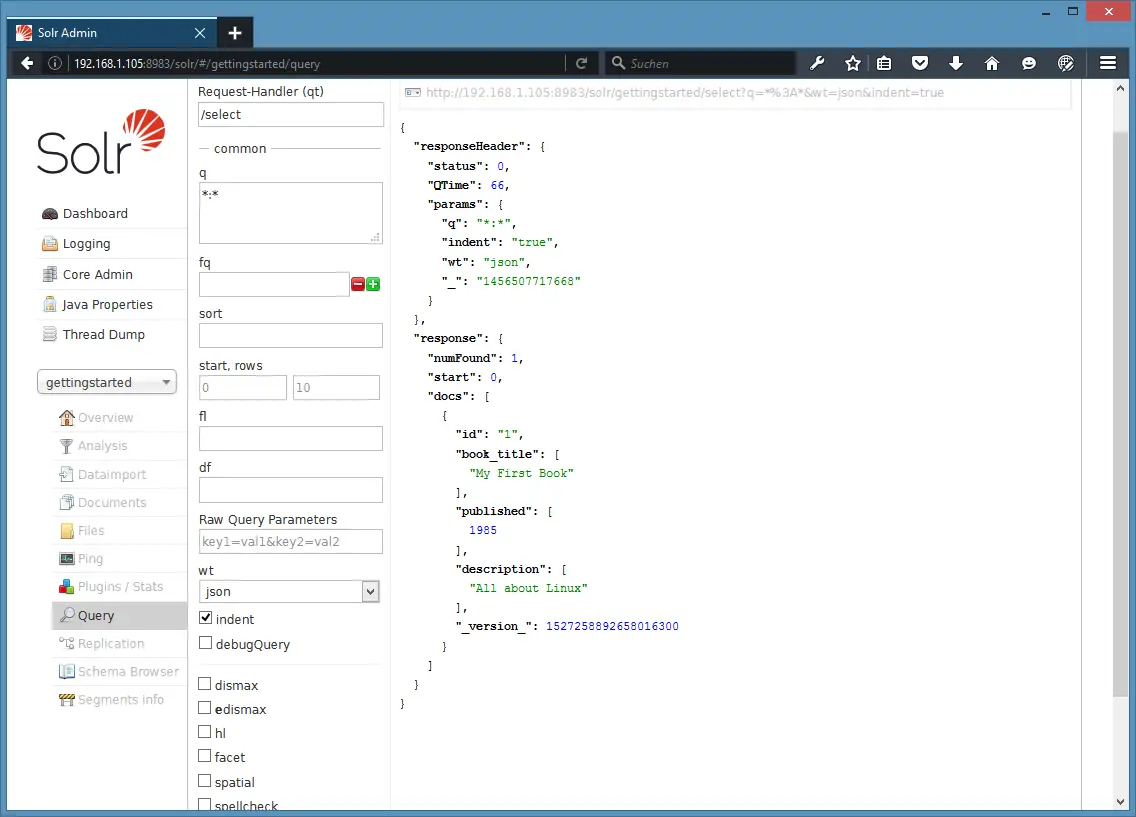
We will see something like this:
Query Output
{
 "responseHeader": {
 "status": 0,
 "QTime": 66,
 "params": {
 "q": "*:*",
 "indent": "true",
 "wt": "json",
 "_": "1456507717668"
 }
 },
 "response": {
 "numFound": 1,
 "start": 0,
 "docs": [
 {
 "id": "1",
 "book_title": [
 "My First Book"
 ],
 "published": [
 1985
 ],
 "description": [
 "All about Linux"
 ],
 "_version_": 1527258892658016300
 }
 ]
 }
}
Conclusion
After successfully installing the Solr Web Interface on Ubuntu, you can now insert the data or query the data with the Solr API and Web Interface.

