How to install WordPress with Apache, MariaDB and PHP 7 on Arch Linux
WordPress is a popular, dynamic, blog-focused content management system. The software is built upon a LAMP or LEMP stack and features an extensive plugin framework and theme system, which allows site owners and developers to deploy easy-to-use and powerful publishing tools.
This tutorial will help you how to install and configure WordPress with Apache2, MariaDB and PHP 7 on Arch Linux.
Install and Configure Apache, MariaDB and PHP for Wordpress
Before we begin with the installation and configuration of Apache, MariaDB, and PHP for WordPress, make sure the Arch Linux system's database is up to date and that all installed software is running the latest versions. Run the following command to update your system in Arch Linux:
sudo pacman -Syu
Setup Apache
Install the Apache 2 web server:
sudo pacman -Sy apache
Configure Apache MPM prefork. Open /etc/apache2/mods-available/mpm_prefork.conf in your text editor and edit the values as needed. The following is optimized for a 1GB of RAM:
sudo nano /etc/apache2/mods-available/mpm_prefork.conf
<IfModule mpm_prefork_module>
      StartServers        2
      MinSpareServers     6
      MaxSpareServers     12
      MaxRequestWorkers   30
      MaxRequestsPerChild 3000
</IfModule>
The edited file above shows the default settings for the Apache HTTP Server. Then turn off the KeepAlive:
sudo nano /etc/httpd/conf/extra/httpd-default.conf
KeepAlive Off
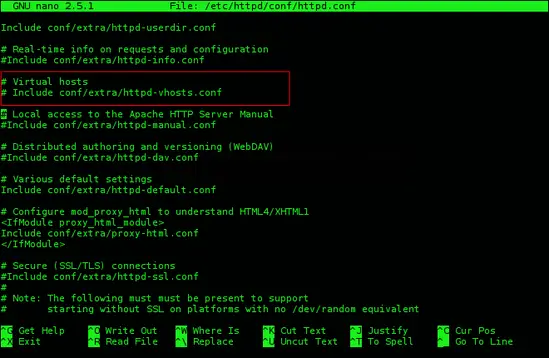
Open and edit the main Apache HTTP server configuration file httpd.conf. Comment out the line include conf/extra/httpd-vhosts.conf
sudo nano /etc/httpd/conf/httpd.conf
#Include conf/extra/httpd-vhosts.conf
In the same file, add the line IncludeOptional conf/sites.d/*.conf at the end of file httpd.conf.
IncludeOptional conf/sites.d/*.conf
Create a directory to store the virtual host configuration files:
sudo mkdir -v /etc/httpd/conf/sites.d
Create the directory /srv/http/wordpress. This directory will later contain the WordPress files.
sudo mkdir /srv/http/wordpress
Create virtual host configuration file for WordPress, in this case, it will be named wordpress.conf
sudo nano /etc/httpd/conf/sites.d/wordpress.conf
Add the following lines in the wordpress.conf:
<VirtualHost *:80>
      DocumentRoot /srv/http/wordpress
      ServerName wparchserver.tld
      ServerAdmin [email protected]
      ErrorLog /var/log/httpd/wparchserver-error_log
      TransferLog /var/log/httpd/wparchserver-access_log

      <Directory />
          Options +Indexes +FollowSymLinks +ExecCGI
          AllowOverride All
          Order deny,allow
          Allow from all
          Require all granted
      </Directory>
</VirtualHost>
Replace the word wparchserver.tld with the domain name of your website.
Restart the apache web server so that it loads the new config file.
sudo systemctl restart httpd
Setup MariaDB
Install the mariadb, mariadb-clients and libmariadbclient packages, by running the following command:
sudo pacman -S mariadb mariadb-clients libmariadbclient
Install the MariaDB data directory:
sudo mysql_install_db --user=mysql --basedir=/usr --datadir=/var/lib/mysql
Start the MariaDB service and set it to run at boot:
sudo systemctl start mysqld.service
sudo systemctl enable mysqld.service
Run mysql_secure_installation, a command line tool that helps you to secure MySQL / MariaDB. mysql_secure_installation gives you the option to set your root password, disable root logins from outside localhost, remove anonymous user accounts, remove the test database and then reload the privilege tables:
sudo mysql_secure_installation
You can accept the defaults for all options, just enter a secure password when requested.
Setup PHP 7
Install the PHP Package. According to PHP 7 on Arch Linux, this command will install PHP 7 and dependencies.
sudo pacman -Sy php php-apache php-gd
Open and edit PHP's configuration file /etc/php/php.ini for better error messages and logs, and upgraded performance. These modifications provide a good starting point for 1GB of RAM:
sudo nano /etc/php/php.ini
error_reporting = E_COMPILE_ERROR|E_RECOVERABLE_ERROR|E_ERROR|E_CORE_ERROR
log_errors = On
error_log = /var/log/php/error.log
max_input_time = 30
In the same file, enable the extensions mysqli and gd by uncommenting the following lines:
...
extension=mysqli.so
extension=gd.so
...
When you are finished, save and close the file.
Now you need to create the log directory for PHP and give the Apache user ownership:
sudo mkdir /var/log/php
sudo chown http /var/log/php
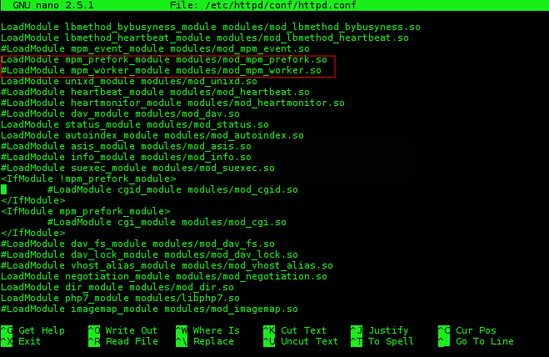
By default, the Apache configurations file uses the mod_mpm_event.so module which don't work for this setup. Open file /etc/httpd/conf/httpd.conf, find and comment out the line LoadModule mpm_event_module modules/mod_mpm_event.so
sudo nano /etc/httpd/conf/httpd.conf
...
#LoadModule mpm_event_module modules/mod_mpm_event.so
LoadModule mpm_prefork_module modules/mod_mpm_prefork.so
...
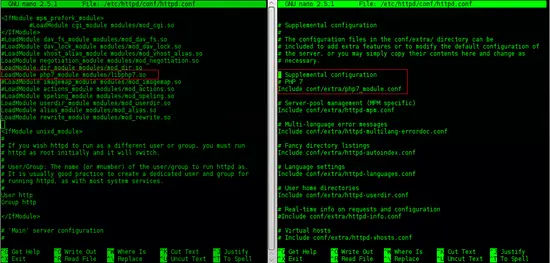
In the same file, enable PHP 7 module by adding the lines LoadModule php7_module modules/libphp7.so and Include conf/extra/php7_module.conf
LoadModule php7_module modules/libphp7.so
Include conf/extra/php7_module.conf
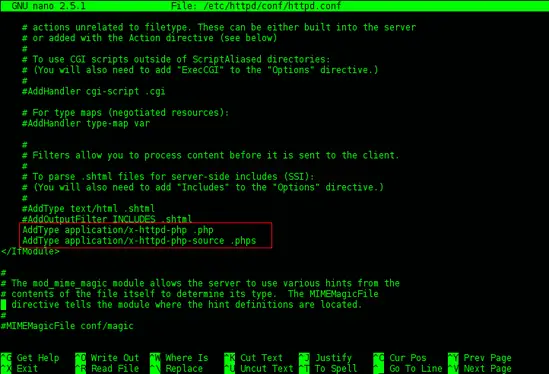
Find the section <IfModule mime_module> in the /etc/httpd/conf/httpd.conf then add the following line :
AddType application/x-httpd-php .php
AddType application/x-httpd-php-source .phps
In the section <IfModule dir_module> add the line index.php and place it before index.html
<IfModule dir_module>
    DirectoryIndex index.php index.html
</IfModule>
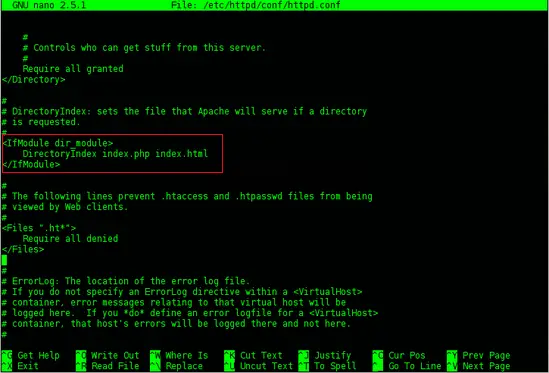
When you are finished, save and close the file.
Create a new MariaDB Database and User for Wordpress
In order to create a new MariaDB database for the WordPress installation, you have to login to MariaDB as root user.
mysql -u root -p
Now, Create a database for the WordPress installation. In this case, we'll create a database named dbwordpress and off-course you can change the name.
CREATE DATABASE dbwordpress;
Create a new user and set the password. Use your own and unique password here.
CREATE USER wpuser@localhost IDENTIFIED BY 'wpP455w0rd';
Now grant the user full access the database.
GRANT ALL PRIVILEGES ON dbwordpress.* TO wpuser@localhost ;
Refresh the database tables and exit from MariaDB.
FLUSH PRIVILEGES;
exit;
Download WP and Configure the Wordpress Installation
Before we download Wordpress, install the wget and rsync packages if you haven't installed them yet:
sudo pacman -Sy wget rsync
Download the latest version of WordPress from the official WordPress site using the wget command.
Now, extract the WordPress tar.gz archive.
tar -zxvf latest.tar.gz
Copy the WordPress installation to the directory /srv/http/wordpress/ using rsync command:
sudo rsync -avP wordpress/ /srv/http/wordpress/
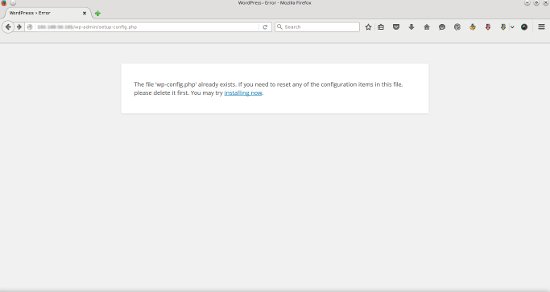
Make a copy of wp-config-sample.php and create a new wp-config.php file. This file contains the WordPress database connection parameters.
sudo cp /srv/http/wordpress/wp-config-sample.php /srv/http/wordpress/wp-config.php
Open and edit the file wp-config.php, Find setting for DB_NAME, DB_USER, and DB_PASSWORD, fill in the values of the database, username and password you created earlier.
sudo nano /srv/http/wordpress/wp-config.php
It should look like this:
/** The name of the database for WordPress */
define('DB_NAME', 'dbwordpress');

/** MySQL database username */
define('DB_USER', 'wpuser');

/** MySQL database password */
define('DB_PASSWORD', 'wpP455w0rd');
Change the directorye ownership of /srv/http/wordpress/ to the Apache user and group.
sudo chown -Rv http:http /srv/http/wordpress/
Set the permissions of all directories in /srv/http/wordpress/ to 755.
sudo find /srv/http/wordpress/ -type d -exec chmod -v 775 {} \;
For all files in the /srv/http/wordpress/ directory, set the mode to 644.
sudo find /srv/http/wordpress/ -type f -exec chmod -v 644 {} \;
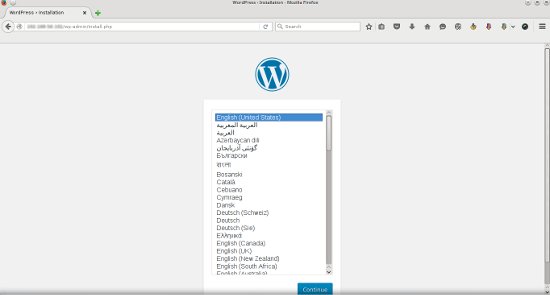
Now install WordPress through it's web installer. Open your favorite browser and navigate to the server name or IP address. Wordpress Installation page will appear in your browser like this:
Select your languange.
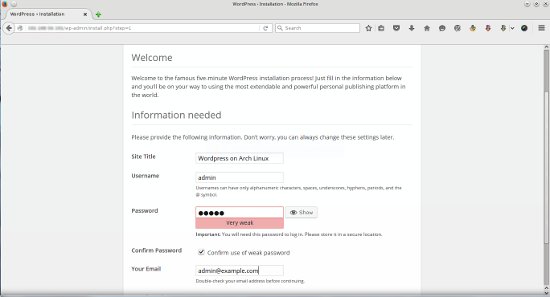
Enter the information about your wordpress site like site title, username and password for login to the WordPress dashboard. When you are finished, click on the Install Button
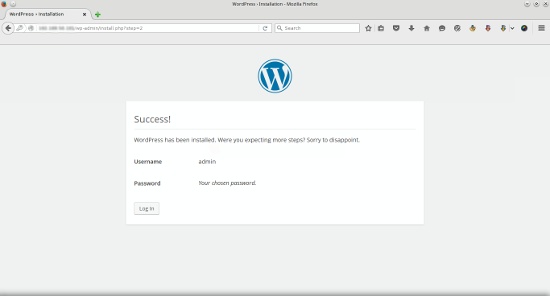
The WordPress installation was successful, now you can login to the WordPress dashboard with the account you just created by clicking Login button:
Optional Setting - Configure Wordpress Permalinks
Before activating the WordPress permalink feature, we have to enable the Apache Rewrite Module. You can do this by opening file /etc/httpd/conf/httpd.conf.
sudo nano /etc/httpd/conf/httpd.conf
Find the line LoadModule rewrite_module modules/mod_rewrite.so and uncomment it.
LoadModule rewrite_module modules/mod_rewrite.so
Save and close file, then restart apache:
sudo systemctl restart httpd
Create a file with the name .httaccess.
sudo touch /srv/http/wordpress/.htaccess
Change the ownership of that .htaccess file to the Apache webserver user and group http.
sudo chown -v http:http /srv/http/wordpress/.htaccess
Now we can activate WordPress permalinks. In the WordPress dashboard, navigate to Settings -> Permalinks.
Now you can choose any of the preconfigured settings to organize URLs, or you can create your own.
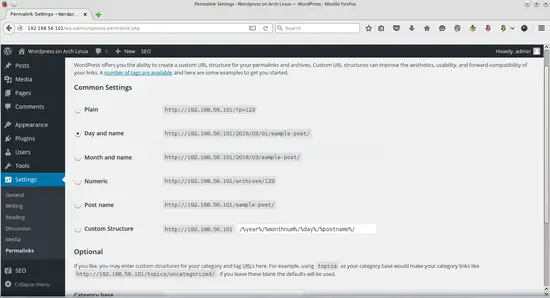
When you have made your selection, click "Save Changes".
Conclusion
Congratulations! You should now have a WordPress website with Apache2, MariaDB and PHP 7 running on Arch linux. For more information, you may want to check out Wordpress on Arch Linux and WordPress Codex.

